The Ultimate How-To for Home Poultry Processing: Balancing the Practical and Emotional Aspects
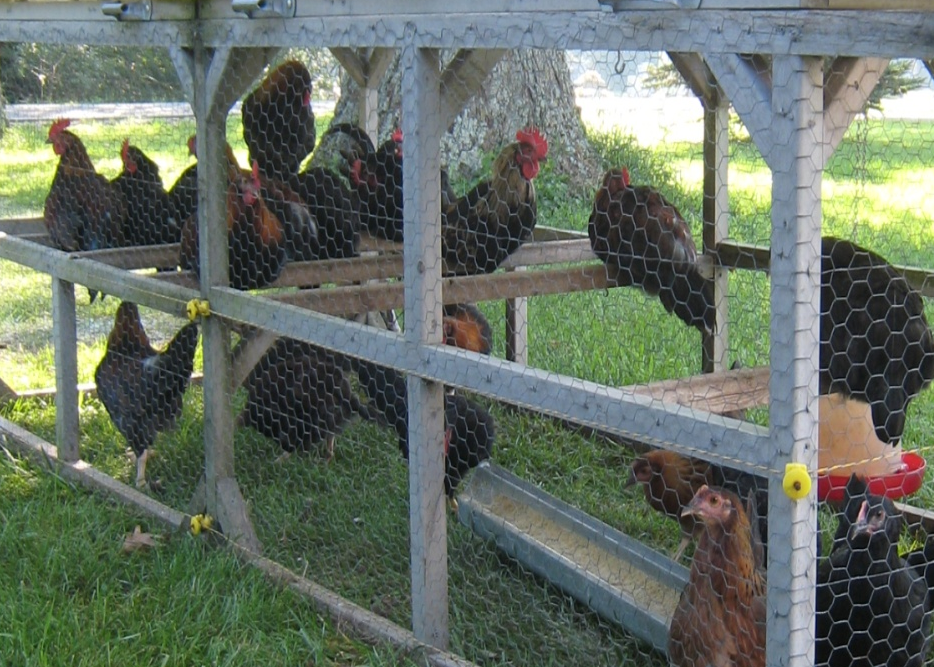
We enjoy our heritage breed chickens and turkeys so much that some people question how we can butcher them ourselves. We've raised them from babies, delighted in watching them grow, named those that we can identify by looks or personalities, and tried to give them a safe and enjoyable upbringing. But inevitably, 50% are boys and not only does adolescence mean fighting, but there's no way we're going to help save their genetics by having a geriatric flock. So our option is either to send the excess males and unproductive hens off to the butcher or to butcher them ourselves.
I do understand why some people say they cannot kill the birds they raise. But I do not want them going through such a frightening process of transport only to be treated like inanimate objects on an assembly line. Because my husband and I had help in making butchering more humane for the birds and more tolerable for us, I want to share that with you. Additionally, I want to show you our set-up for making the butchering easier for us.
Borrowing Native People's Attitudes and Ceremonies:
When I worked as a family practice doctor with Native People in the southwest and in Alaska, I admired the way they related to other animals, especially those they killed for food. Rather than pride, they express both gratitude and reverence towards the animal who gave their lives so they and their community could live.
I was glad that the first time my husband and I butchered chickens that a native friend, David, who has Lakota-Sioux heritage, offered to help. He first "smudged" the working area with sticks of sage and as he gently handled each chicken, he would say, Mitakuye Oyasin, or, "We are all related." I may no longer use sage, but I repeat this phrase when holding each bird to remind myself of our mutual dependency. Just as I had cared for them, they now provided food so that we can live.
David also added a bit of levity by telling some of the cockerels with a wink that there would be "really cute chicks where they are going!"
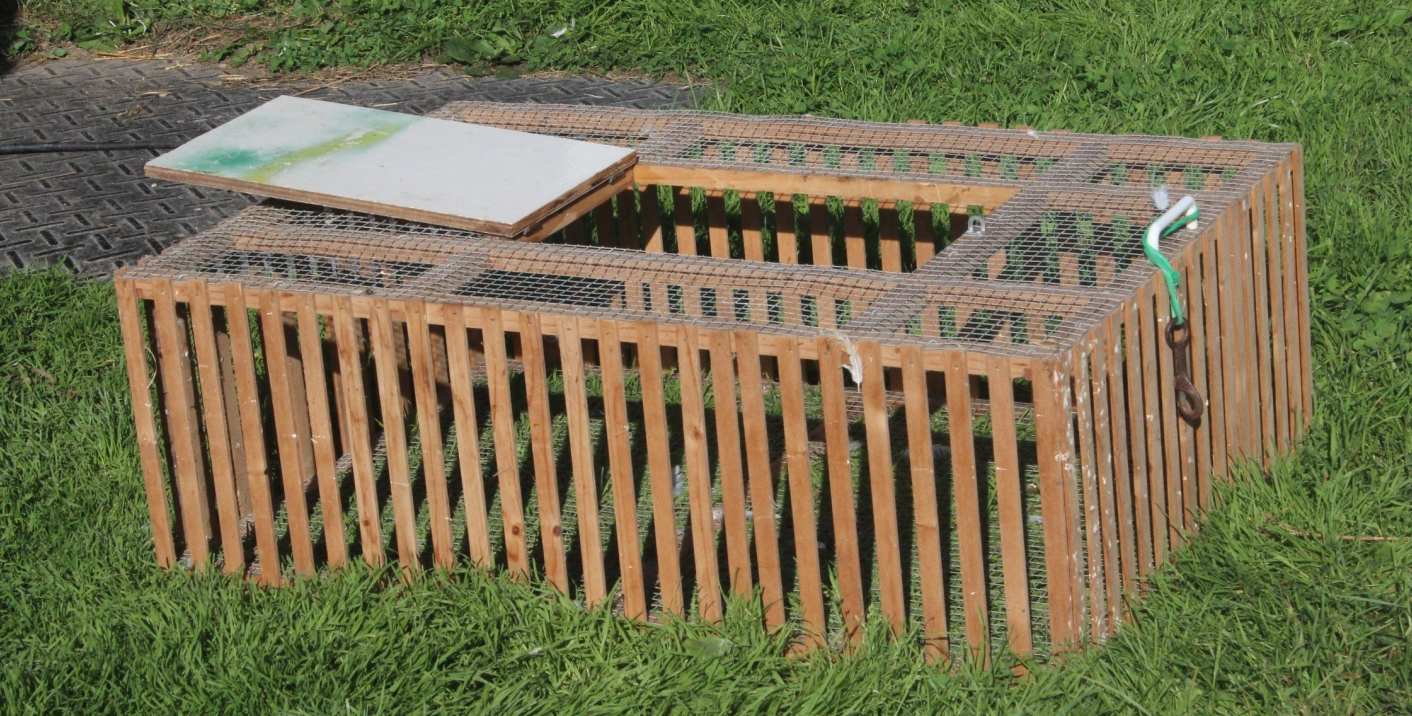
Through the years, we have maintained the "reverence" for handling our animals when it's time to butcher. Turkeys are so large that we carry each one in our arms. We carry the chickens in a homemade crate that comfortably holds about five birds at a time, bringing them from the chicken house or chicken tractor. They sit in the shade and peck on grass close to the butchering area. My role is to take one bird out at a time, moving slowly and talking softly. By tucking its head under my cupped hand while holding the chicken in my other arm, I sway back and forth gently while saying Mitakuye Oyasin, or sometimes just "thank you." The chicken remains calm, almost "hypnotized," as we then gently invert it into a cone.
Even with these rituals and attempting to give the birds a "good death," we are emotionally exhausted after a couple mornings of butchering and then take a few days break from butchering.
Step-by-step set-up for butchering:
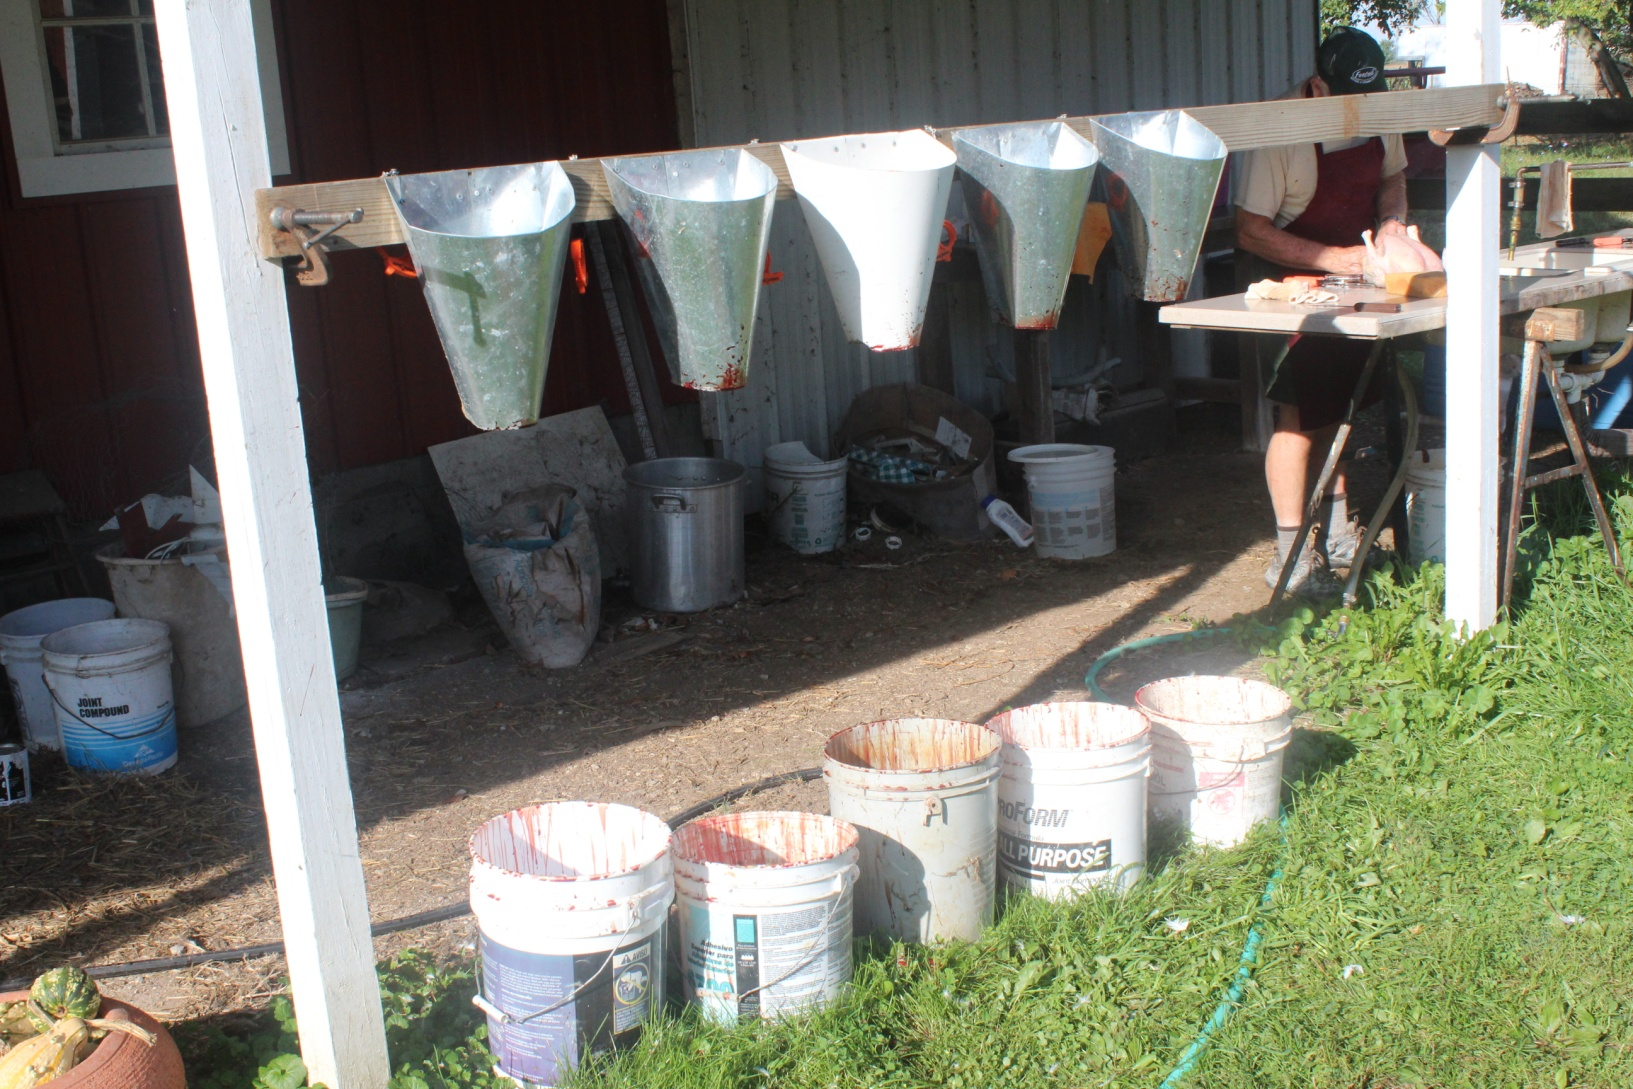
The cones:
Cones can be purchased locally at stores like TSC along with other poultry processing equipment. We chose to have five, perhaps because that's how many chickens could fit comfortably in the crate. We also have one large cone for the turkeys. If you make your own, take care not to have sharp edges.
Both safety and ease of butchering are facilitated with a heavy duty poultry shear and at least one very sharp knife for each person. We had to stop and resharpen our knives after every couple of chickens.
The how-to:
Chickens are gently placed in the cones one-by-one. Using one hand to stretch the neck, make a quick cut with a sharp knife across the neck. The blood is caught in a dry wall bucket below each cone. The blood and all the feathers are later buried in the compost pile.
A cable clamp that will hold their legs together is conveniently hung by each cone. We place one around their ankles as soon as they're placed in the cone. After the head is cut, the clamp keeps the chicken from coming out of the cone during their "flopping around" movement.
Scalding:
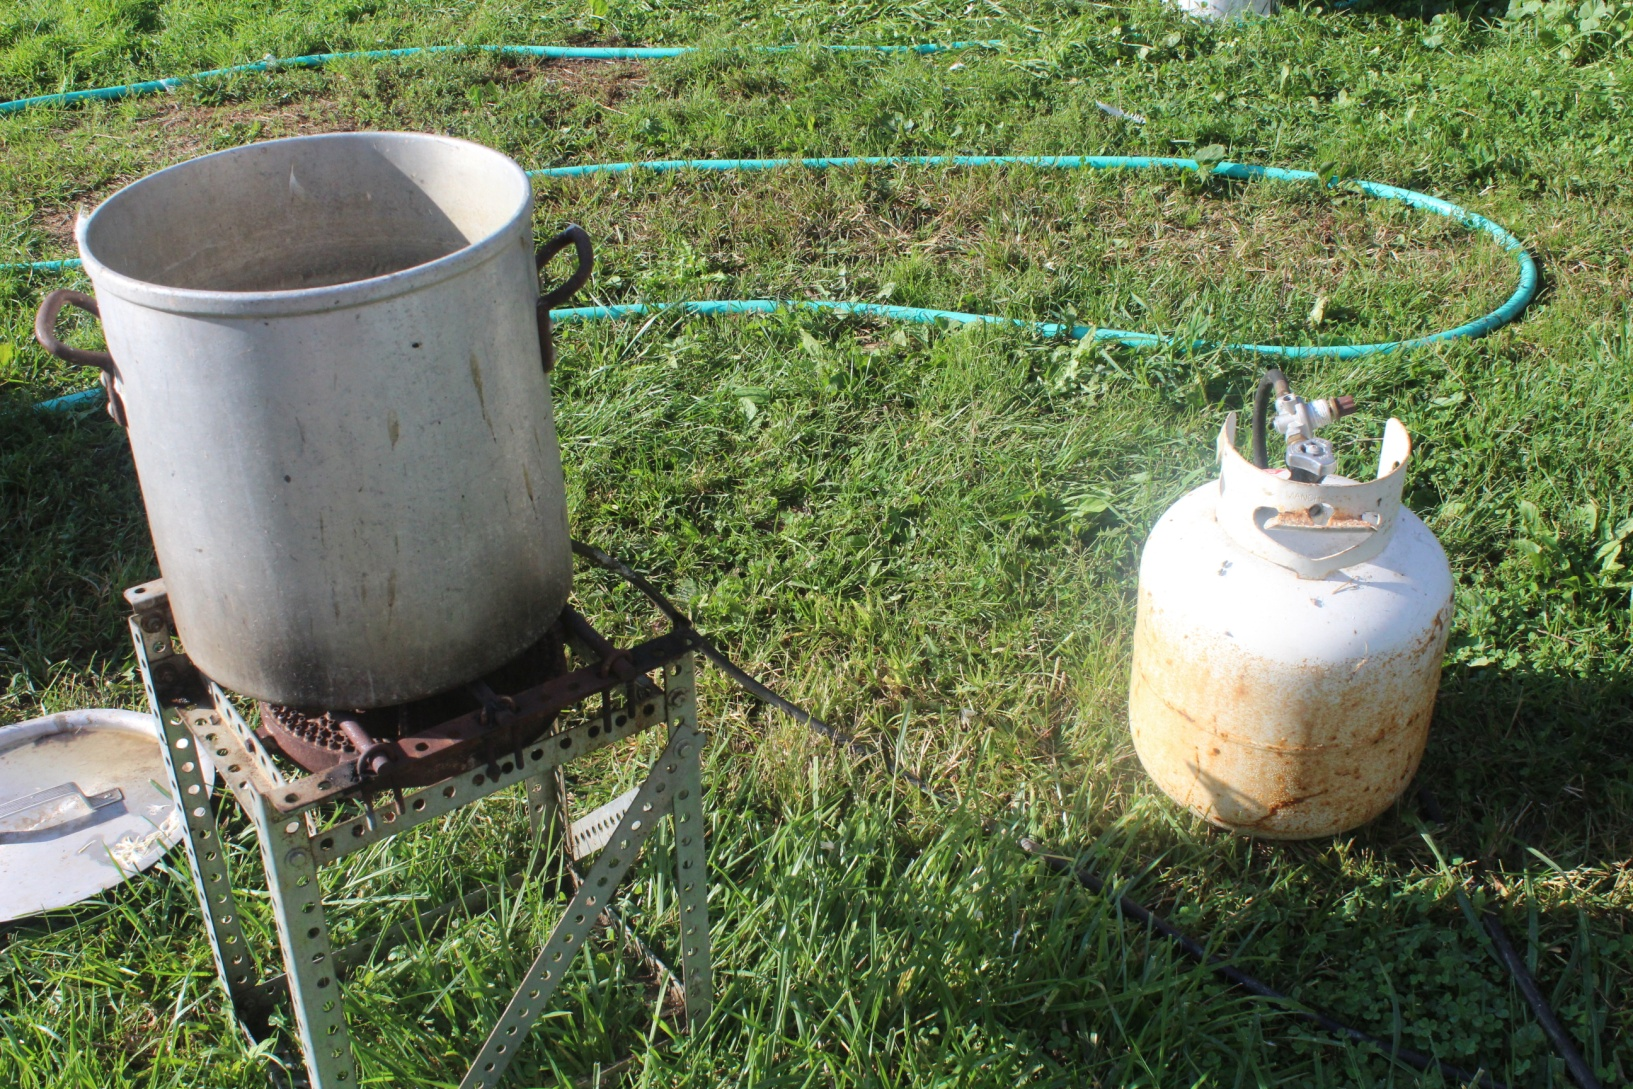
There are certainly fancier set-ups than ours, but buying a 13-acre farm, that had belonged to so many generations before us, meant that we could scrounge some equipment from the barn loft and the outbuildings. The large scalding pot is made of aluminum, but of course any large pot, such as stainless, would work. Never hesitate to get used equipment locally from Craigslist or even online from eBay.
After the birds have "bled out," their heads are removed with shears and they are then held by the legs and dipped in and out of the hot water until the feathers can be easily pulled out. Not having the water too hot is important because you don't want their skin to tear. A long-stemmed thermometer will help you keep the temperature between 145 and 160 degrees Fahrenheit.
Our thermometer is an analog thermometer that I use for cheese-making, but I can see that a digital one would work really well.

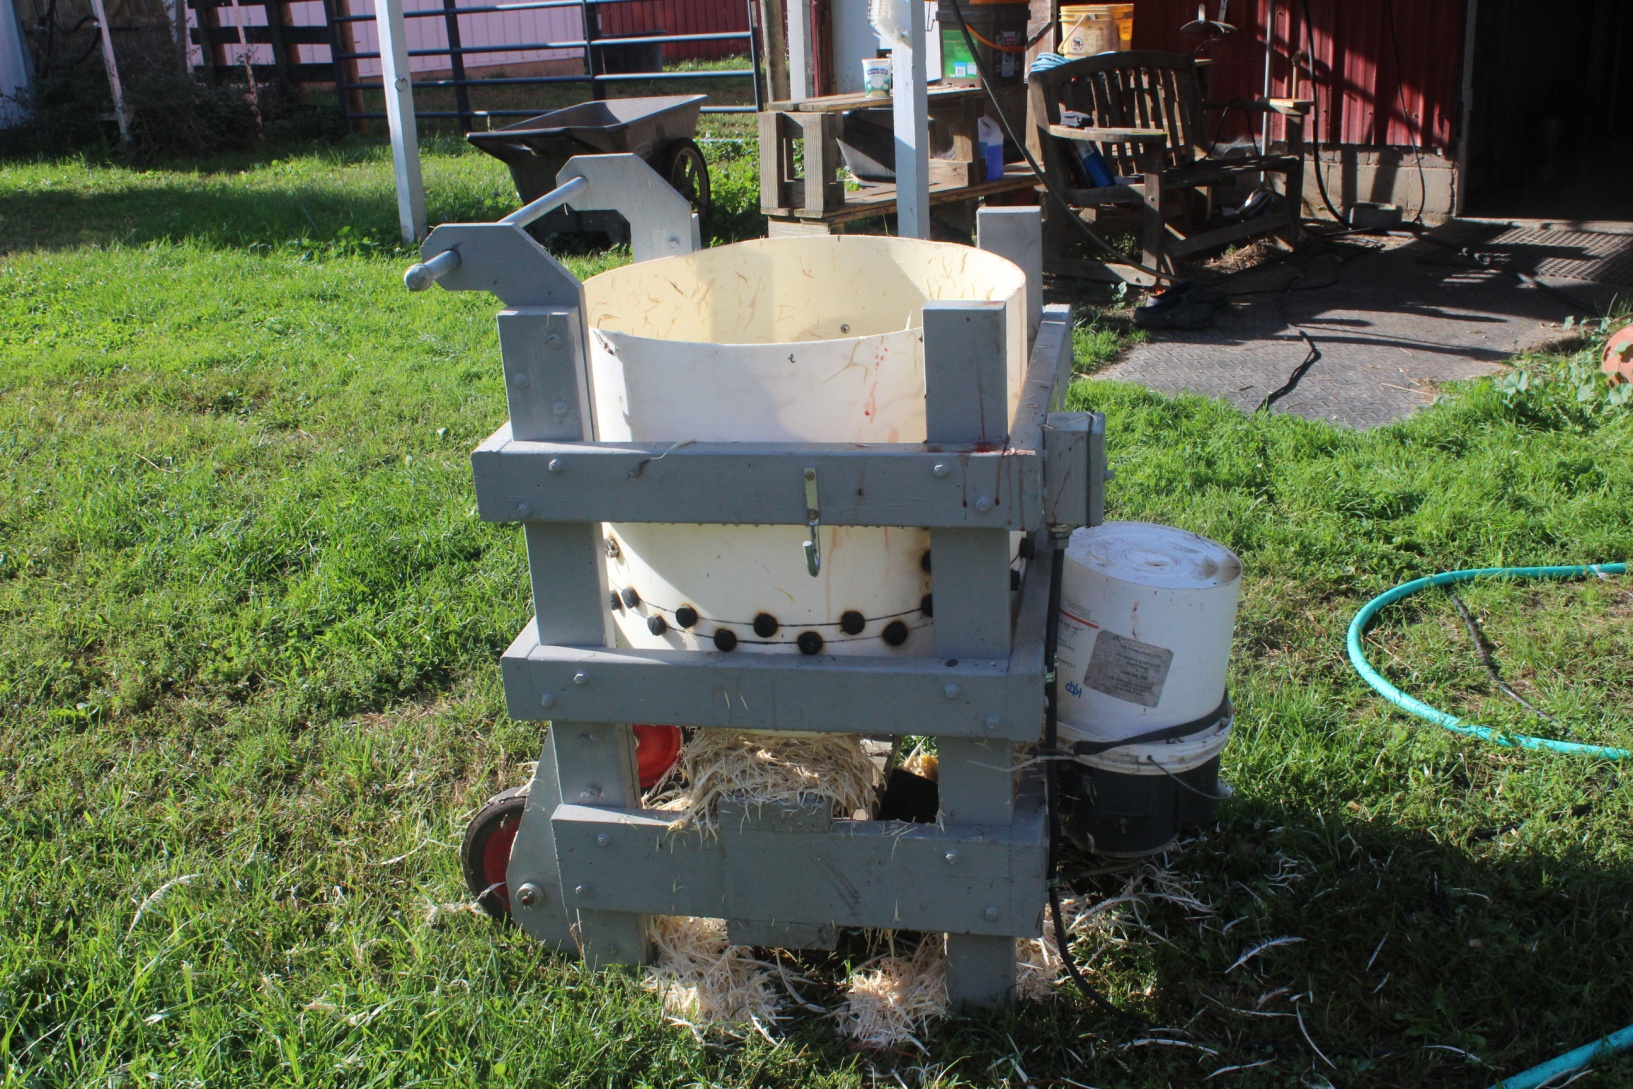
Plucking:
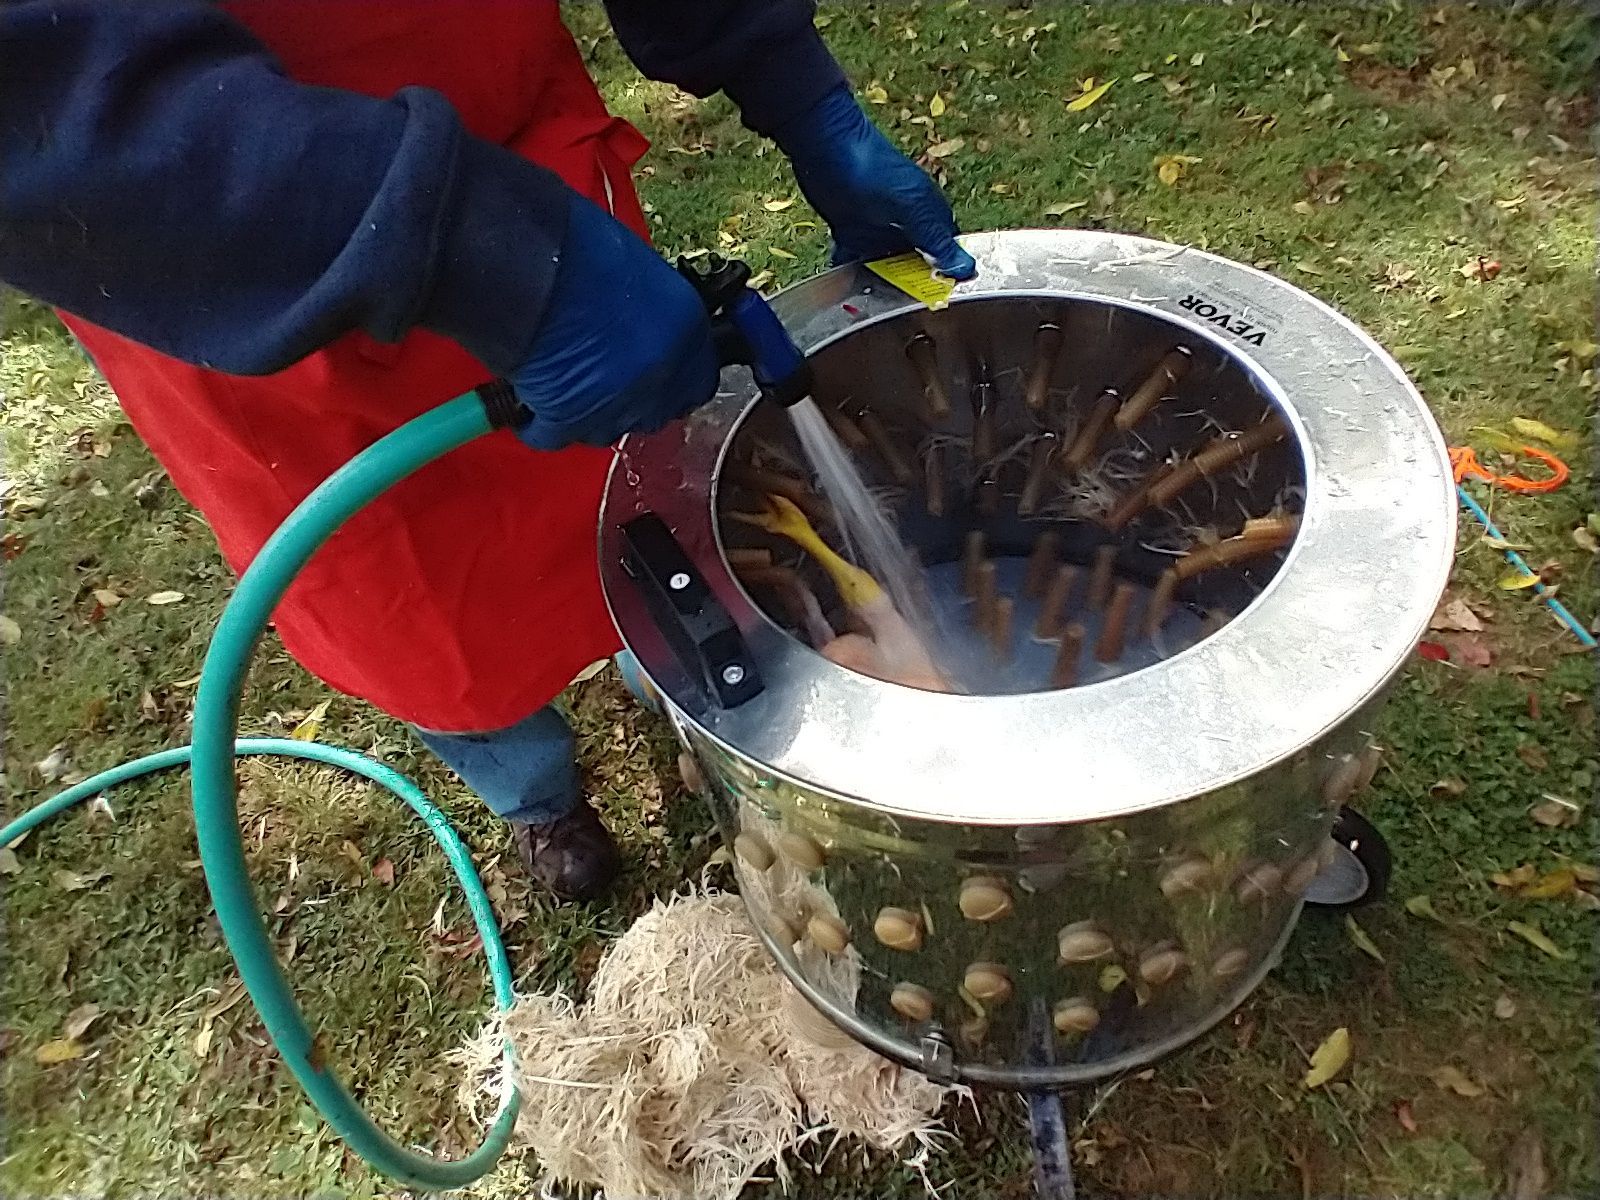
When we've scalded our chickens properly, they will pluck easily without tearing the skin. An electrically powered chicken plucker sure helps, and our homemade plucker is a Whizbang plucker made with instructions and parts. There are similar pluckers that can be bought from local stores.
If you are only butchering a few chickens, hand-plucking, after scalding, is certainly feasible. In truth, I am only repeating my mother's memories of growing up on a small farm where a single chicken was butchered for Sunday dinner. I'm pretty spoiled by having a plucker when doing more birds!
Gutting and cleaning:
Once the chicken is plucked, it's carried to the near-by work table for "eviscerating" and then immediately put into a large cooler with ice water.
We began learning about how to clean a chicken from YouTubes and books. However, not being in a rush and having good tools (make sure those knives are sharp!), really helps. I admit that we still haven't learned to eat the liver, gizzard and heart--but these innards provide our dog with her favorite food. Most of the other innards are buried in the compost pile.
Our work table is a used countertop from Craigslist. By working under the lean-to in front of the barn, we're in shade by mid-morning. This location also gives us access to running water (the hose hooks up to the sink!) and electricity for the plucker.

The "inedible" parts:
In the buckets below the cones there will be quite a bit of blood. Below the plucker there will be a pile of feathers. In the buckets below the "butchering tables" there will be both feet and innards like the intestines, heart, gizzard, lungs, and gonads. How do dispose of what we don't want to eat?
Neighbors taught us that we could be eating more of the birds, and my farming grandparents with their seven children would certainly have agreed. The liver, gizzard, and heart are certainly "edible" and nutritious. I certainly respect those who "waste not."
Because we have two dogs, we "waste not" also, by sharing with them! I cook the necks, livers, hearts, and gizzards (which first need their inner lining removed) and use them for dog food through the winter. We recently saw dried chicken feet for sale at the farmers' market which were being sold for rather expensive dog treats. Because the feet are clean after going through the plucker, I simply give them about ten minutes on a cookie sheet in a 350 degree oven and then cool and freeze them. The dogs now rank them as one of their favorite treats!
We could bag the rest of the innards, blood and feathers for the landfill, but because we are surrounded by woods and not people, we carry all the "wastes" into the woods where it disappears overnight. The chickens are not wasted while feeding many.

Into the freezer:
Once the large cooler is filling with clean birds, its time to get them dry and into freezer bags. Benches behind the work table are draped with towels and the birds are taken out, one-by-one and dried thorough inside and out. Large and medium-sized freezer bags are kept in a storage container that we use from one year to the next. After placing each bird in a bag and twisting the top shut, air needs to be removed from the bag. My fancy method of doing this is to insert a straw through the narrow opening, being careful to not touch the chicken, and suck. I then quickly withdraw the straw and do a final twist to close the opening. I can imagine you wrinkling your nose at this primitive method, but I know no better way!
After each couple of birds are done, I get them as quickly as possible into the freezer.
Your reward:
Processing a live chicken or turkey involves both emotions and a learning curve that are not easy, but it allows us to produce our own food in an ethical and sustainable manner.
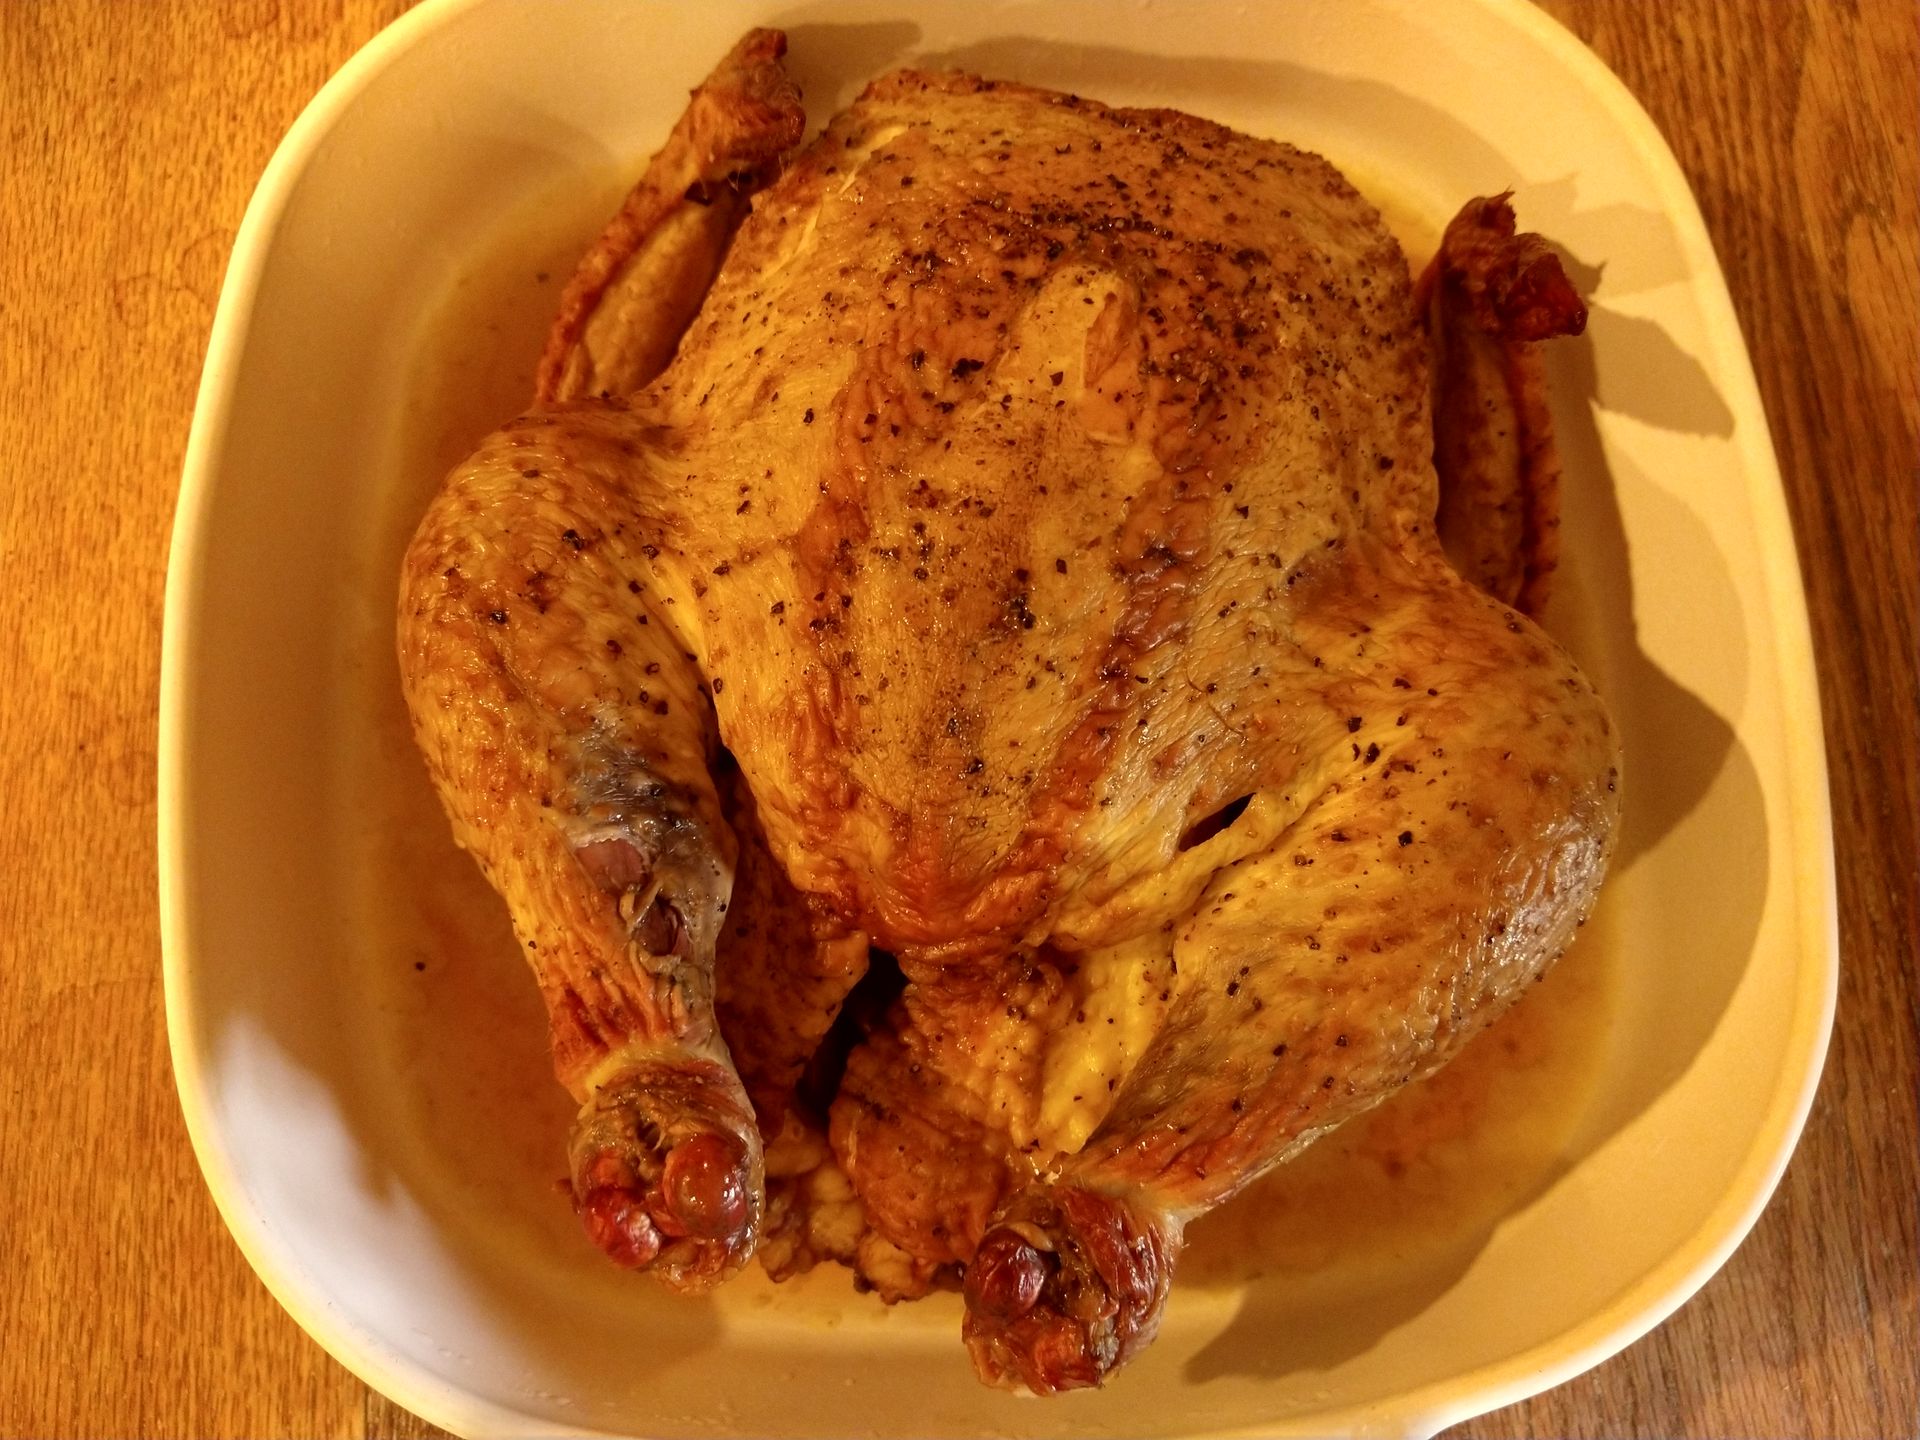
A practical aspect of cooking a heritage breed bird, as opposed to a quickly raised Cornish Cross chicken, is that heirloom breeds need to be cooked slowly on a lower heat. Because the old breeds take about 18 weeks to mature instead of the hybrid's eight weeks, their protein is more complex and flavorful. Depending on the chicken's size and age, you'll want to keep the oven temperature below 325 degrees for about 25 minutes per pound.
I am grateful to have such nutritious food from the beautiful farm animals. Our grace before eating has become one of thanks to our birds for giving their lives for our meal.