How to Grow, Store, and Use Ginger and Turmeric in Your Kitchen
It's always interesting to try something new, so this past year we planted ginger and its cousin, turmeric. Each of the steps from planting to preserving was a new experience to me, and although I'll probably modify how to do this in the years ahead, the crops were very successful. Because I'm now enjoying both in food and drinks, I want to share this with you. When something tastes wonderful and also has health benefits, it's a winner!
Health benefits:
Ginger smells and tastes wonderful to me so that I'm using far more now than when I just had a spice jar of dried ginger from the store. I'm glad that the Cleveland Clinic states that it's good for pain relief, blood sugar regulation and reducing nausea. Its support of the immune system and relief of arthritic pain is appreciated, and its anti-microbial properties may help us get better faster from bacterial or fungal disease. That it is also helpful in preventing dementia and heart attacks makes it a super-hero.
Turmeric is related to ginger because they both contain "zingiberene" which gives them anti-inflammatory properties. Turmeric's bright yellow color comes from "curcumin" which is why curry powder is yellow. In addition, colorful foods tend to have more nutrition, and this is also true of turmeric. John Hopkins University states that turmeric helps with conditions like inflammation, high cholesterol, anxiety, degenerative eye conditions, kidney health and muscle soreness after exercise.
It might be tempting to take turmeric or ginger supplements in pill form instead of eating the roots, but as our moms told us, too much of a good thing can actually be harmful. Stick to eating the roots!
Cure rhizomes before planting:
The ginger roots from the grocery store will actually work for planting your own crop of ginger. Both our ginger and turmeric roots (also called "rhizomes") were purchased from Fedco Seeds this past year.
When you get your rhizomes, be sure to separate and dry them before planting. Fedco will include a "Growing Guide" which tells us to use a knife which is sterized in alcohol between cuts. Ginger is cut into one to two inch pieces with each "finger" at its narrow base about 1/4" above where it connects to the main rhizome. Turmeric is simpler because we just snap off the larger "fingers." Both are placed on racks in a space with good air flow for about five days.
Sprouting rhizomes:
Ginger and turmeric rhizomes take a long time to sprout. We didn't do that previously, but instead just planted them after "curing" them. They took almost two months to emerge!
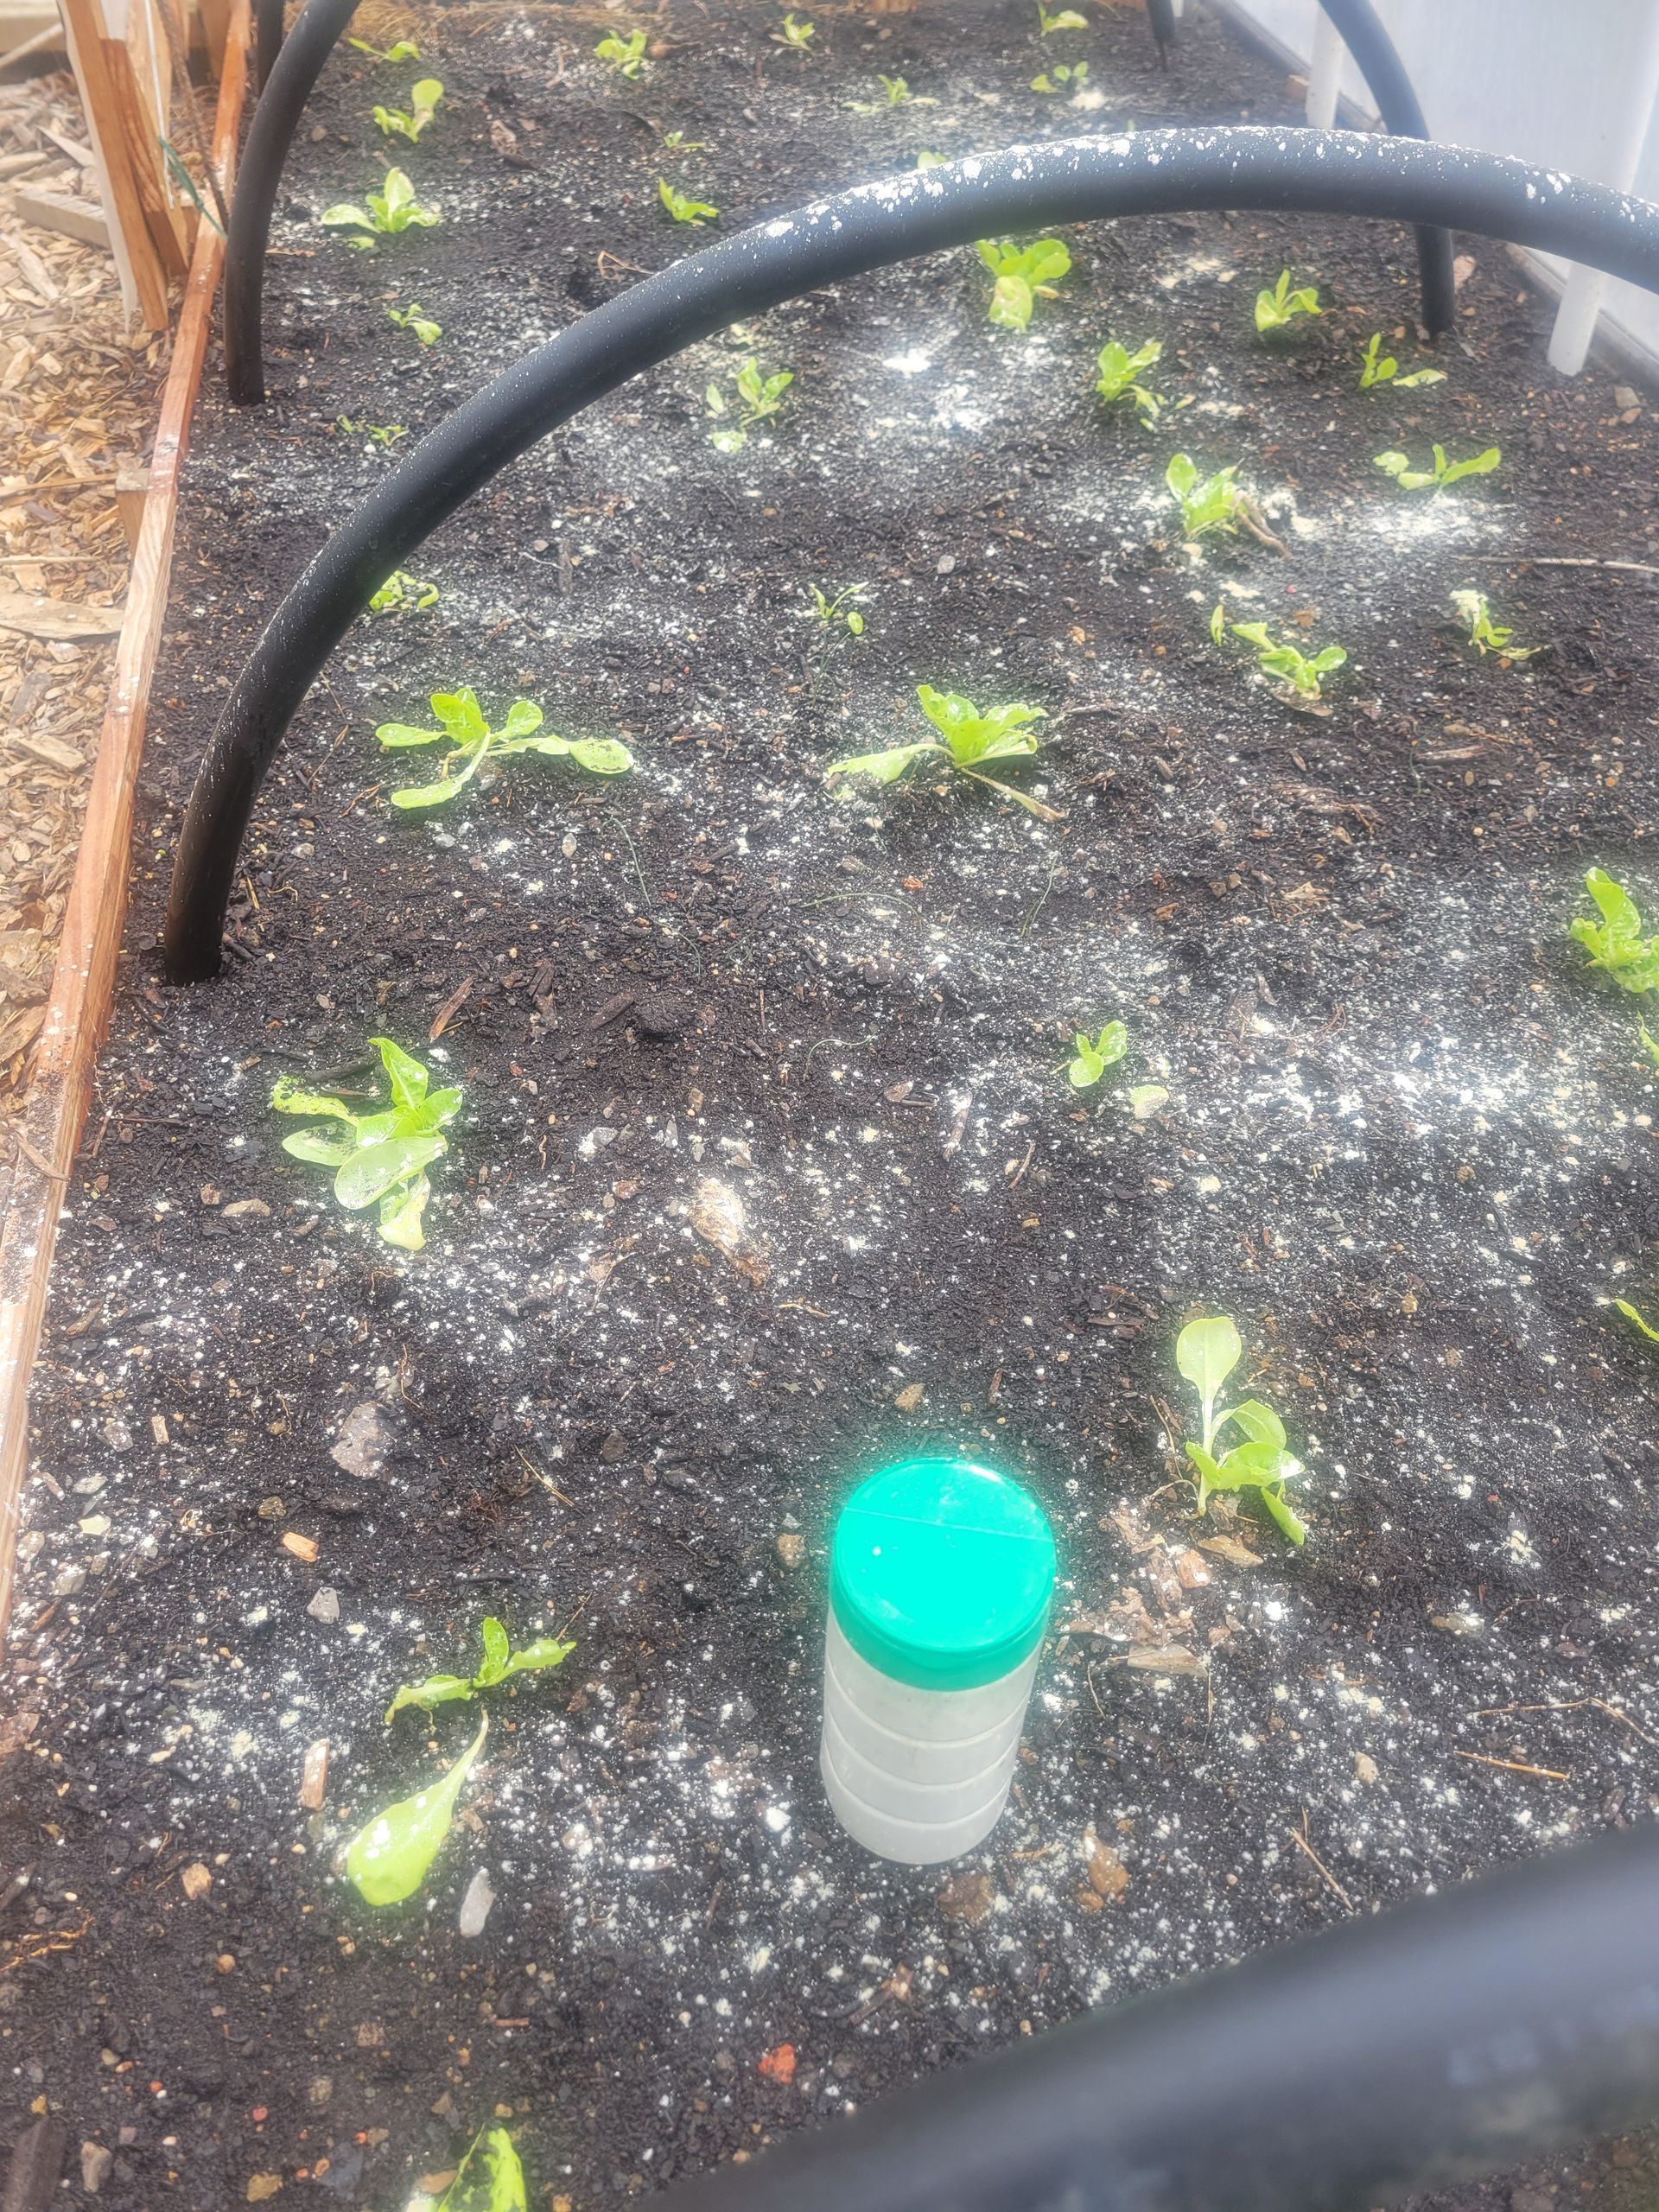
Wherever you live, attempt to begin sprouting the rhizomes before mid-April. As temperatures are warming and because we live in NE Tennessee now, we've actually begun sprouting the rhizomes by mid-March.
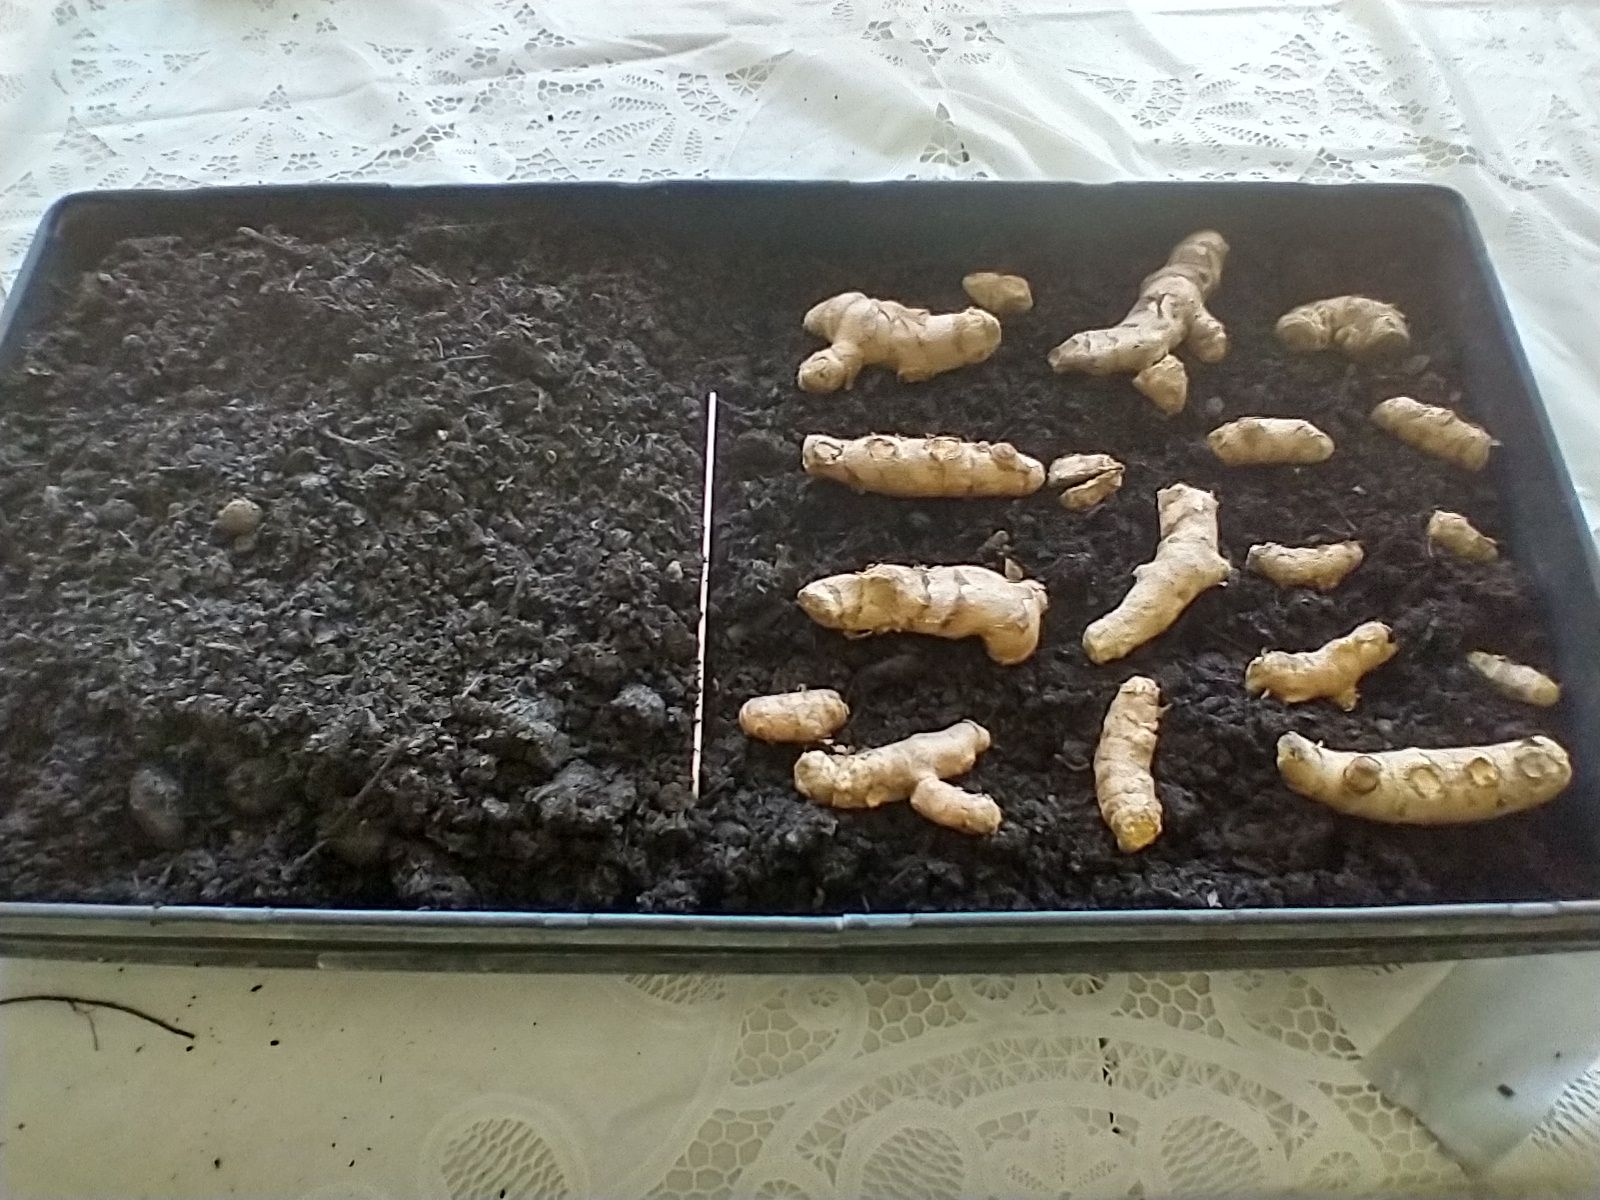
Prepare a well-drained tray or crate with 3" of good potting soil and place the rhizomes on top so that they don't touch one another. Next, cover the rhizomes with a few inches of the soil. In this photo, the ginger rhizomes, on the left, have already been covered.
These rhizomes are then kept lightly watered. In this case, it's better to keep the soil barely moistened. The trick then is to keep the temperature around 80 degrees. I cover the tray with a clear plastic cover with a growing light just above and a heating pad below. The temperature may not get quite to 80 degrees, but it's close!
Curing rhizomes
Sprouting rhizomes
Planting rhizomes:
Our soil is mostly clay and rocks and so growing the roots in containers allowed for better soil and hopefully larger rhizomes. Two containers were created from the halves of a white 55 gallon plastic barrel with generously-sized holes drilled in the bottom for drainage. Warmth is important, so if you live in the northern states, consider growing these in a hoop house or under cover.
Books tell us that both ginger and turmeric need eight to ten months to grow, and because we're now in growing zone 7b, we planted them in mid-April. Then we waited for them to emerge...and waited and waited. Both finally sprouted in early June and grew to have generous foliage. If you've seen decorative banana plants, the turmeric's large leaves looked like that to me.
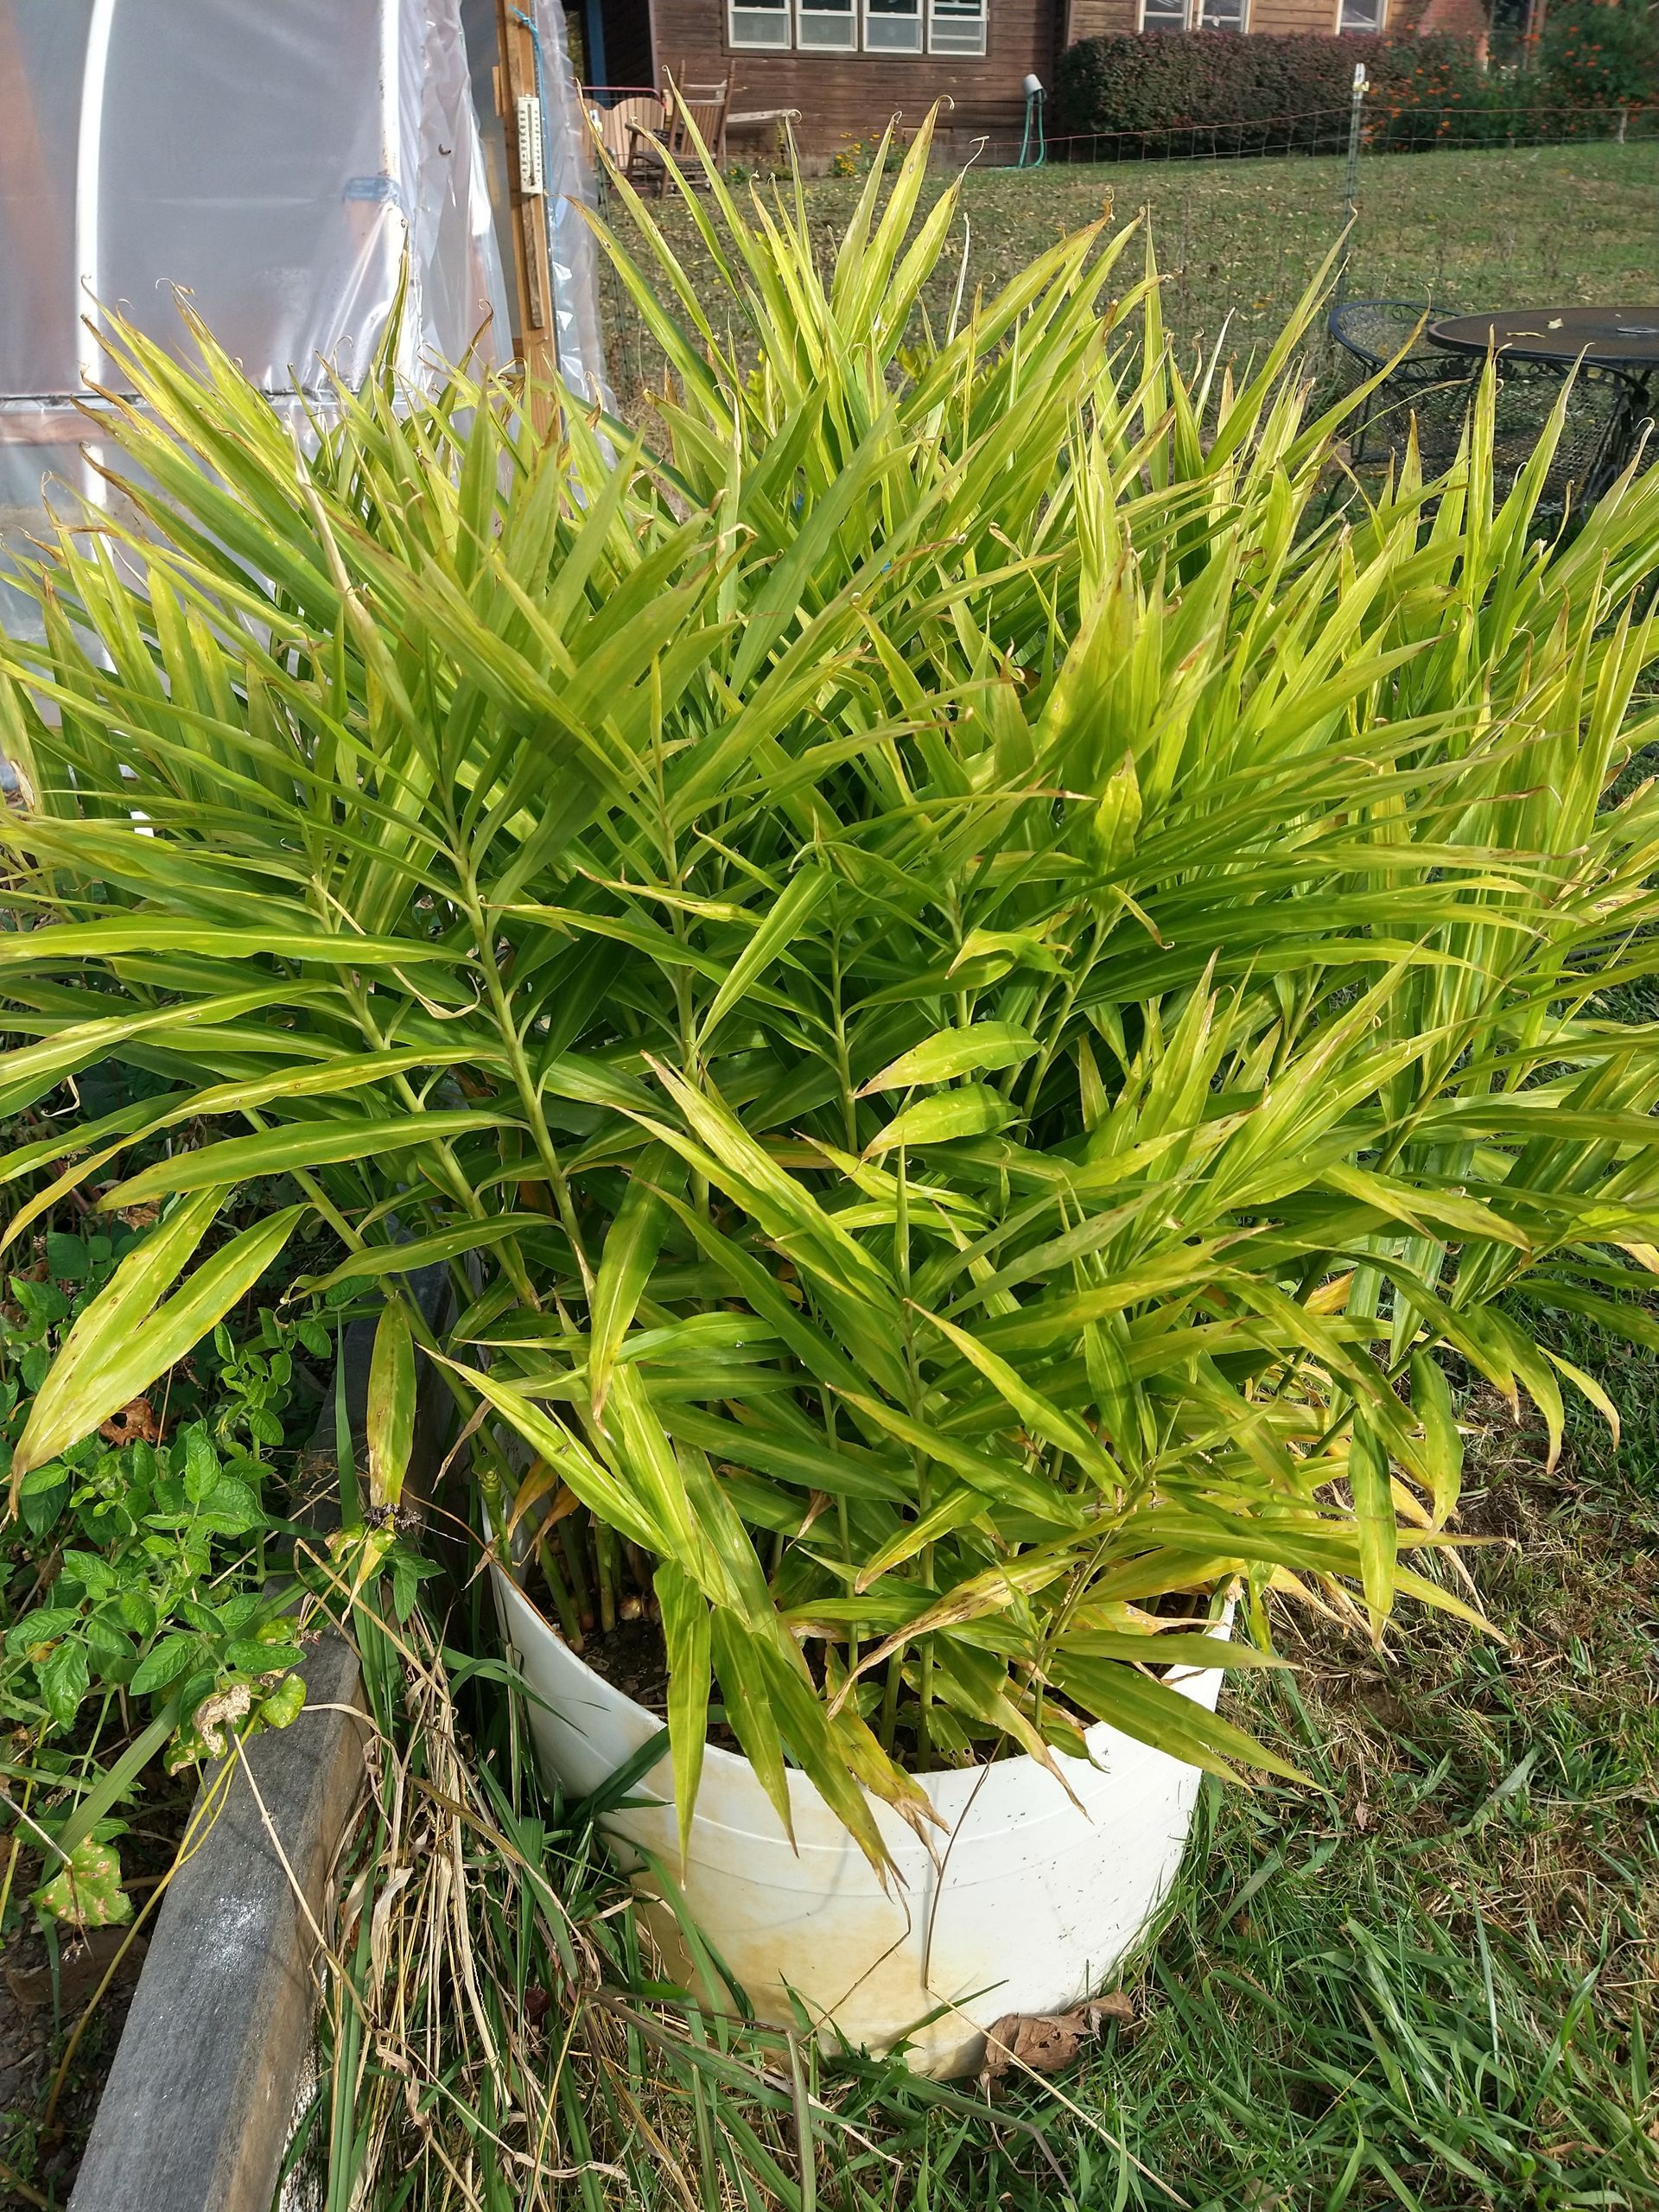
Ginger leaves
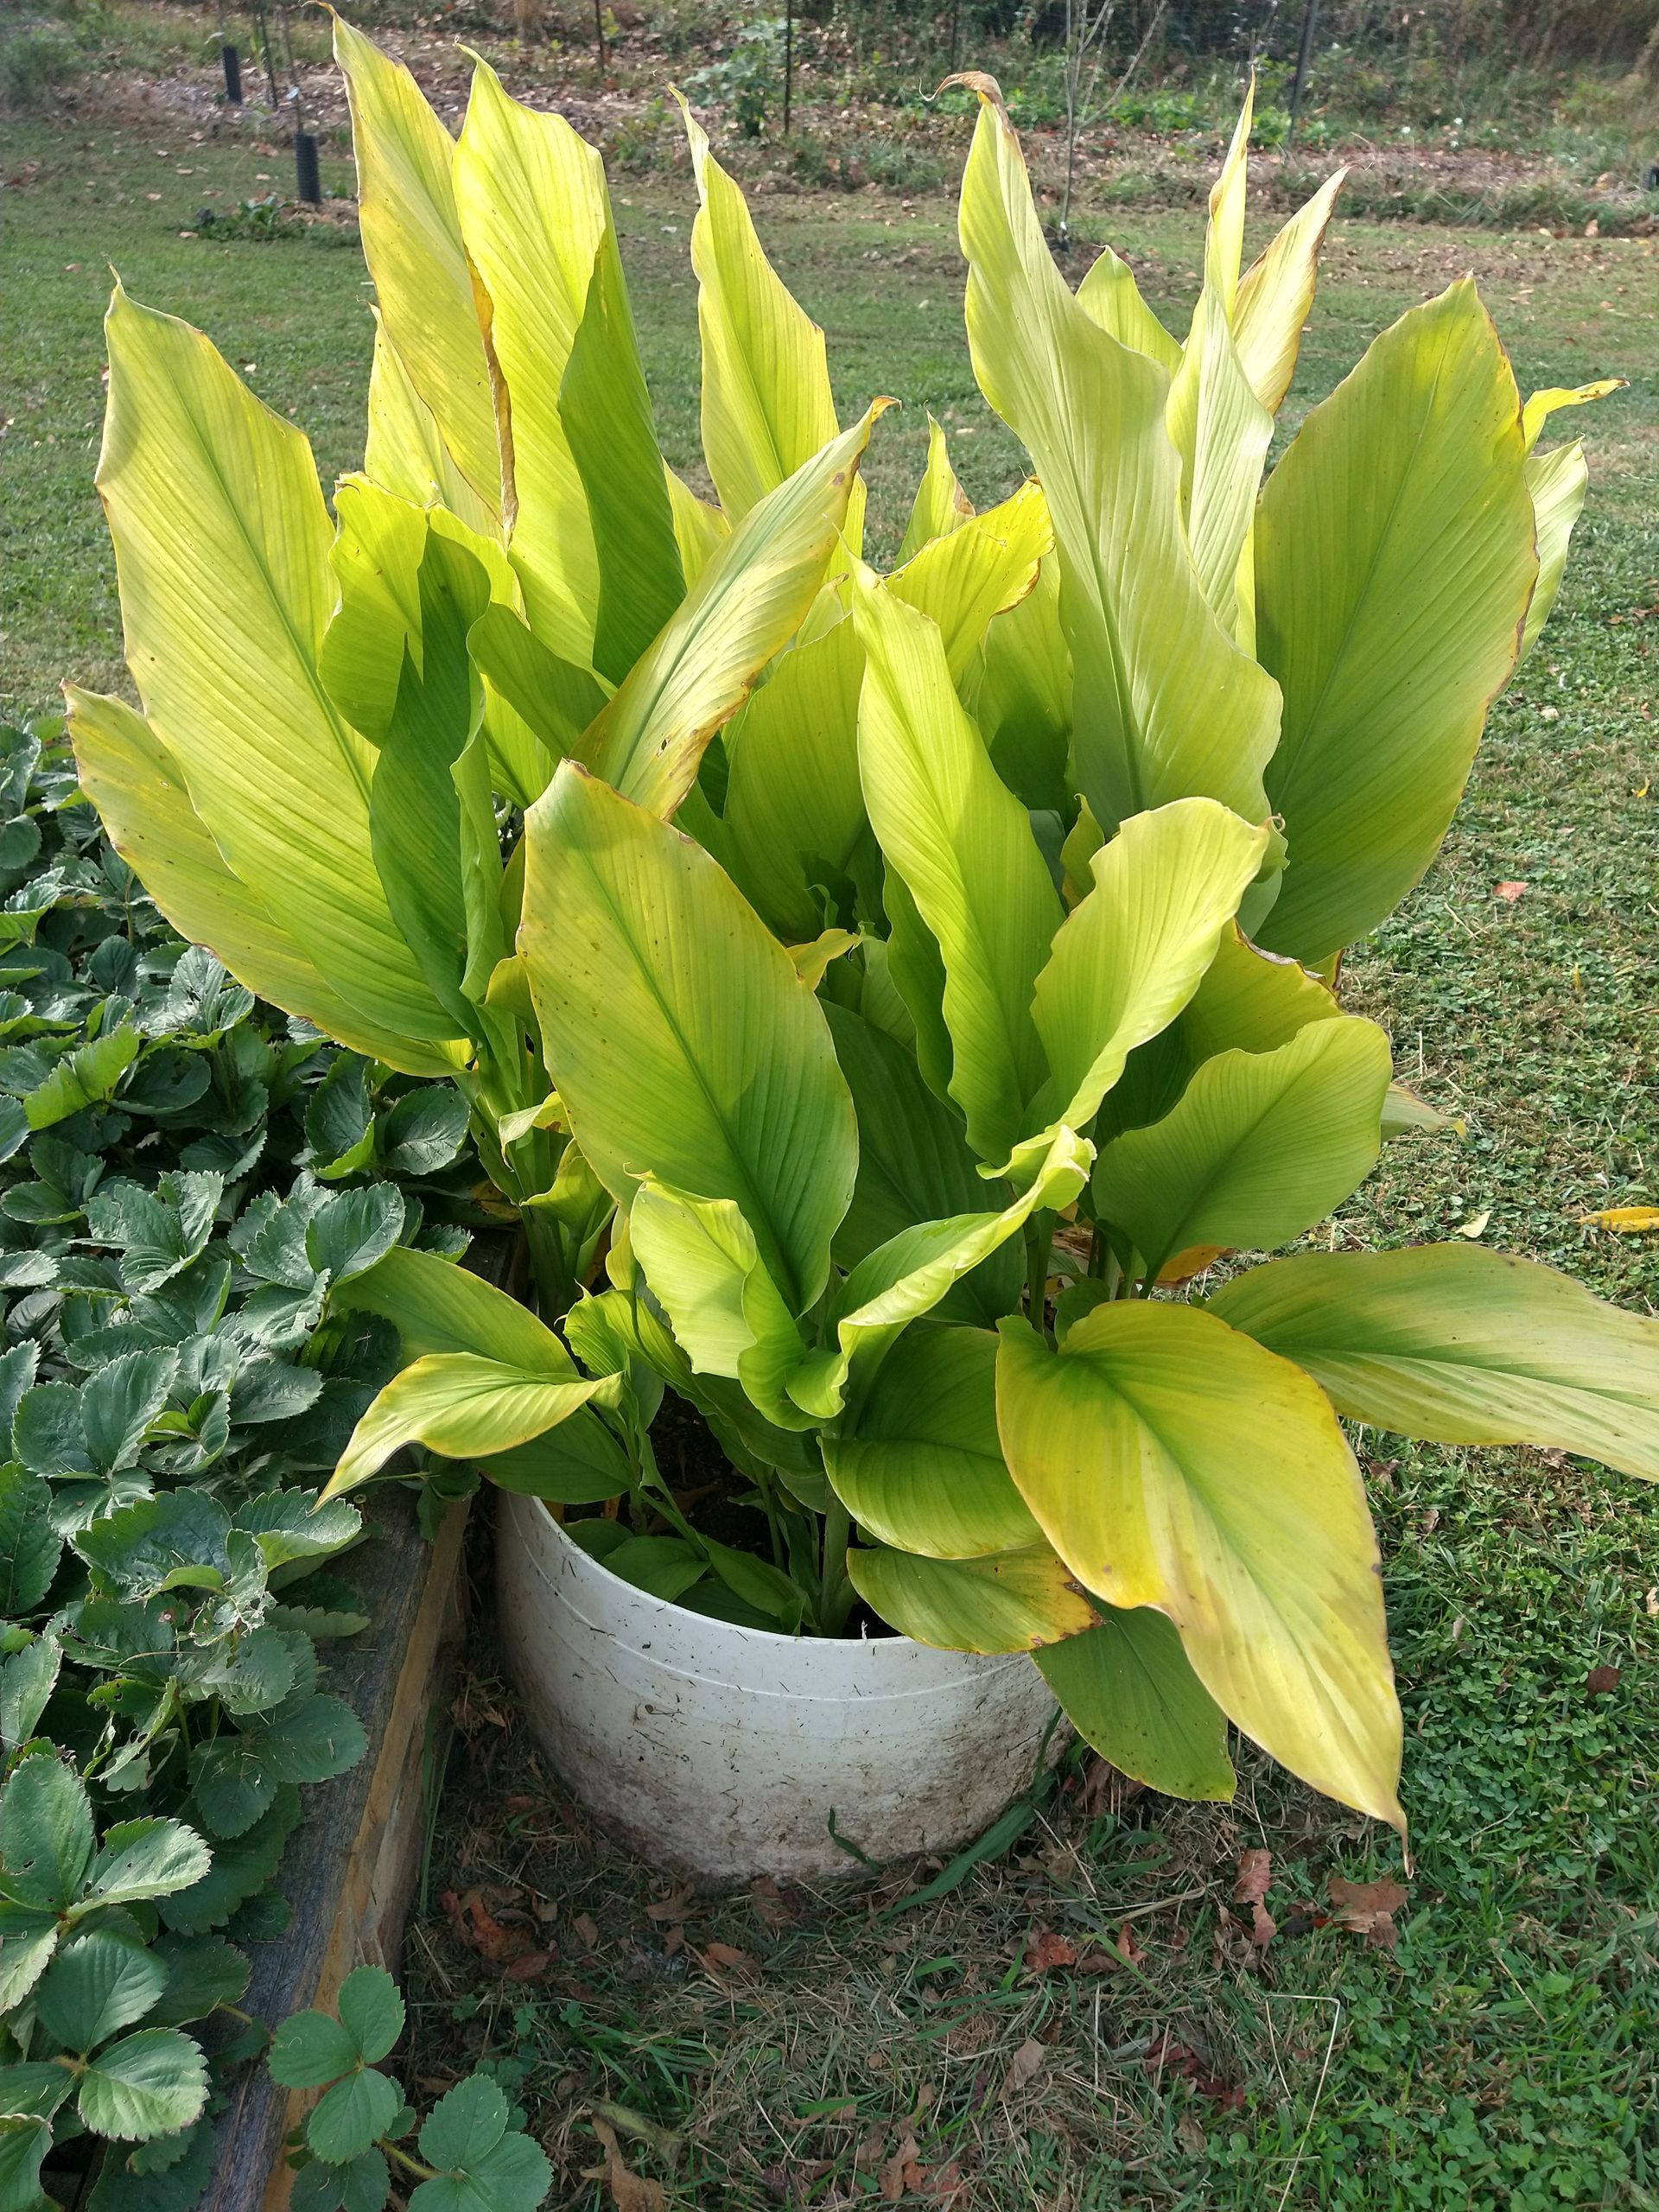
Turmeric leaves
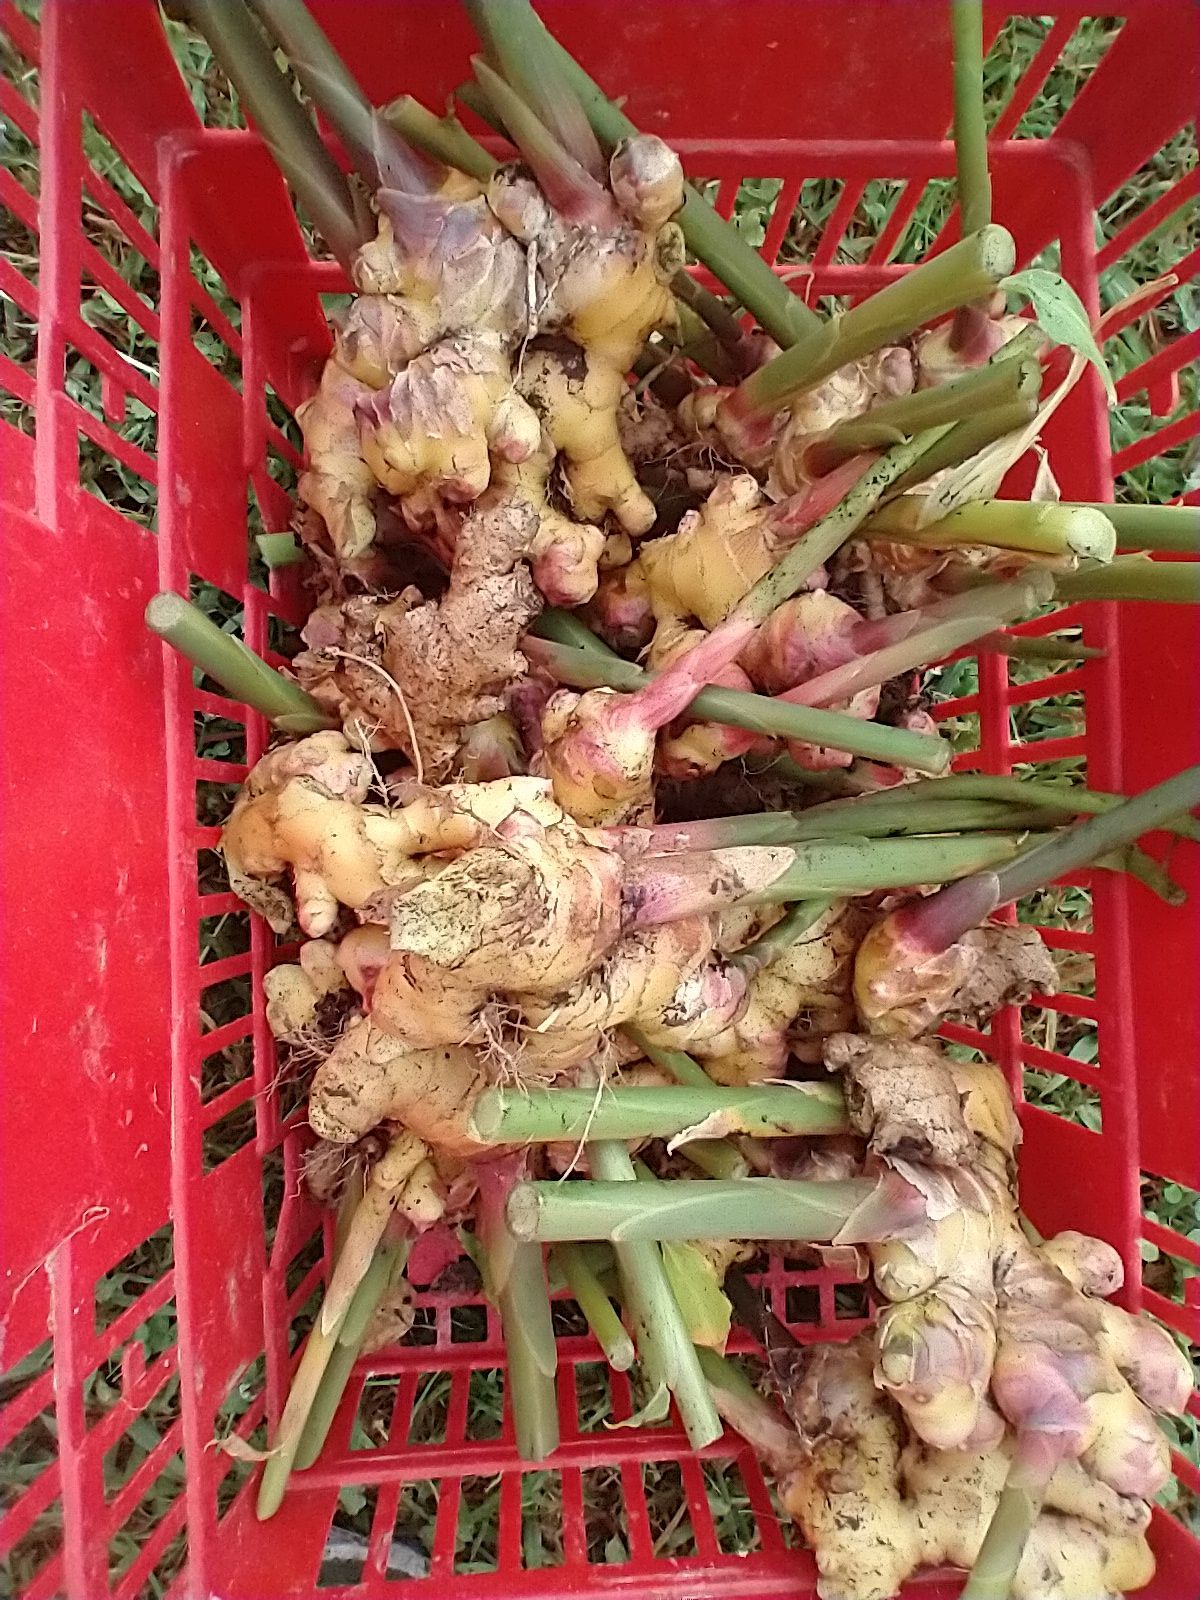
Harvesting:
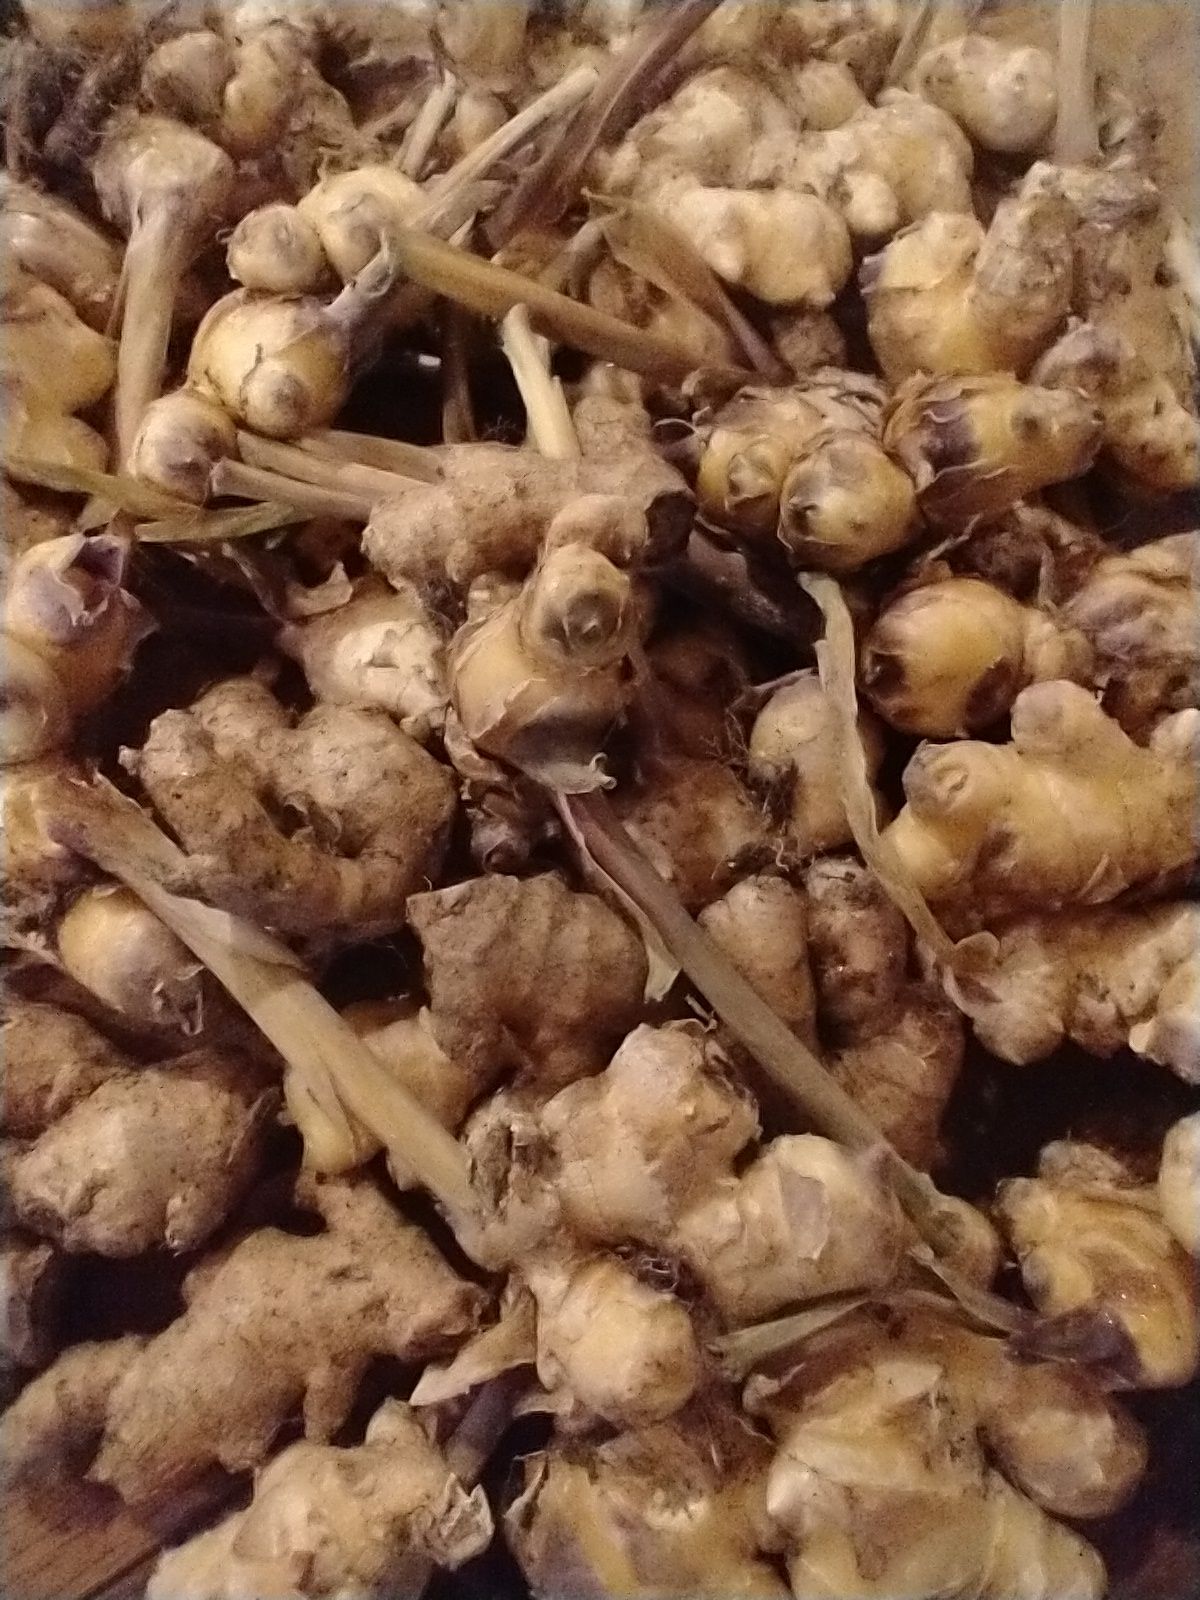
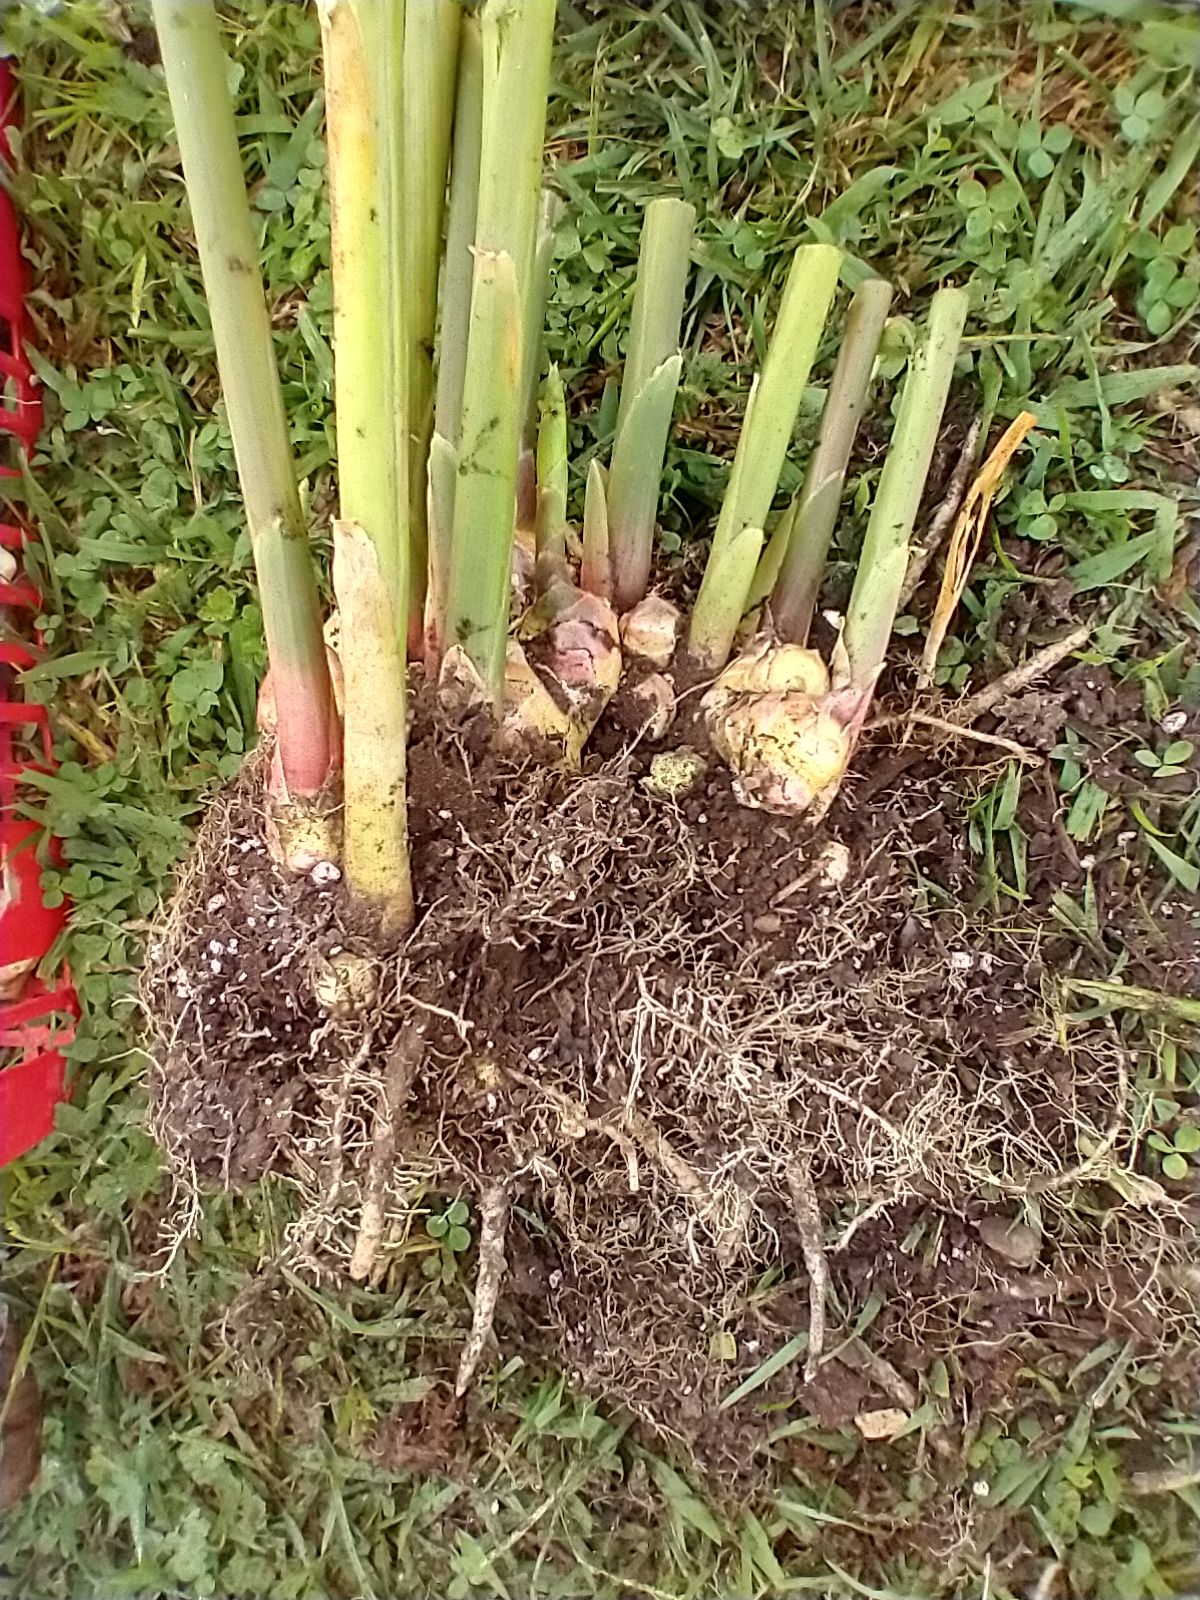
Books tell us that both ginger and turmeric should be allowed to grow for eight to ten months, or until the foliage dries. However, as temperatures dropped below freezing at night in early November, we felt we had to harvest both while the their leaves were mostly green. This probably resulted in a reduced harvest, but there was still more than enough. Perhaps next year we can provide them with a longer season if we begin earlier with their containers in the hoop house.
Harvesting the rhizomes consisted of tipping the pots on their sides with one person holding onto the stalks while the other pulled the container away. The rhizomes were then pulled into smaller clusters while shaking them free from as much of the soil as possible.
Curing rhizomes after harvest:
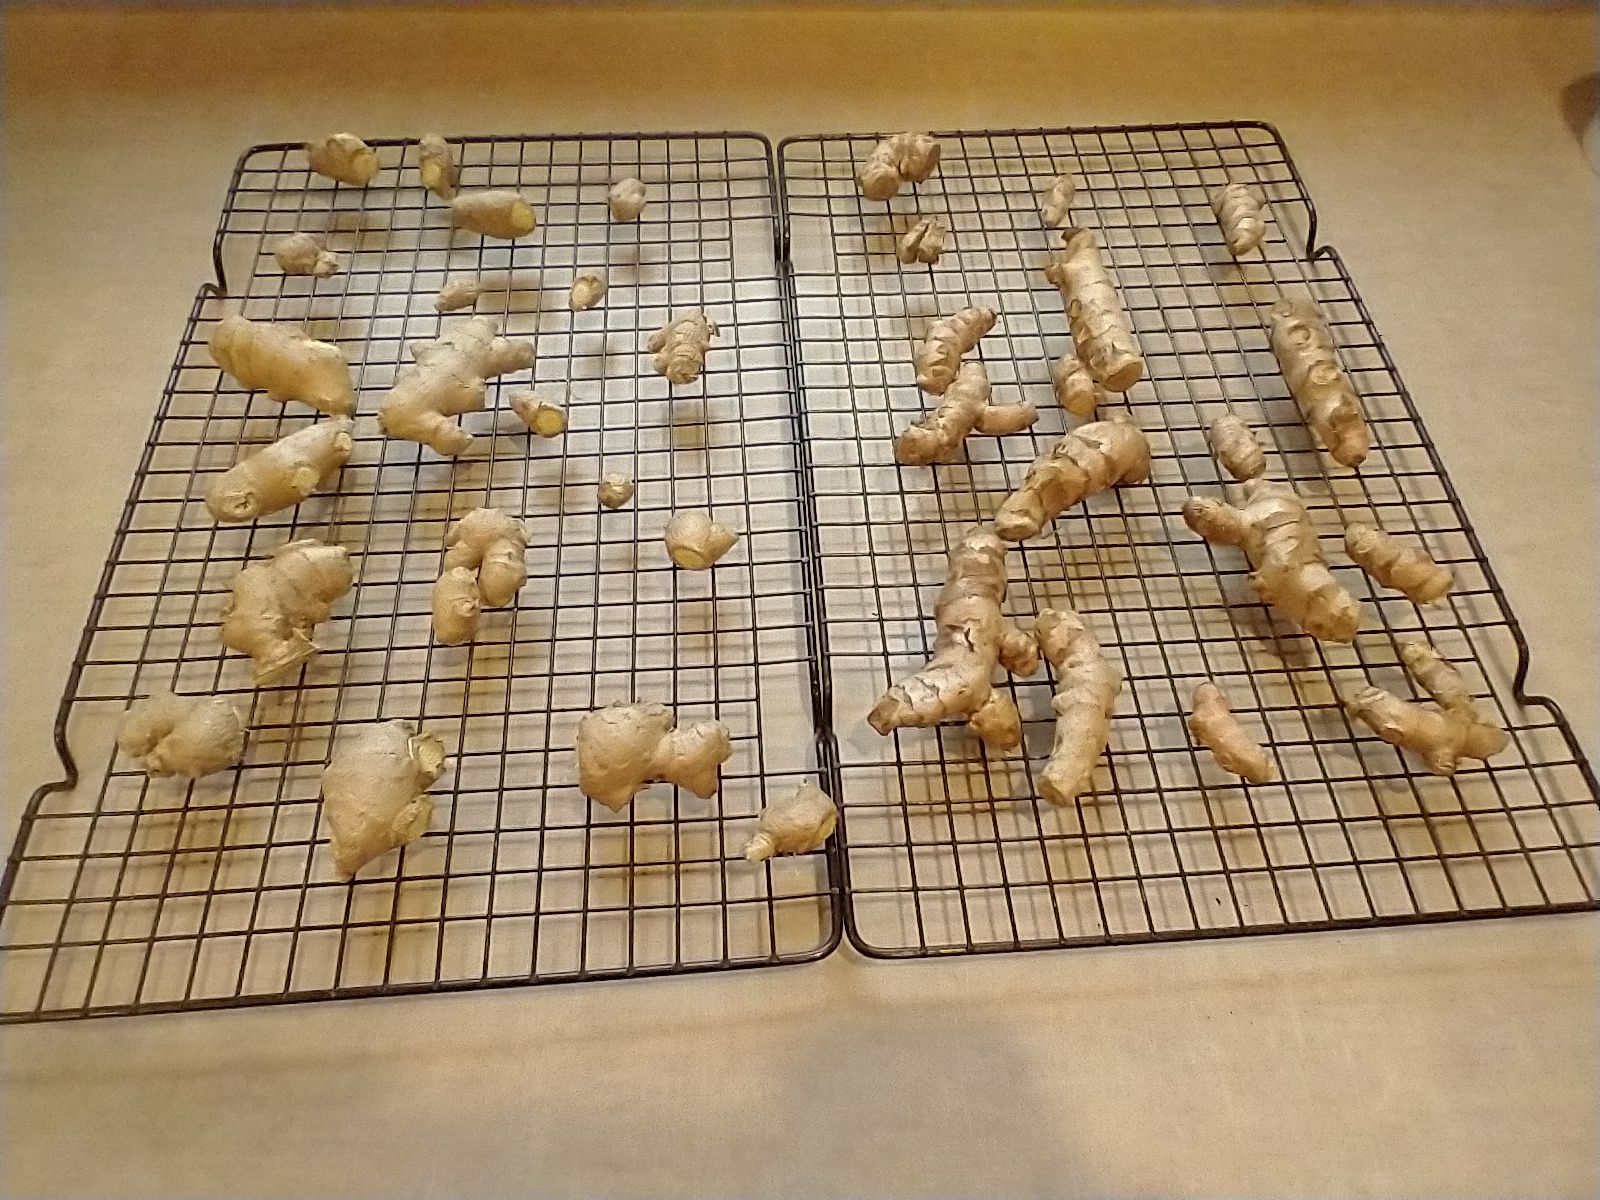
I want to use both the ginger and turmeric rhizomes for months ahead. This requires "hardening" or "curing" them before storage. It may sound a bit technical, but curing is easy because it only requires putting them in a cool, dark place for a couple of weeks. This is enough time for the skins to harden a bit which greatly extends their storage life. The only preparation necessary before curing is to separate out the rhizomes and brush off enough of the soil so that the skins can be exposed to air.
Preparing the rhizomes for use:
I tried various measures for removing the remaining dried soil after the rhizomes had cured. Because I have a rag-bag filled with worn dishcloths and washcloths, I put a few to use rubbing the soil off of the rhizomes.There are so many nooks and crannies to clean that I sometimes separated the various nodules with a knife, or sometimes removed a small nodule all together. Rubbing with a rough cloth did a good job of cleaning off the dried soil and sometimes even took off a bit of the thin skin. My goal isn't to peel off the skin completely however. I use these rhizomes with their skin on because it doesn't provide any "off" flavor and it does contain nutrition.
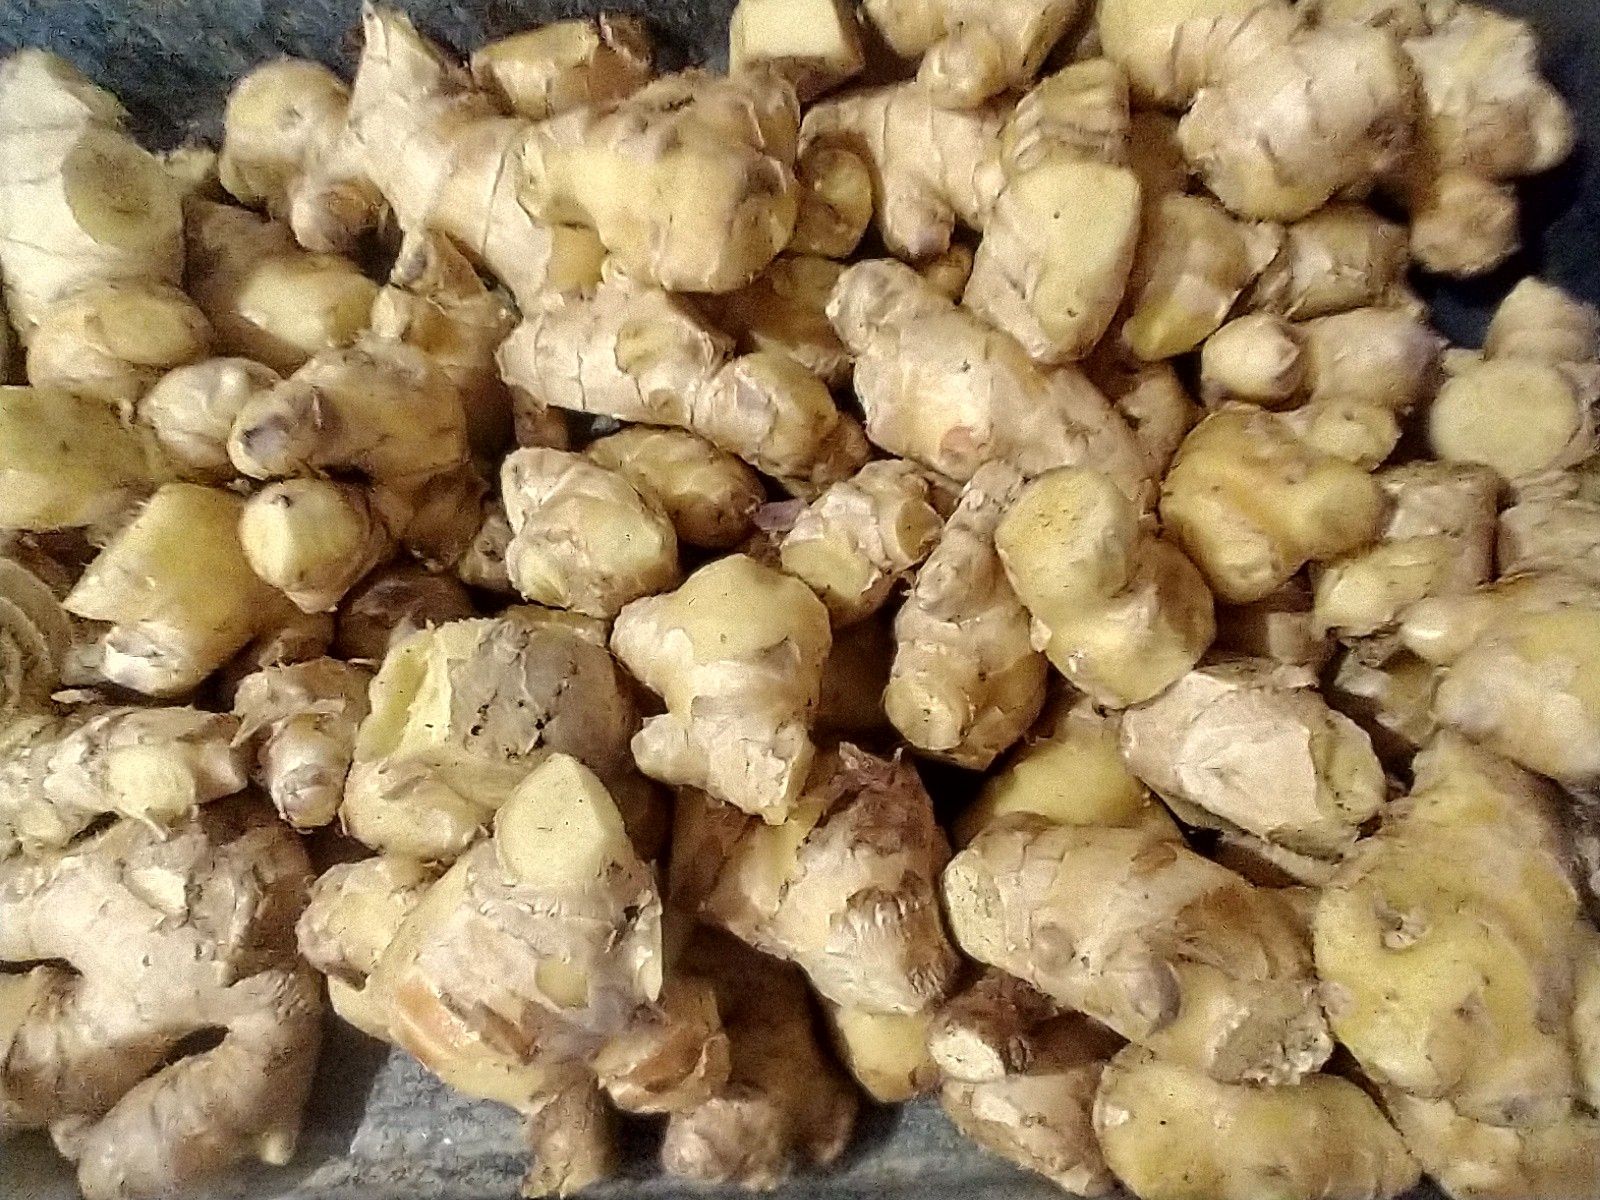
Cleaned ginger, ready for storage
Preparing rhizomes for storage:
Harvest can only happen once-a-year, but we want to use the ginger and turmeric year-round. This means we have to find successful ways to store our harvest. Here are some methods that are working well for me:
- Drying: I began storing a few of the cleaned rhizomes by slicing them in thin pieces and drying them. I used the electric food dryer, but putting them in single layers, perhaps on cookie sheets lined with paper towels, in sunshine would work well too. These dried pieces are then stored in small, air-tight jars and will be broken or crushed into small pieces for cooking.
- Shredding: A zester works well for shredding the fresh roots into small pieces that can either be stored frozen or refrigerated in air-tight containers. I found that the electrical coffee bean grinder worked great for either dried or fresh rhizomes, although the turmeric turned our grinder yellow!
- Refrigeration or freezing: Ginger supposedly lasts one month in the refrigerator or six months in the freezer. However, a friend states that she stores frozen ginger root longer than a year and that it still seems fresh. I'm content now to have plenty of rhizomes of each ginger and turmeric in the hydrator of the refrigerator and lots more in the freezer. Storing them in air-tight containers is important to get us through until the next harvest.
When frozen ginger is thawed, it seems "water-logged" and a big mushy. But that doesn't affect its flavor and it grinds quickly
in the coffee bean grinder, so it works as well as fresh ginger for drinks or dishes.
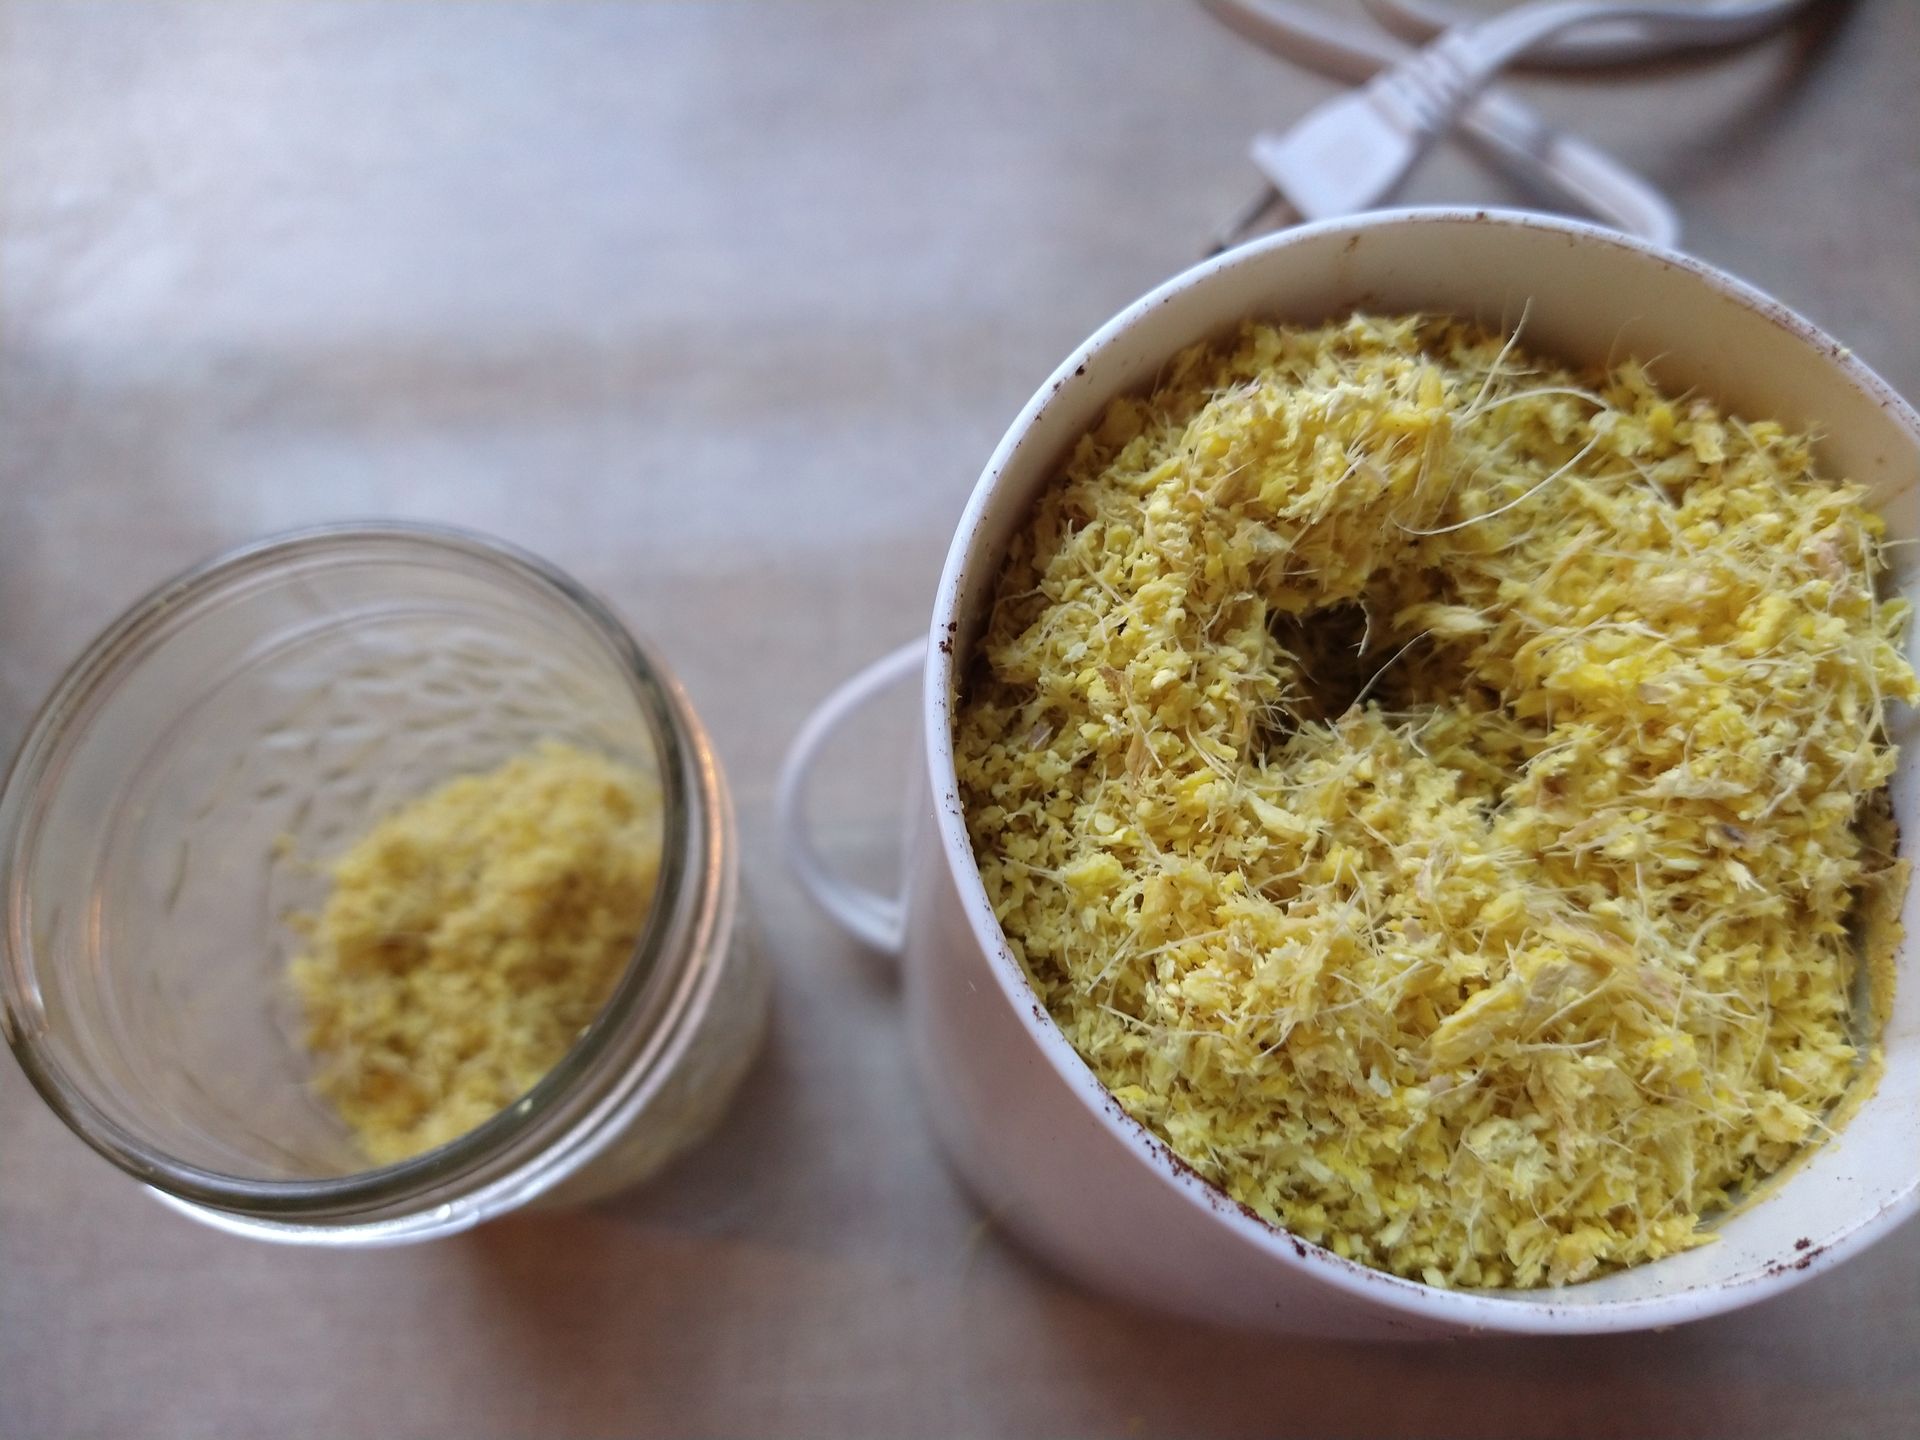
Fresh ginger ground in coffee bean grinder

Zester
Cooking with Ginger and Turmeric:
Now that our refrigerators or freezers are well stocked with these beneficial rhizomes, how do we use them? My solution is simple; because I'm not one for following recipes, it's easy for me to just put them in wherever they sound good!
For starters, both do well in tea, to which I enjoy adding honey from our beehives. In the summer, this combination of the shredded rhizomes plus honey in water makes a refreshing and delicious cold drink. I also add ginger and turmeric to everything from soups, to stews, to stir-fry to chicken dishes. Ginger is so versatile that it also flavors baked goods like gingerbread and ginger cookies. Candied ginger has always been a favorite of mine, and now we can make our own.
Turmeric by itself has equal versatility. Because it doesn't offer as much taste to a dish, I can sneak it into any meal...as long as I don't mind adding a bit of yellow! Black pepper makes a big difference in how much turmeric we actually absorb, so I attempt to also include pepper in any dish it might complement. This means that our chicken, rice or vegetables may be both spicy and a bit "jaundiced," but they now include additional nutritional benefits.
If you prefer following recipes, there are multiple ideas and recipes in cookbooks and online. You won't find as many for turmeric, but I encourage you to frequently add it into dishes for its health benefits.
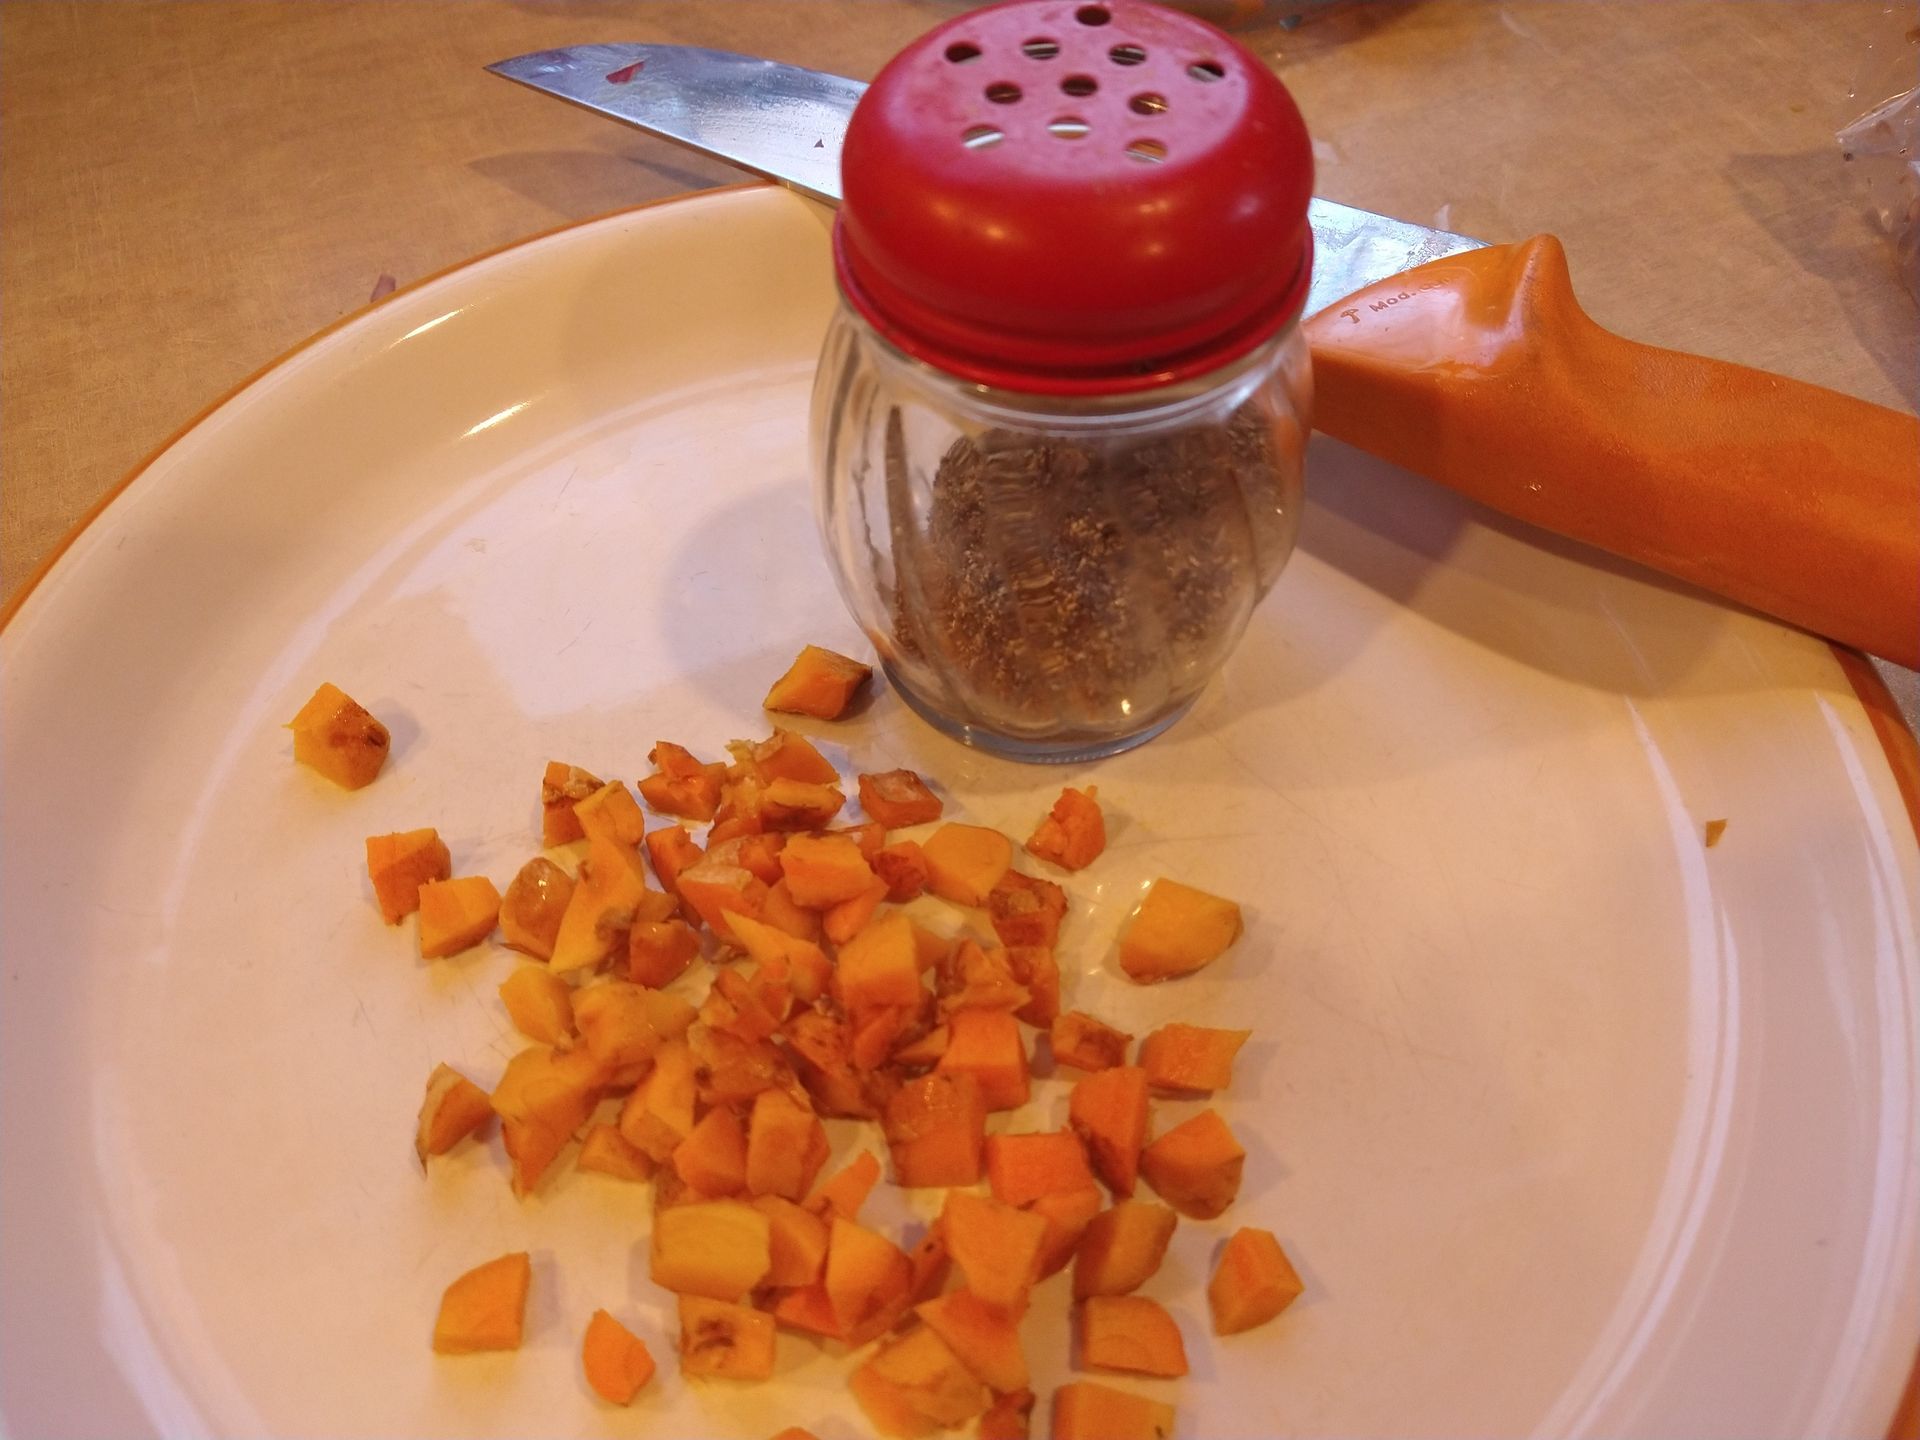
Chopped fresh turmeric:
I'm glad that turmeric doesn't add a lot of flavor to any dish because that makes it more versatile. When I'm chopping vegetables for a stir-fry, or perhaps a Shepherd's Pie, I like to add turmeric. Black pepper does add its "heat," but it also aids our body's uptake of "curcumin" from the turmeric by up to 2,000%.
Besides its nutritional benefit, chopped turmeric retains its "crunch" which I think adds more appeal to baked vegetables.
I wish we could pool all of our ideas for this nutritious and versatile rhizome!