How to Build Raised Garden Beds for All Ages and Locations
Advantages of raised garden beds:
Raised garden beds or containers can be found in many different situations because they fulfill various needs. Here are some reasons for gardening in raised beds:
- We've recently moved to NE Tennessee where the soil is either very rocky or dense clay. Building raised beds allows us to rapidly improve the soil.
- Raised beds are easier to work in for handicapped or older folks.
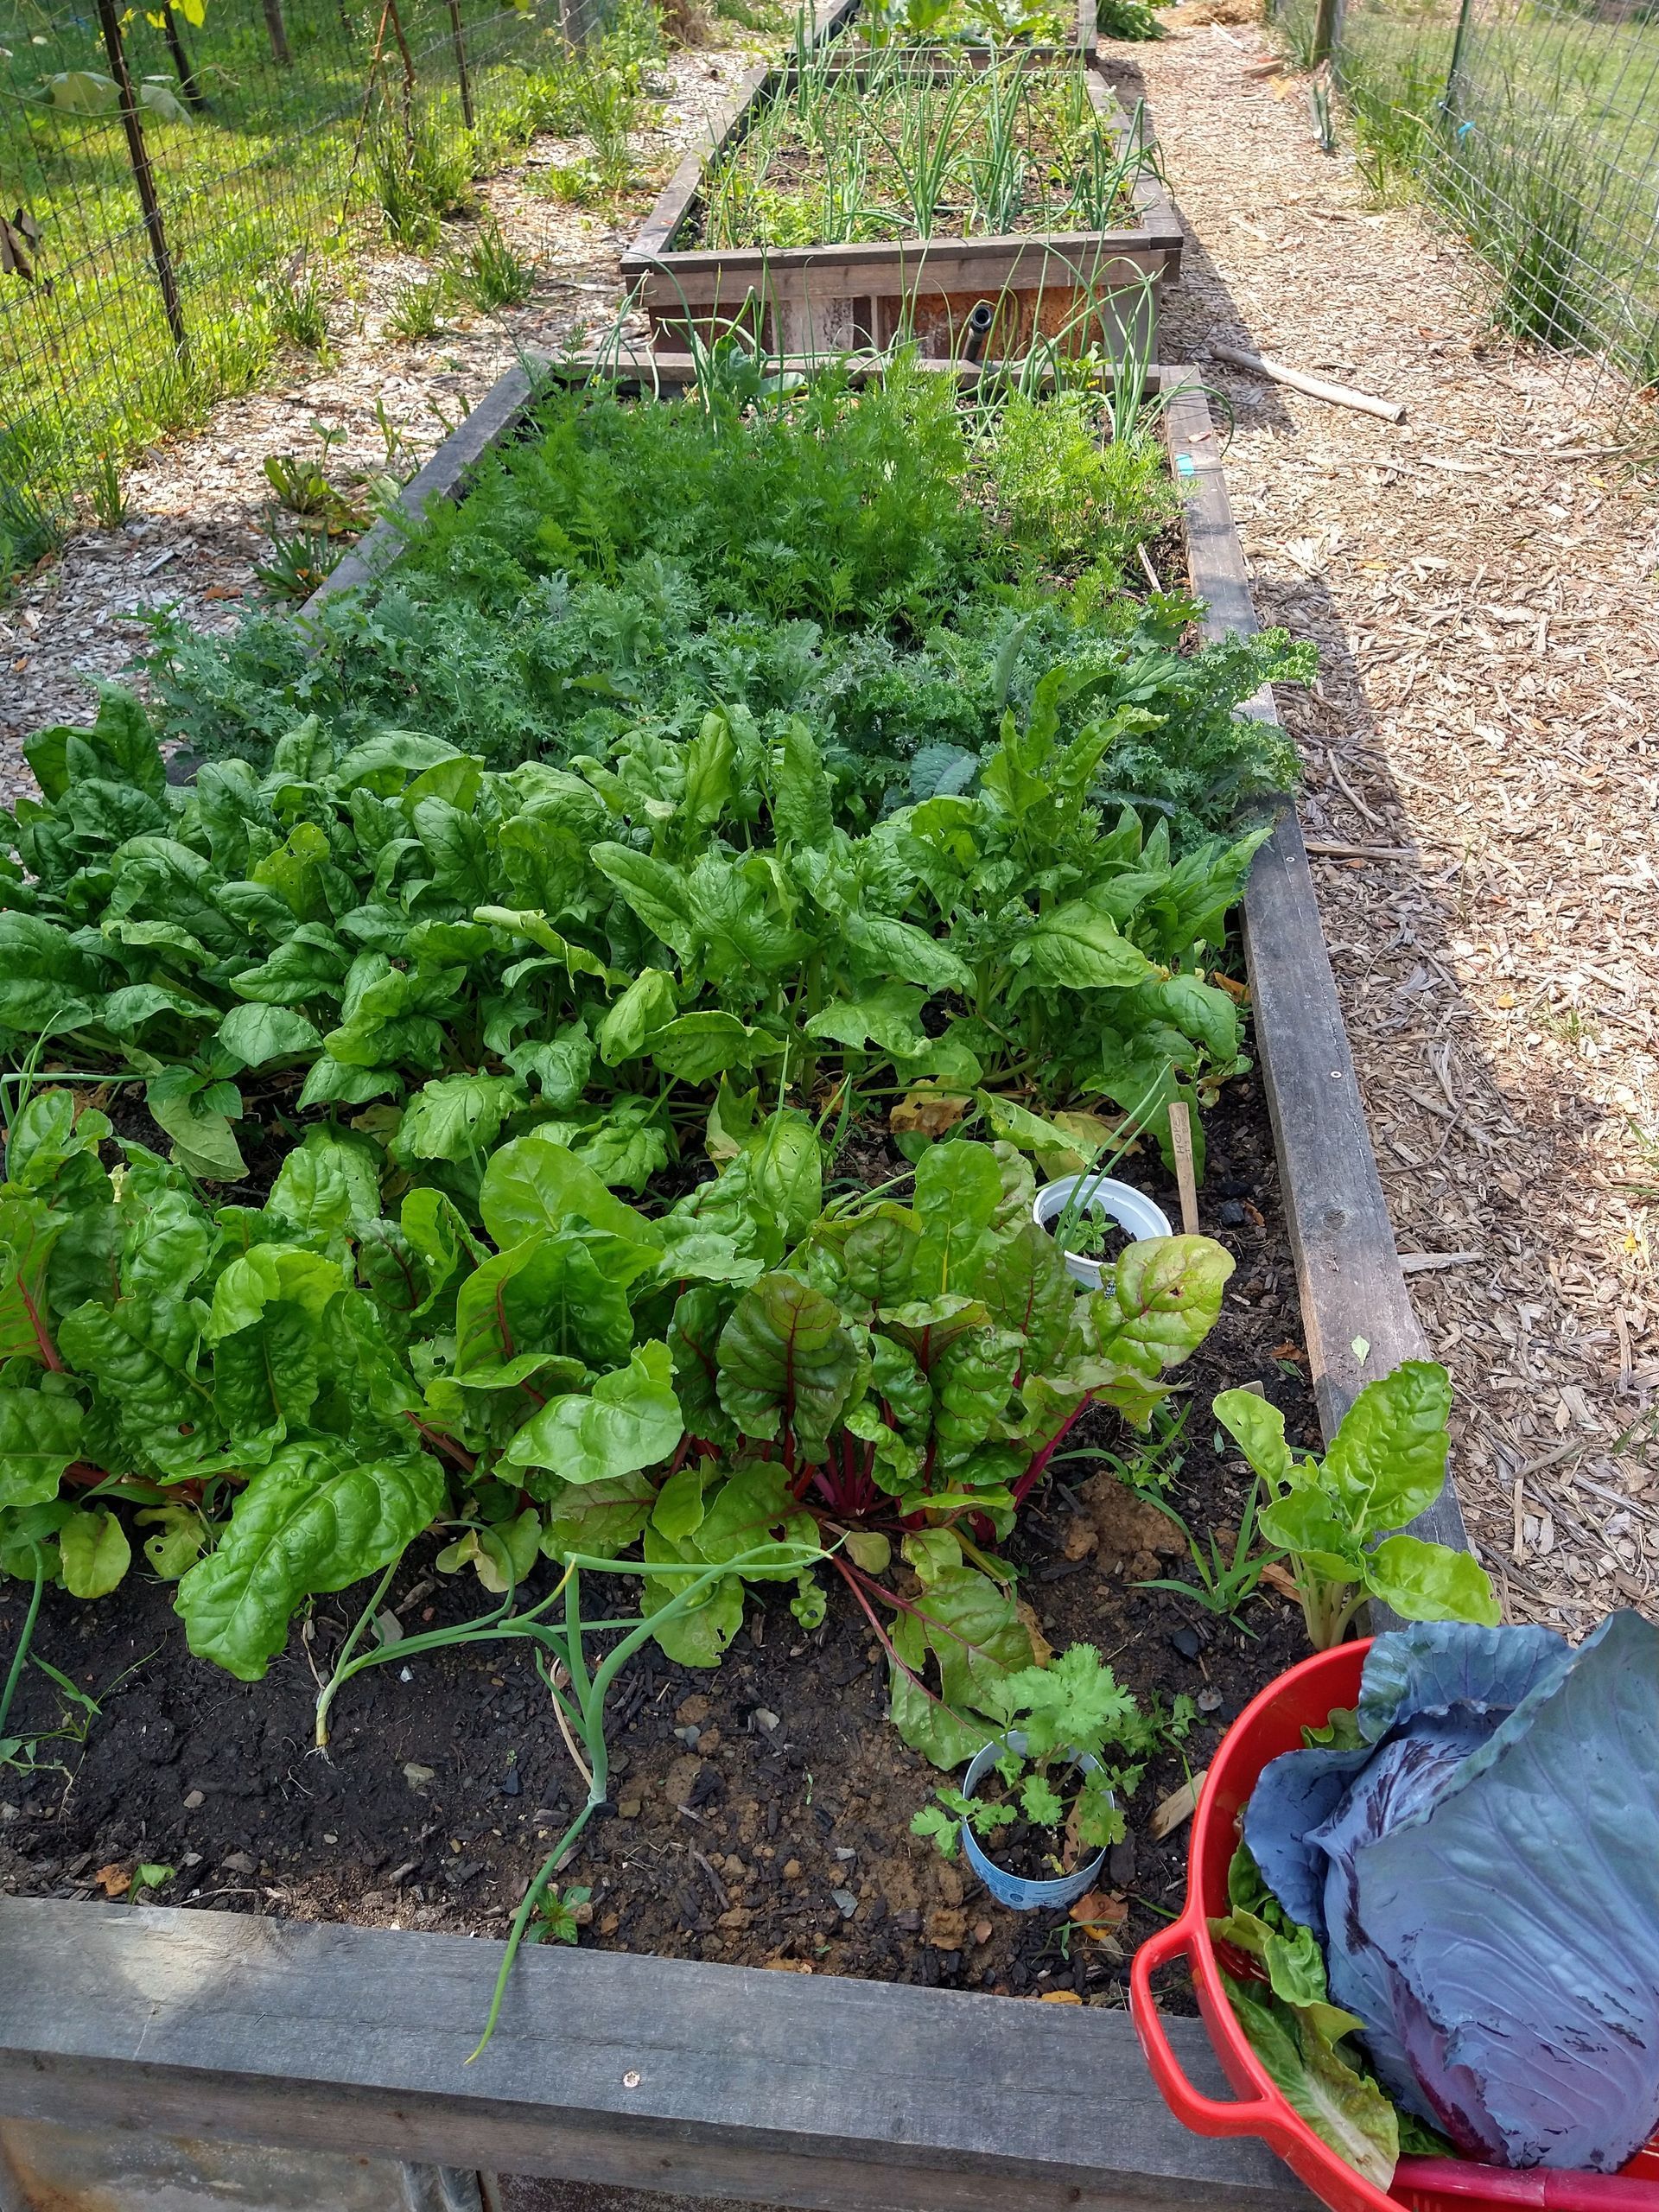
- Small mammals can't access our root crops quite so easily!
- They drain well.
- The soil warms earlier for spring planting.
- Weeds like crabgrass won't have easy access.
- They look "tidy" and so are suitable for suburban and urban front yards.
Planning for construction:
The first decision was determining what height to make them. Although raised beds can be as short as twelve inches in height, they also can be high enough for kneeling or higher yet for sitting when gardening. What feels right to me is about eighteen inches in height with a wide enough top-edge to sit on.
Besides personalizing the height of these beds, we also need to be able to reach the entire bed from the edge. For example, if I can comfortably reach a couple of feet when sitting on the edge, then the bed should be no wider than four feet so I can access all of it.
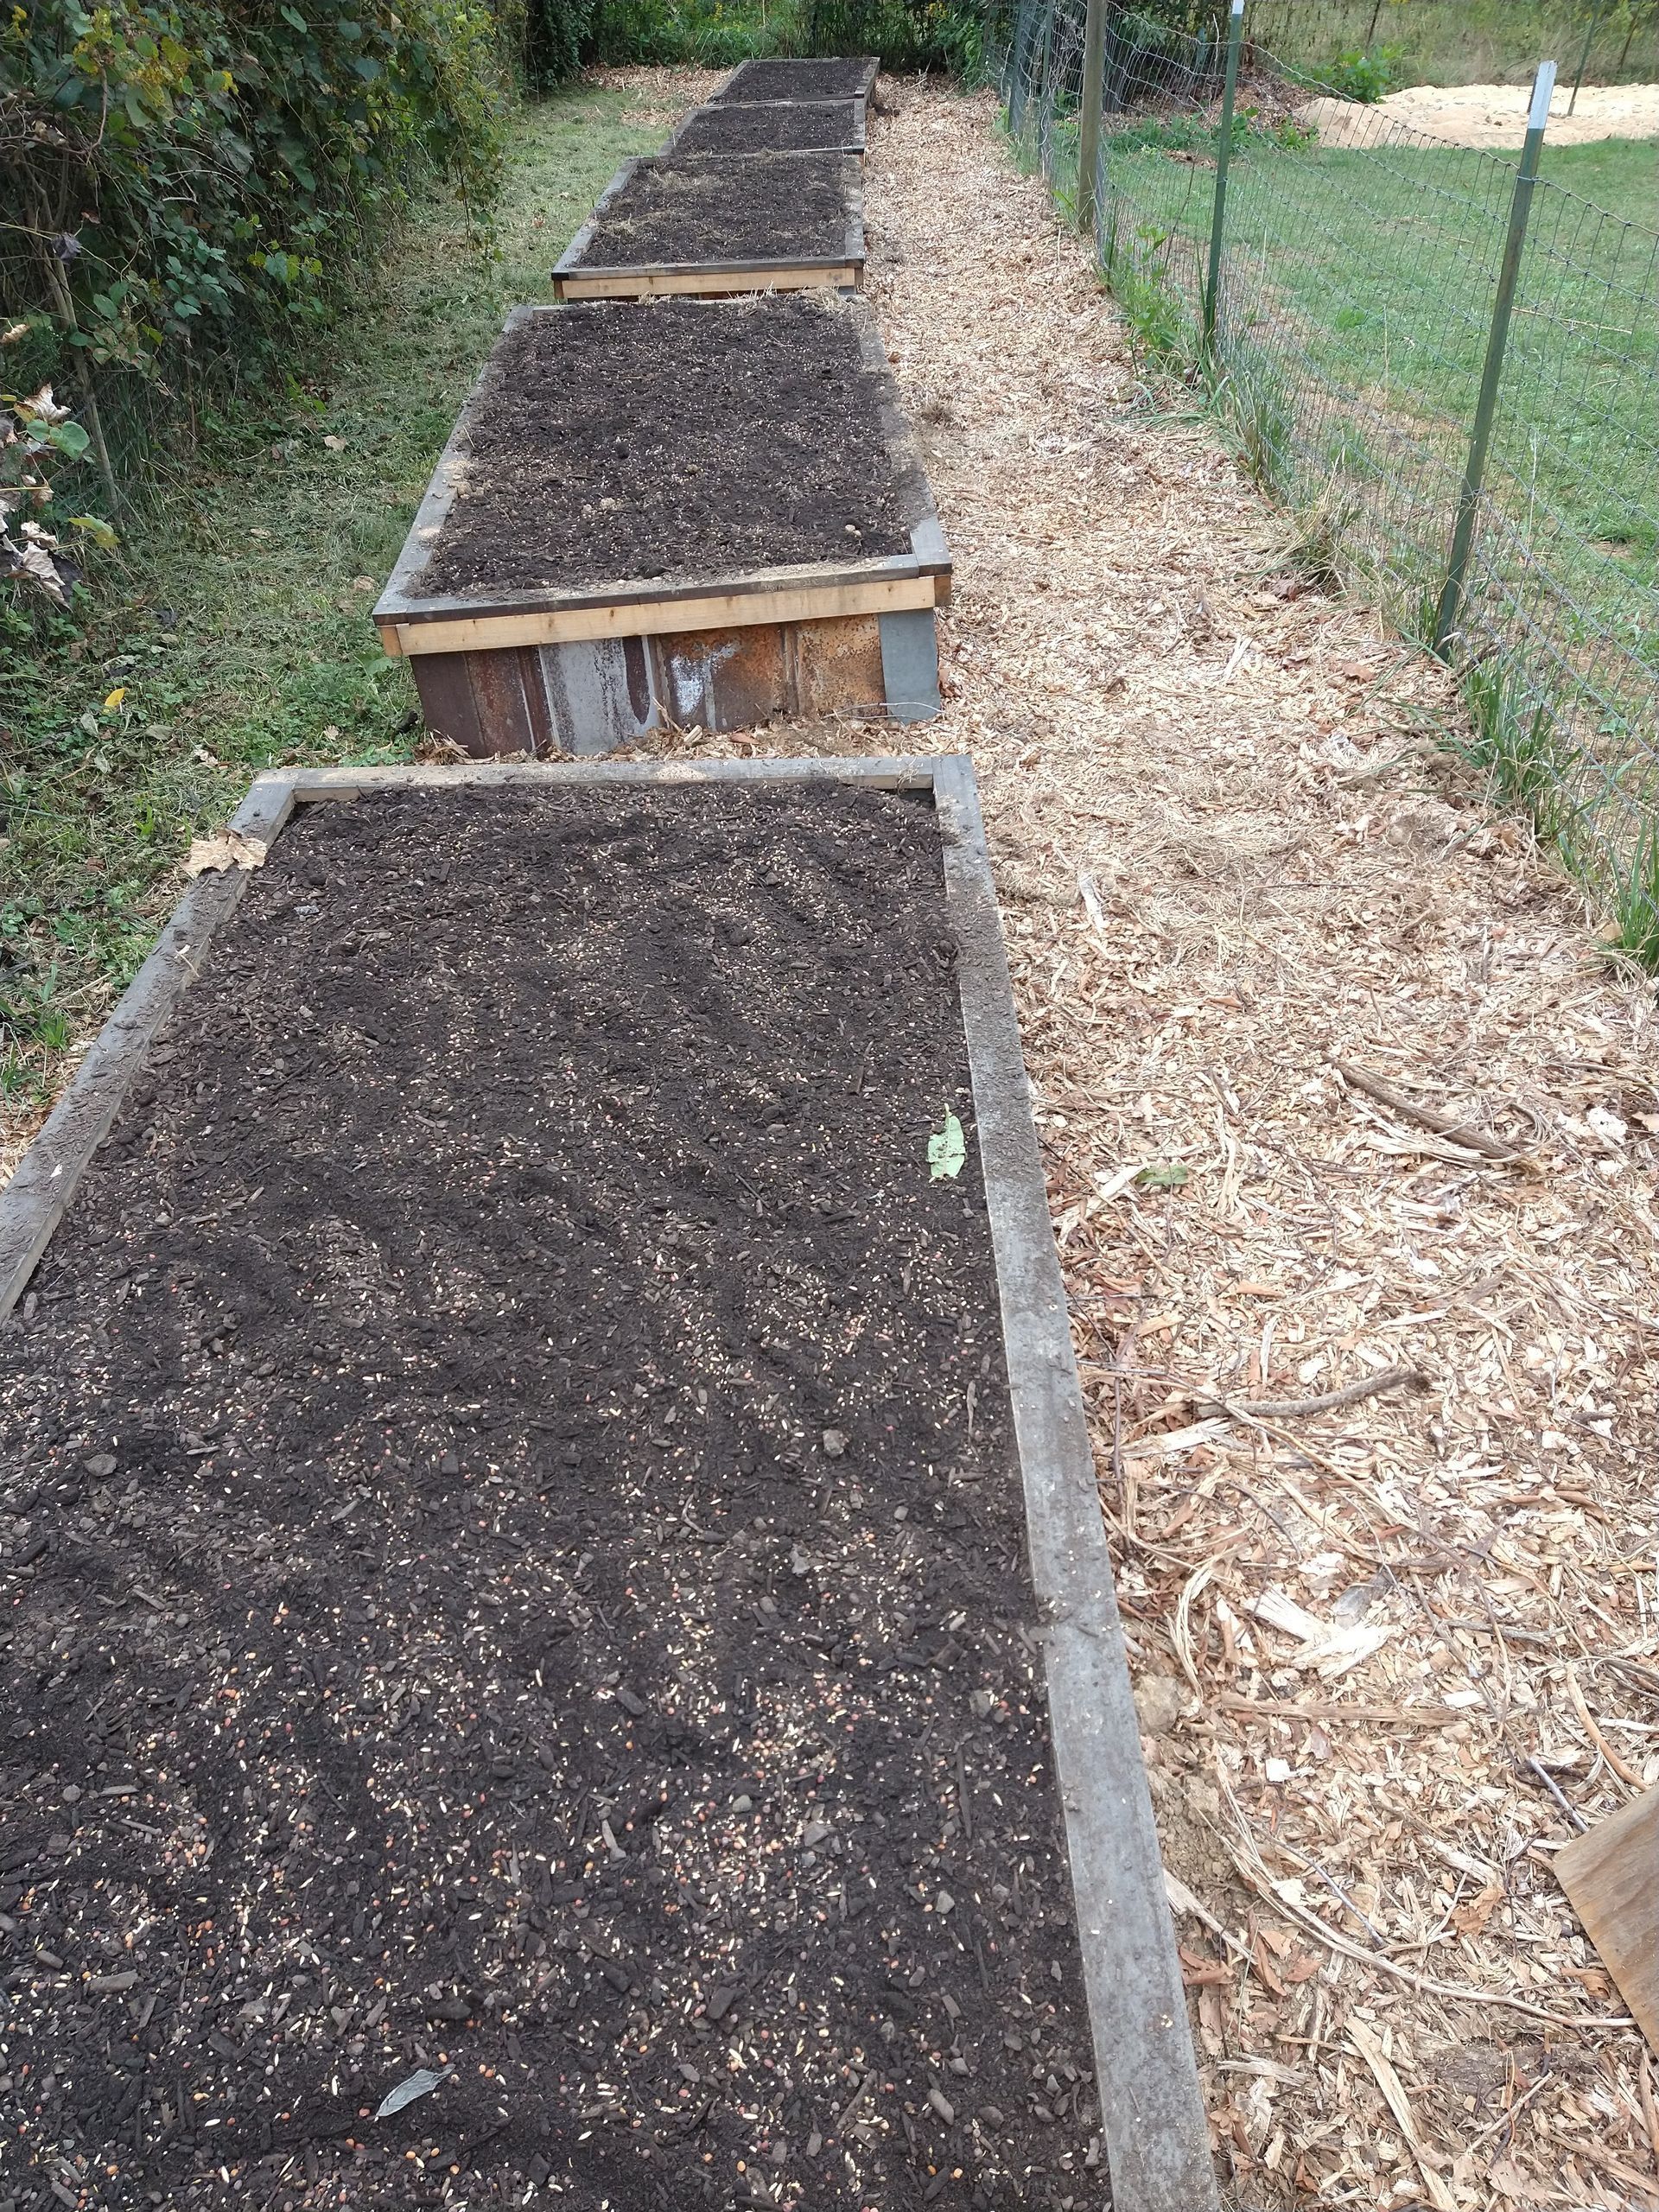
Before beginning the actual building of the beds, we needed to choose the best location for them. At our place, we’re delighted to be surrounded by many large trees, but that meant we had to look carefully for a location that would give plants at least six hours of sunlight a day. Not only do we want plenty of sunshine, but when planning for more than one bed, we wanted to make sure we could walk comfortably between the beds. We also need a wide enough path that allows us to access all the beds with a cart or wheelbarrow. Finally, as with any garden, we had to figure out a convenient way to access water.
Constructing the raised beds:
Materials:
Once our perfect-as-possible site was chosen, it was time to choose the material to build them. This decision was easy for us because stacks of metal were left here from torn down tobacco barns. This galvanized steel’s virtue certainly isn’t good looks, but it will have longevity. If you find your front yard is best suited for a raised bed or two, untreated wood is attractive but won’t last as long as other materials like steel, cinder block, brick or stone.
After deciding on the design, location and material, the building of our raised beds began. The 18” high steel walls were at first held together at right angles with two short pieces of wood positioned catty-corner from each other. More of the scrap steel was then cut and riveted to the outside of each corner to give longterm stability to the beds.
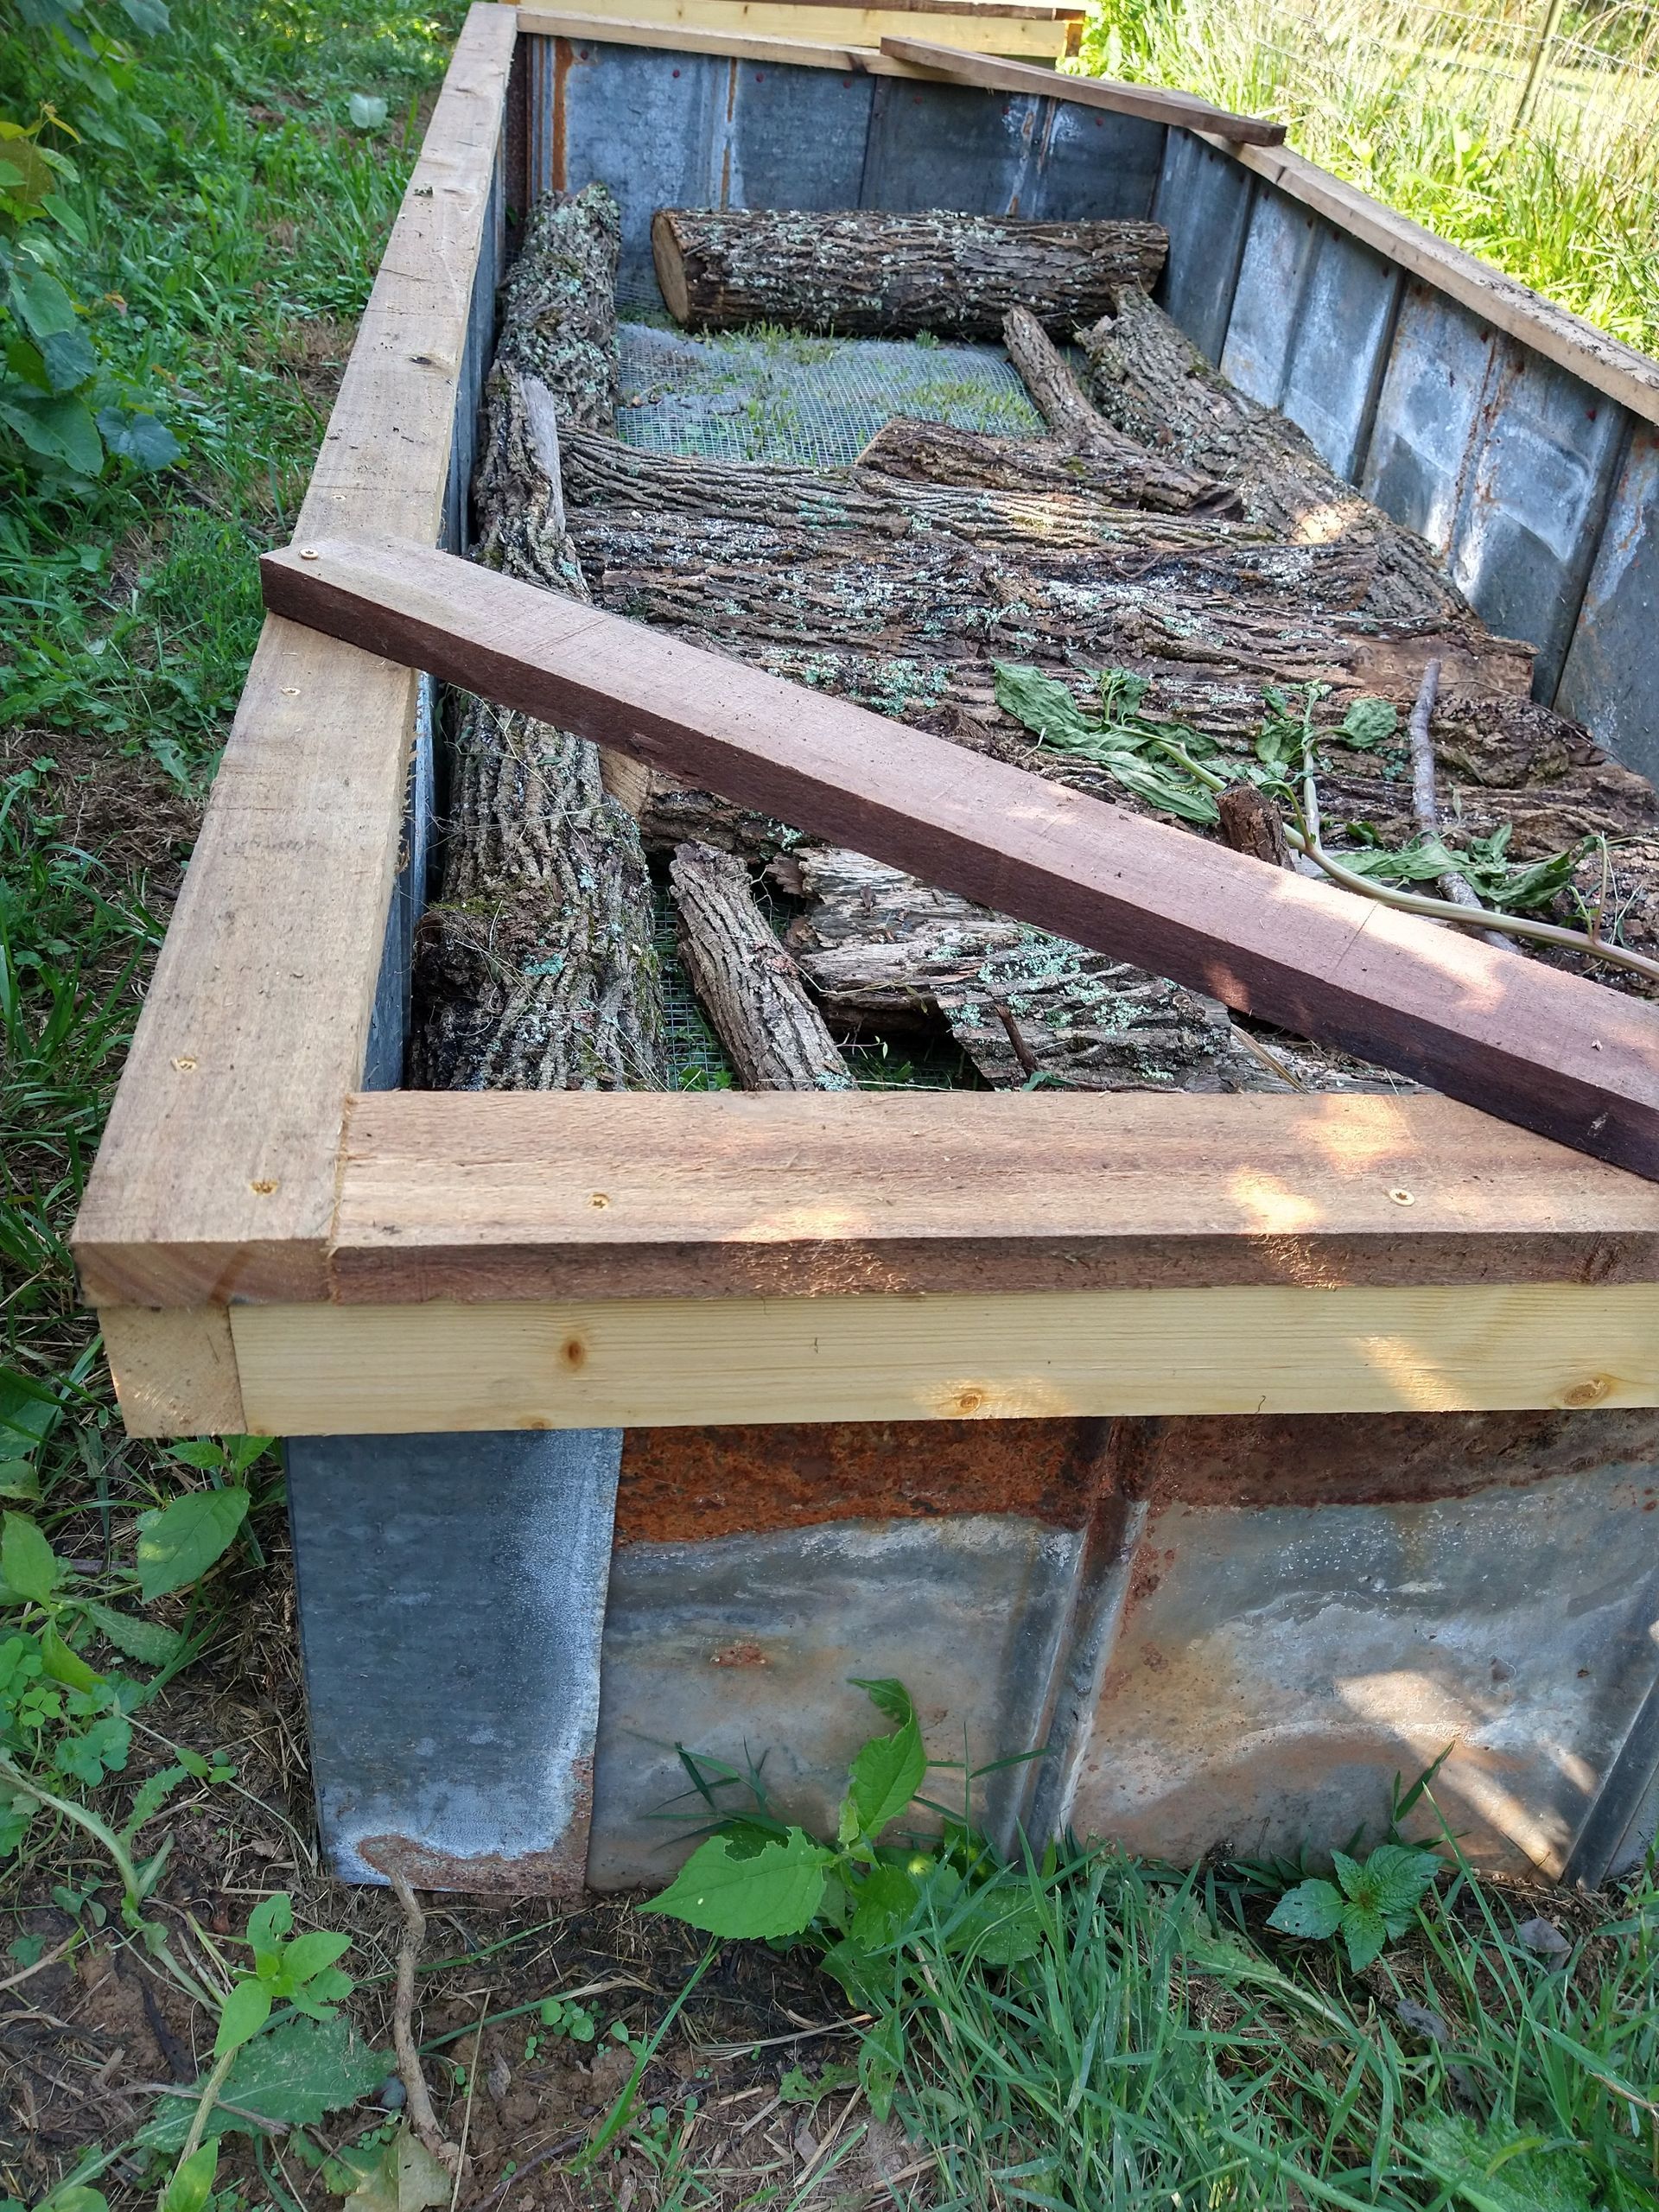
We had one more task before beginning to fill the beds. The many holes in our yard forewarned us that we are sharing this homestead with moles. Actually, there’s probably an extended family of moles, judging by the number of holes. These moles were here long before us, so I admit they have first dibs on the yard. However, I feel pretty strongly about not sharing our future sweet potatoes with them. We’ve found that placing 1/2” hardware cloth at the base of each bed gives us the power to keep them out, and that seems fair enough to me!
Hugelkultur:
With the hardware cloth in place, it's time to add soil. The 18” height means it’s going to take a lot of soil to fill each bed. If you have cows, chickens or turkeys, you may have a lot of compost. Most of us don't, and an option might be mixing 1/3 vermiculite, 1/3 peat moss and 1/3 compost. With five beds, that option would be expensive. That's why you might want to consider “hugelkultur.”
This German term, hugelkultur, literally means a mound bed or mound culture. This method of gardening makes raised beds even more practical because it doesn’t require as much topsoil or compost. Most plants are happy with 12” of topsoil, and so placing other organic material up to this level works well. This layer can be logs, sticks, straw and leaves. Having this organic material under the topsoil will ensure drainage and help hold moisture. It also creates heat for the plants as it breaks down. This layer also provides many fungi and bacteria for the soil-food web which helps insure that food grown here will be tasty and nutritious. We’re fortunate to be surrounded with woods and so have plenty of organic material.
We used hugelkultur when moving to a "new" homestead and wanted to begin growing our own food ASAP. We didn't have compost at first to use for topsoil, and using hugelkultur helped fill up the raised beds. The soil sank a lot by the end of the first growing season as the wood biodegraded. But being able to grow food right away gave us one year to create more compost and we were able to "top-off" each bed at the end of the growing season.
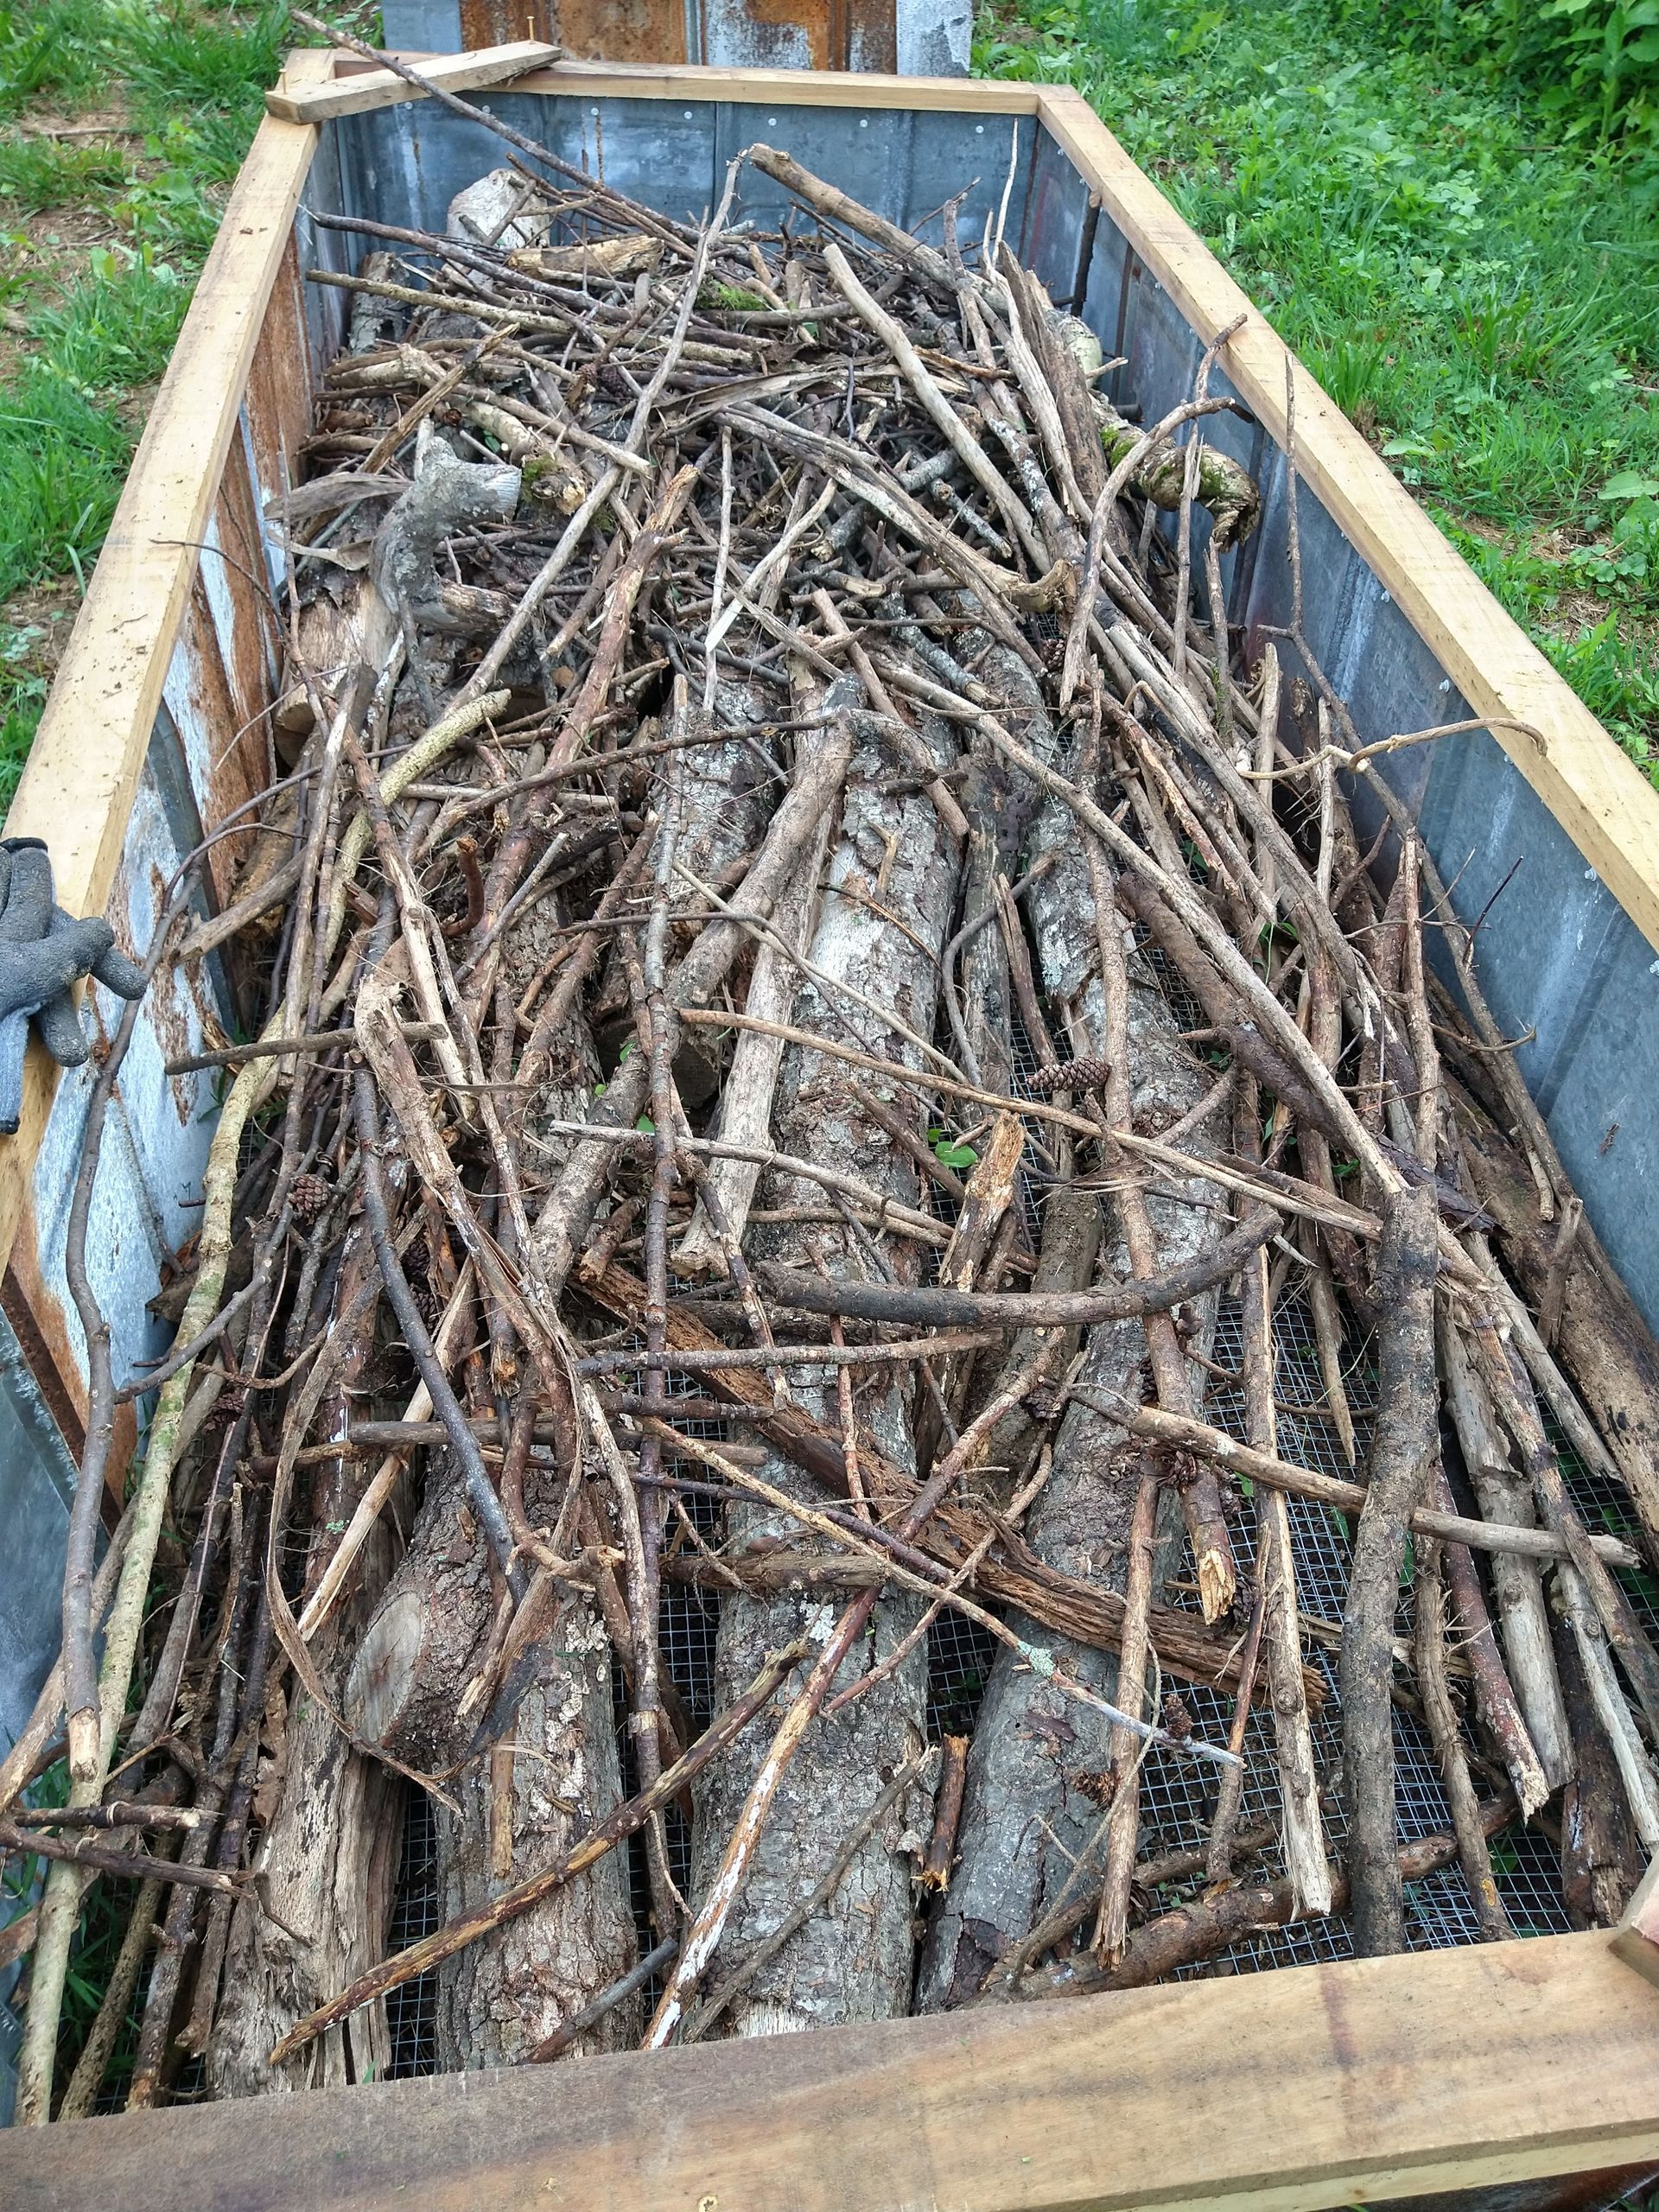
When the raised beds were new, there was a lot of space between the limbs and branches. Autumn leaves were not yet available, and we didn't have that much topsoil. Therefore, we hauled loads of sawdust from a local sawmill to fill in the spaces between branches. On later raised beds, we used wood chips for the hugelkultur which didn't require as much "filler."
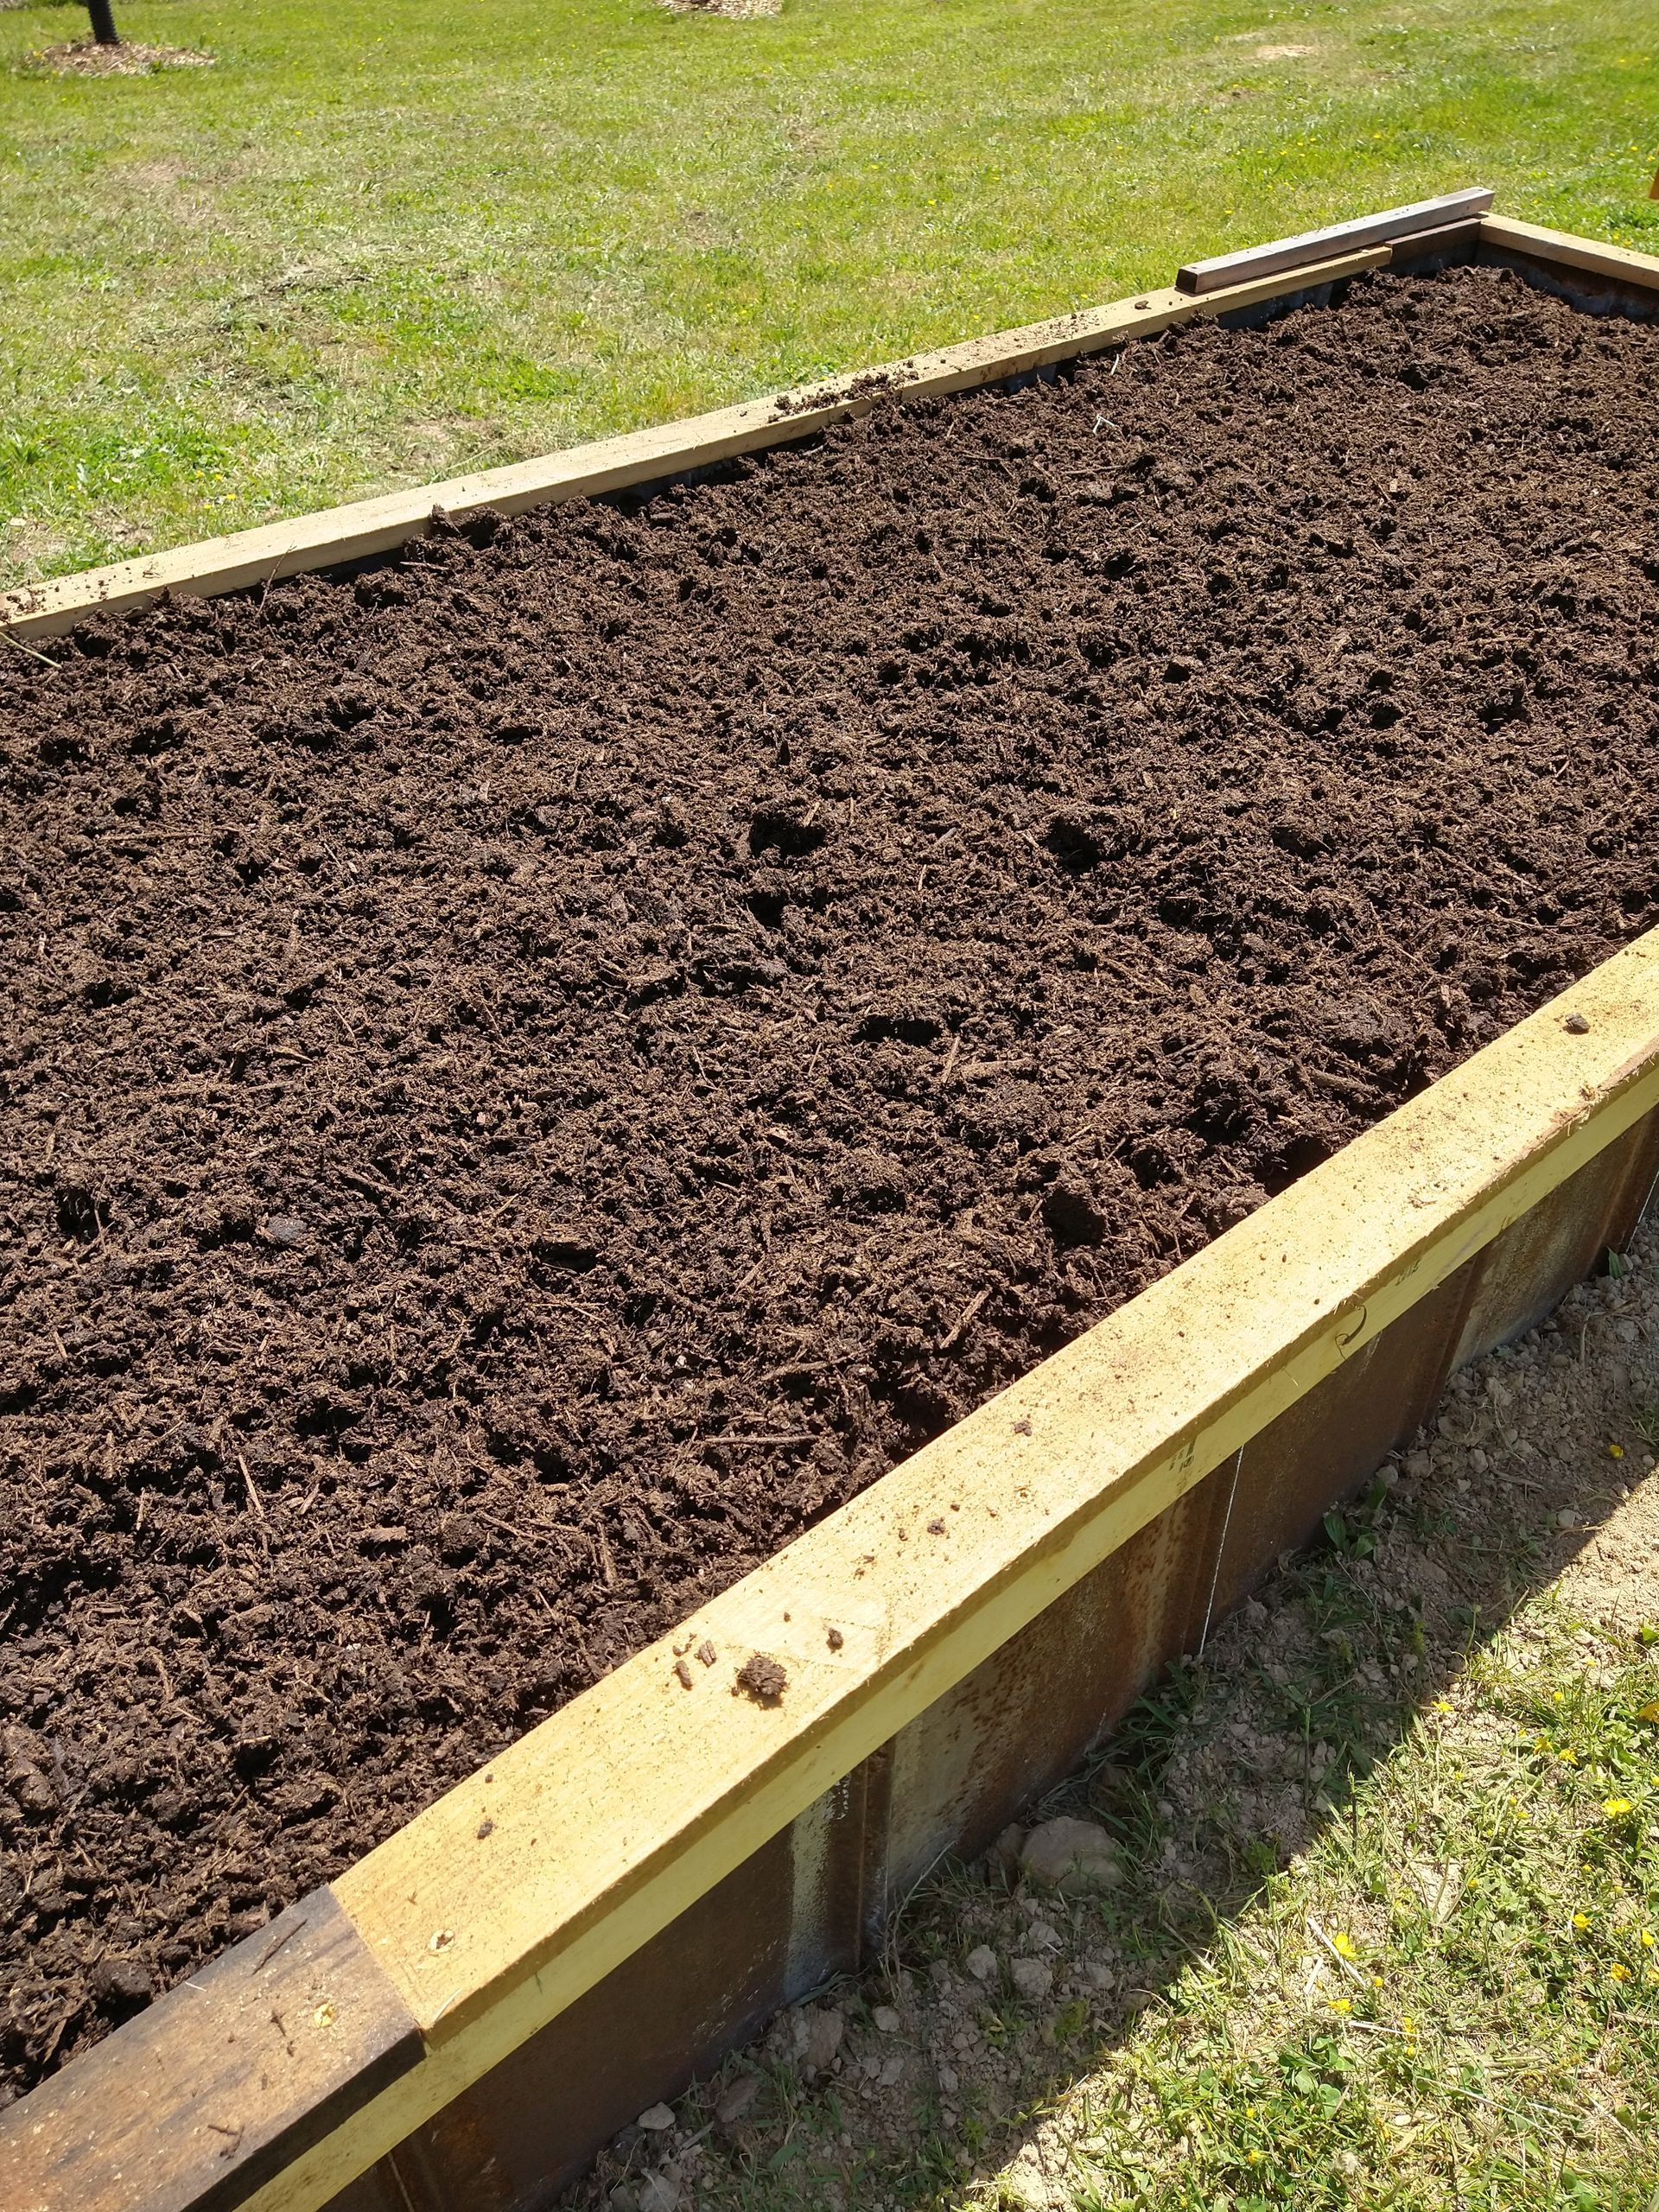
Topsoil:
After the wood "hugelkultur" layer is complete, it's time to add topsoil. If you have an active compost pile, this certainly is the best topsoil or "humus" available. This compost will also serve to "top off" the bed each spring as the organic material decomposes and settles. If you get your compost from a farmer, make sure that the manure or grass being used hasn't been treated with a herbicide. That compost could kill your precious garden plants.
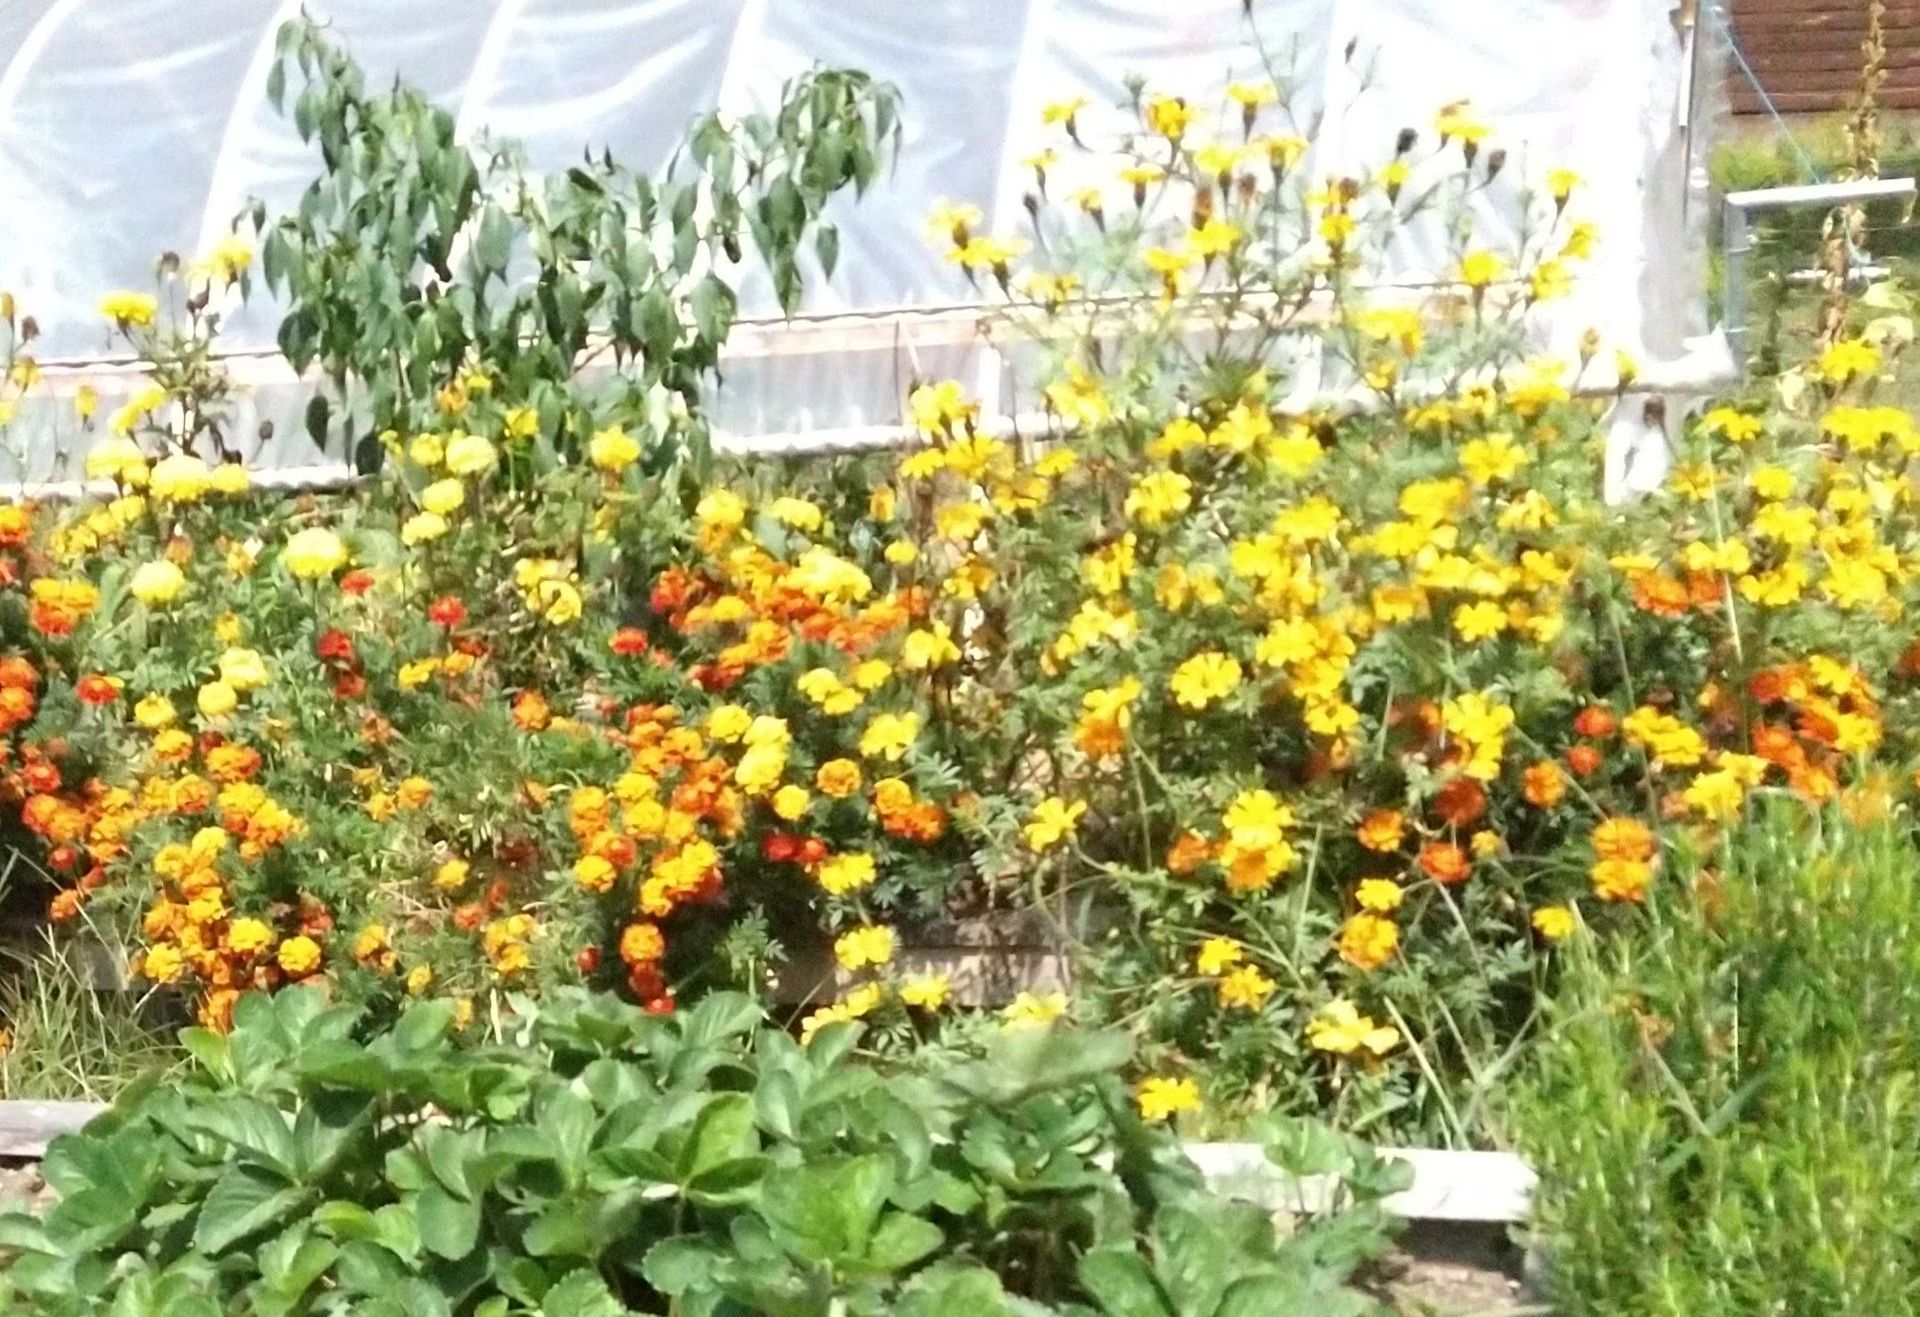
The topping on this garden lasagna could be a layer of mulch while waiting for the beds to “settle.” but because the nutritional content of food is dependent on the soil’s bacteria and fungi, planting multiple species of cover crops will not only increase the nutrition and flavor of your produce, but also sequester a lot of carbon into the soil. We might as well let the soil get "settled" while improving the health of its soil food web at the same time.
Coverings to extend season:
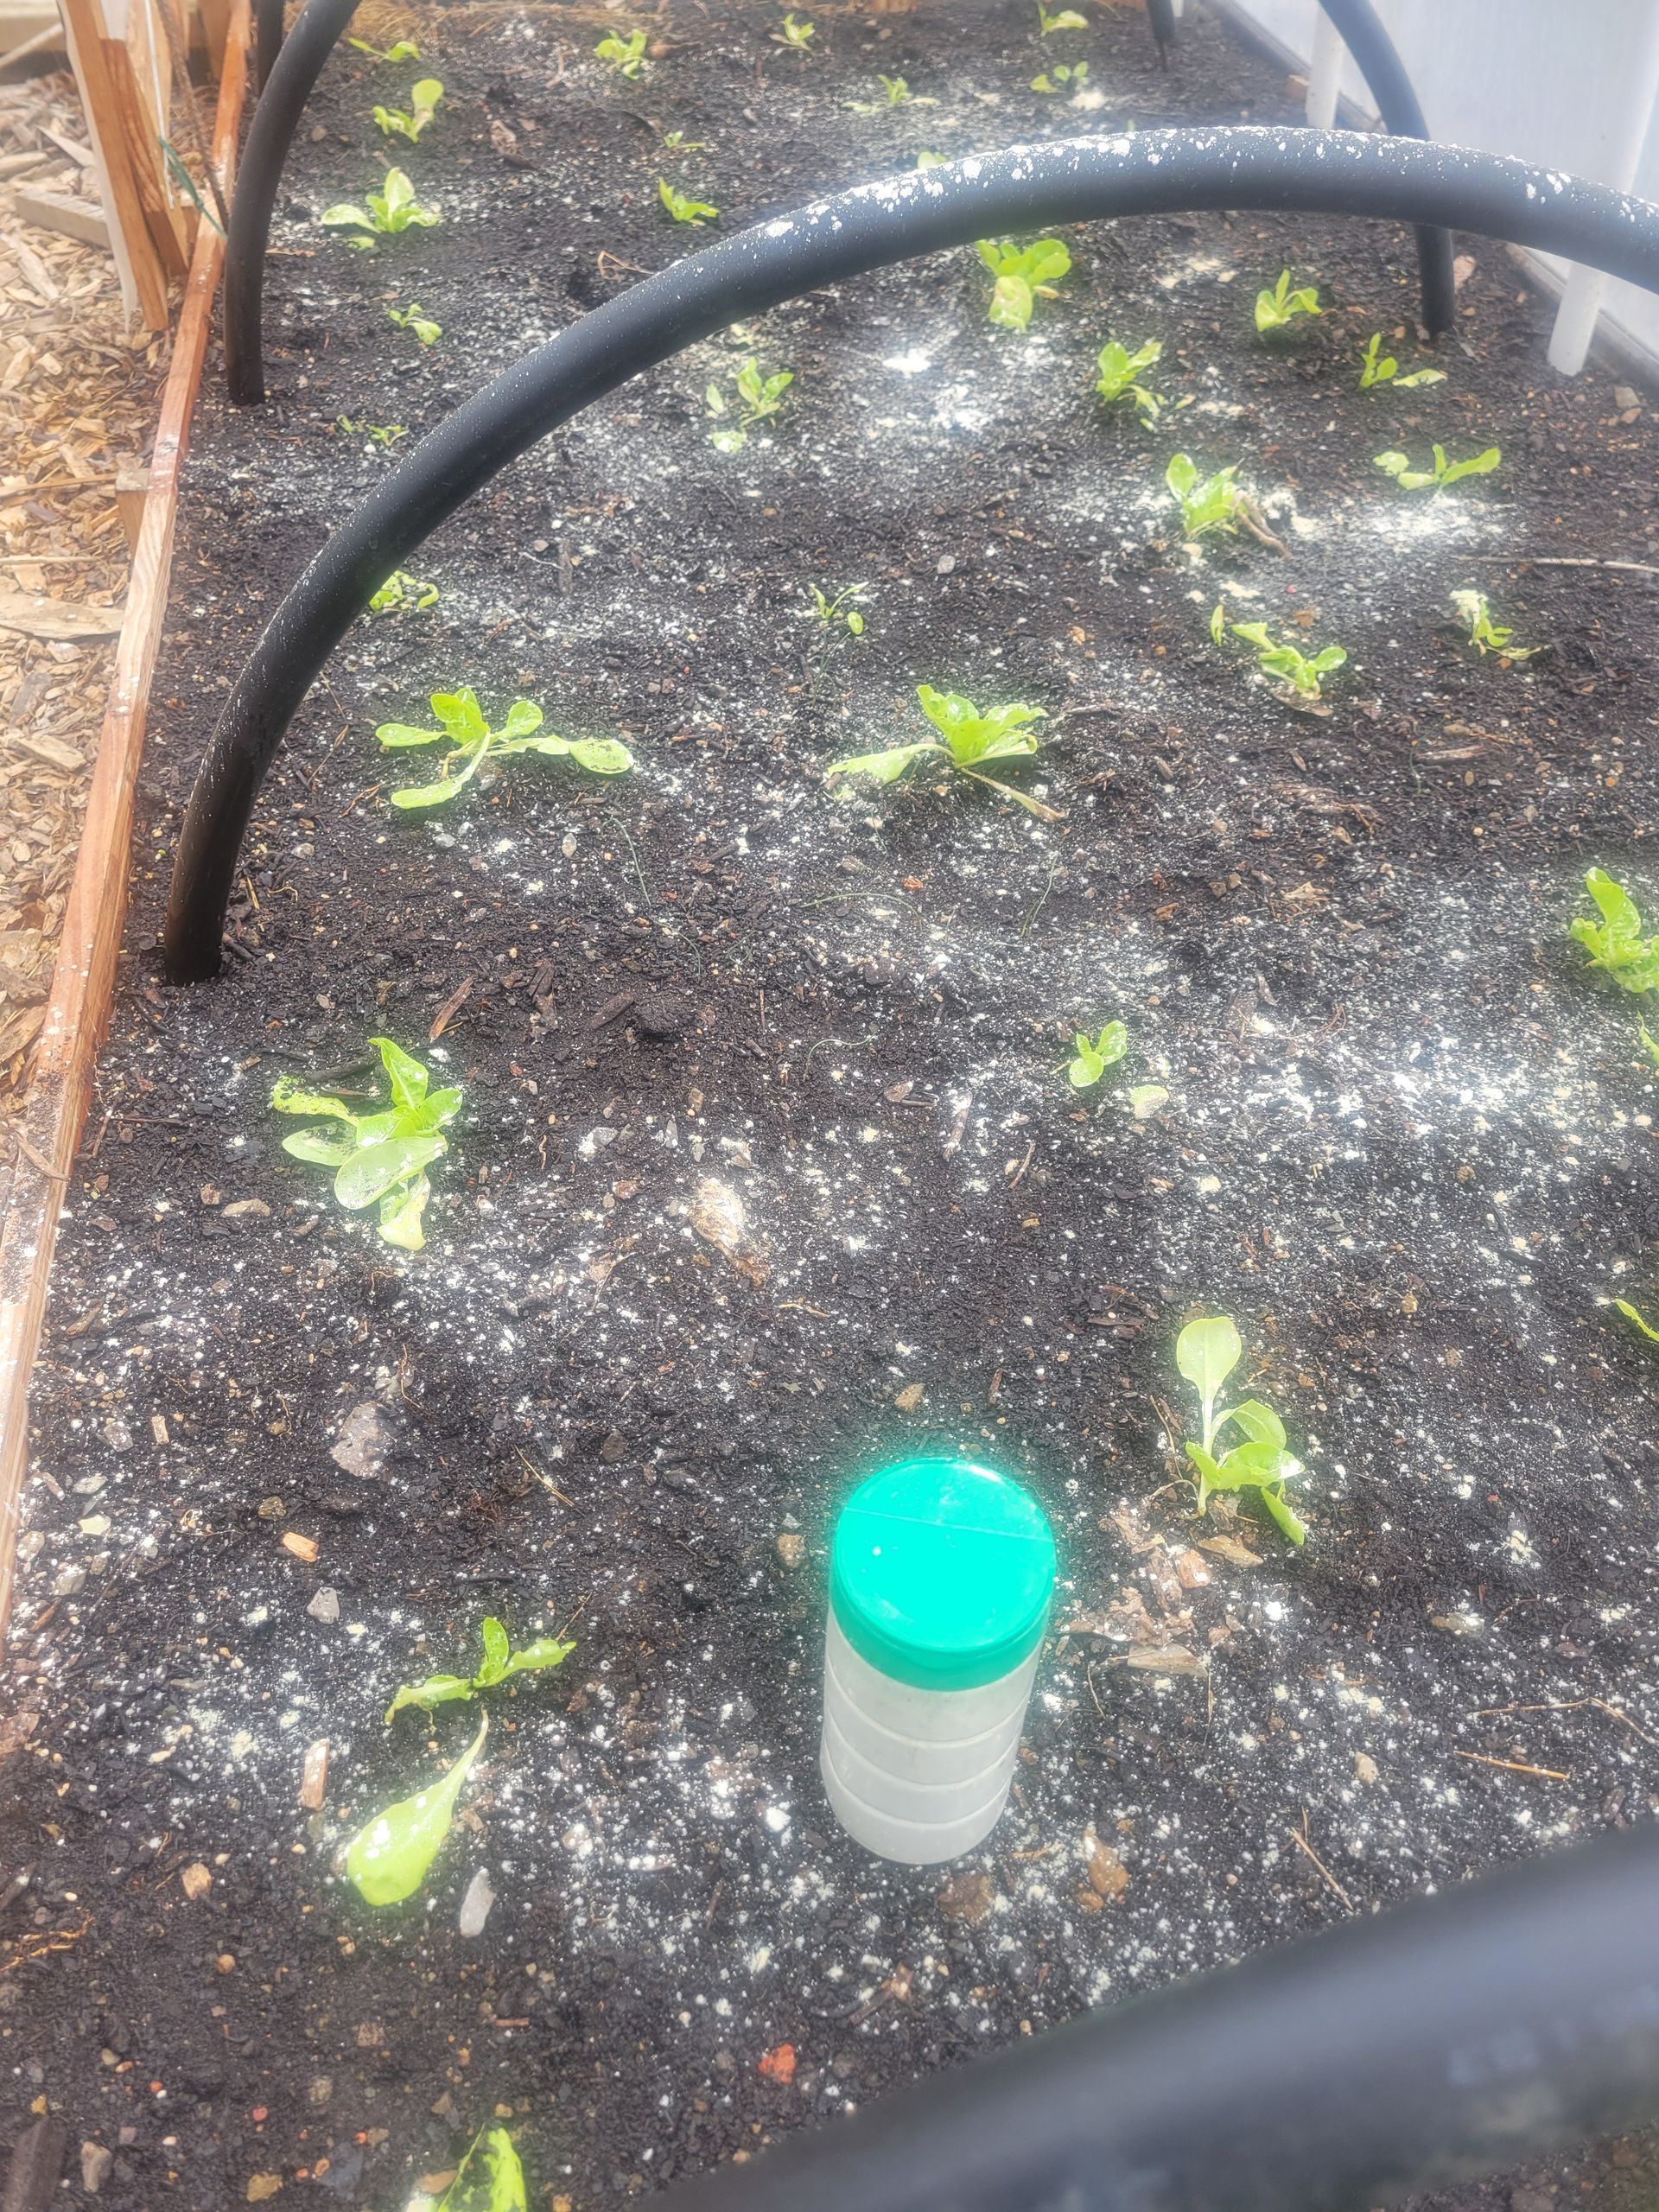
Another helpful addition is to have permanent high or short hoops over some of the beds to allow an extended growing season into the cooler months or for shade in the summer.
When we want to extend the season, we may purchase white “frost blankets,” though I sometimes use old sheets instead. What’s important in November is that the plants still get air and light while staying warm enough for below-freezing nights. Having the cloth reach the soil is important to capture the soil’s warmth, but this becomes easier when covering raised beds.
For vegetables that want shade in the summer, use cloth that blocks about 30% to 50% of the sun.
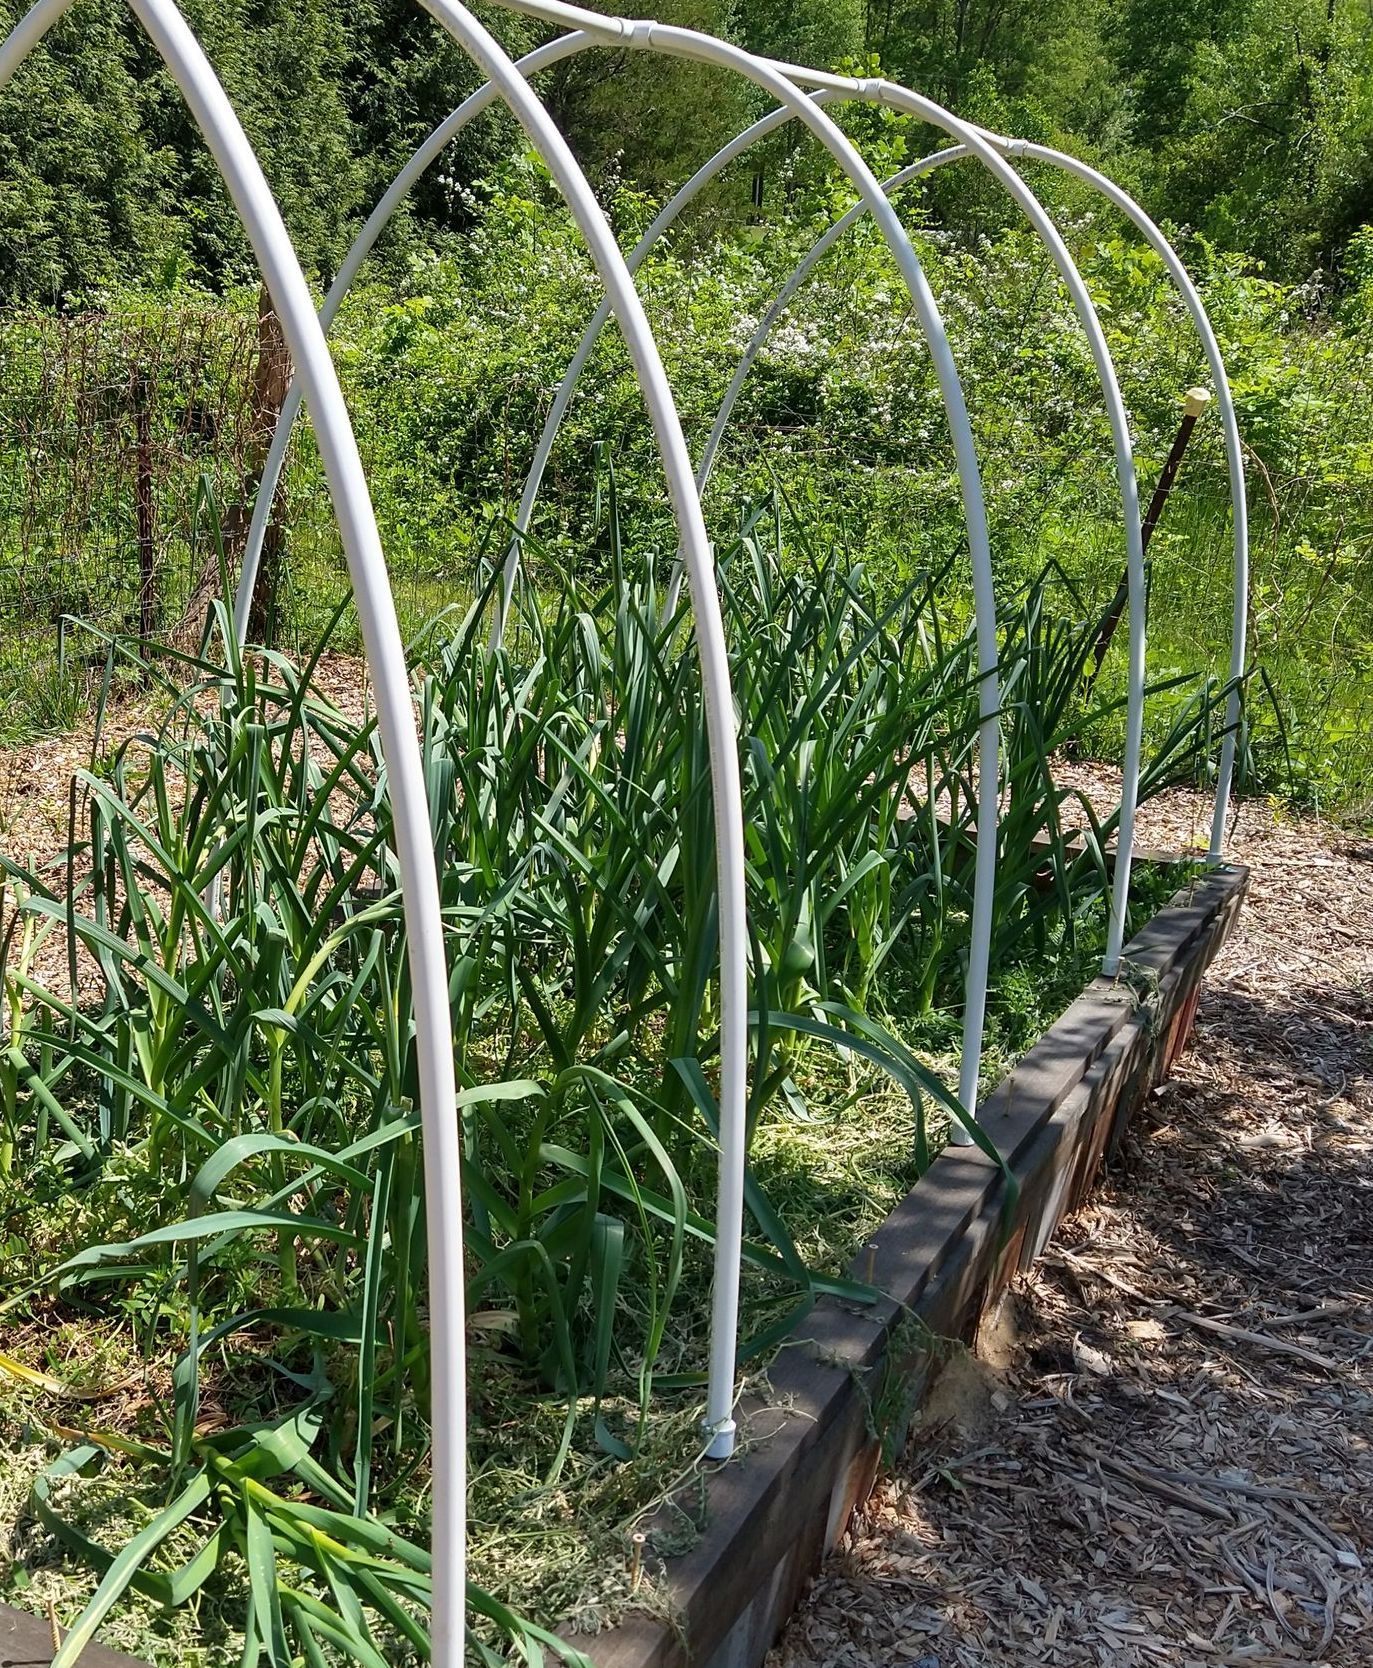
Hoops over spring garlic
Enjoyment:
Whether you're building one or many raised beds, build them so that you're comfortable when gardening. You may want to sit on the edge of the bed, so make the edges broad enough to be comfortable.
Raised beds can be attractive! If your front yard is the sunniest area you have, put those raised beds there. If your urban building has a flat roof, that'll be perfect for your raised beds. The can border your patio area and be conveniently located for getting dinner greens, or they can line the walk through your deep backyard.
Raised beds are also perfect for vacant city lots. Attractive paths can be constructed around the beds while there's no worry about the plants and produce being contaminated by what might be in the soil or paved area where you build them.
Enjoy!